

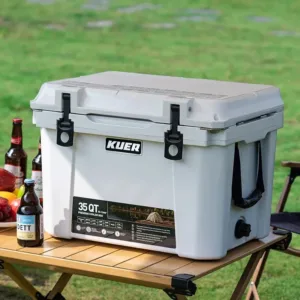
Yes, pre-chilling a rotomolded cooler is well worth the effort for anyone looking to maximize ice retention on multi-day trips. Thick, foam-insulated rotomolded walls store significant ambient heat, which would otherwise melt a large portion of your ice on day one just to cool the box itself. Pre-chilling eliminates this “ice tax” and can extend total ice life by 30% or more in warm weather.
This guide breaks down why the method works, walks through a step-by-step prep routine, and highlights common mistakes that waste your effort. The payoff is simple: longer-lasting ice, colder contents, and less wasted ice cooling the cooler instead of your food and drinks.
Key Takeaways
- Pre-chilling a rotomolded cooler for 12–24 hours can extend ice retention by 30%+ by eliminating the “ice tax” of cooling warm walls.
- Always start with a clean, dry cooler and use enough sacrificial ice to fully chill the interior walls.
- Pack with a 2:1 ice-to-contents ratio, pre-chill all food and drinks, and limit lid openings to preserve cold.
- Drain meltwater right before loading, but leave cold water in the cooler during your trip — it holds temperature better than empty air.
- Match pre-chill time to your cooler size: larger boxes with more thermal mass need longer to fully cool.
Why Pre-Chilling a Rotomolded Cooler Works
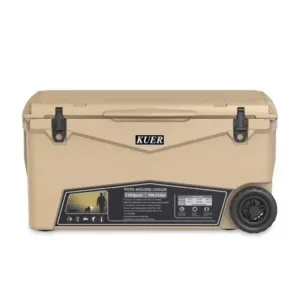
Thermal Mass & the “Ice Tax”
Rotomolded coolers are built with thick, dense polyurethane foam insulation that gives them industry-leading cold retention — but that same heavy wall mass also stores a lot of ambient heat.
When you place ice in a warm cooler, the first several hours of melting go entirely toward cooling the plastic and foam walls, not keeping your contents cold. Pre-chilling removes this upfront drain, so fresh ice works to keep your food cold from the moment you close the lid.
The benefit is far larger for rotomolded coolers than for thin-walled standard coolers. Thin-walled tubs store much less heat, so pre-chilling delivers only minimal gains. For thick rotomolded models, it is one of the single most impactful steps you can take to boost ice life.
| Preparation Step | Rotomolded Cooler Impact | Standard Cooler Impact |
|---|---|---|
| 12–24 hour pre-chill | Critical; cuts wall heat and eliminates ice tax | Helpful, but low wall mass stores less heat |
| Performance gain | Significant, measurable ice retention improvement | Minimal; stored chill fades quickly |
Measurable Ice Retention Gains
The performance boost from pre-chilling is backed by real-world testing:
- A pre-chilled 50-quart rotomolded cooler held ice ~30% longer than an unchilled unit in 85°F weather.
- 15 pounds of sacrificial ice dropped the interior of a 50-quart cooler from 75°F to 38°F before loading, adding up to 22 extra hours of ice retention.
- Mammoth Cooler recommends 6–12 hours of pre-chilling for most models, with longer times for larger boxes and hot conditions.
How to Properly Pre-Chill a Rotomolded Cooler (Step-by-Step)
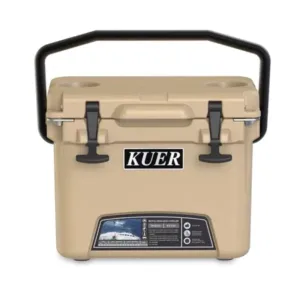
1. Start with a clean, dry cooler
Empty any old contents and rinse the interior with clean water. Scrub corners and seams with mild soap to remove residue, then rinse thoroughly. Prop the lid open to air-dry completely, or wipe dry with a towel if you’re short on time. Leftover food or dirt can hold heat and speed up melting.
2. Add sacrificial ice or frozen water bottles
Place a full bag of sacrificial ice (or several frozen water bottles) inside the empty cooler box and close the lid firmly. For larger boxes, use enough ice to cover the bottom evenly — a token handful will not fully chill the walls.
3. Let it sit undisturbed
Leave the cooler in a cool, shaded spot (not in direct sun) for the full pre-chill window. Do not open the lid early, as this lets cold escape and wastes the sacrificial ice.
Pre-Chill Time by Cooler Size
| Cooler Type | Suggested Pre-Chill Time |
|---|---|
| Small day cooler (≤25 qt) | 4 – 8 hours |
| Medium camping cooler (30 – 50 qt) | Overnight (8 – 12 hours) |
| Large group/multi-day cooler (60 qt+) | 12 – 24 hours |
Longer times are recommended for larger coolers and for trips in hot weather.
4. Drain meltwater and wipe dry
Right before you pack, open the drain plug and pour out all meltwater from the sacrificial ice. This water has absorbed heat from the walls — leaving it in will warm your fresh ice faster. Wipe the interior dry if needed.
KUER rotomolded coolers include a large leak-proof drain plug to make this step fast and mess-free. Optional wheels also help move a fully loaded box without heavy lifting.
5. Load pre-chilled contents + fresh ice
Add your pre-chilled food and drinks, then top with fresh ice to fill all gaps. A full cooler holds cold far better than a half-empty one.
Common Pre-Chilling Mistakes to Avoid When Using a Rotomolded Cooler
- Loading warm food or drinks: This is the #1 mistake. A room-temperature six-pack carries enough heat to melt several pounds of ice. Always pre-chill contents in the fridge first.
- Skipping the drain step before loading: Meltwater from sacrificial ice has absorbed wall heat. Leaving it in when you pack wastes your fresh ice cooling that water back down.
- Using too little sacrificial ice: A single handful of ice will not fully chill thick rotomolded walls. Use enough to cover the entire bottom of the cooler for consistent results.
- Draining meltwater too often during the trip: Emptying water every day lets warm air fill the space, making ice melt faster. Leave cold water in place unless you need extra room or items are getting wet.
FAQ
Is pre-chilling a rotomolded cooler really necessary?
No, it is optional, but it delivers significant ice retention gains for multi-day trips. Skipping it means your ice will first spend hours cooling the warm walls, shortening usable ice life by 30% or more in warm weather.
How long should I pre-chill a rotomolded cooler?
Match time to size: 4–8 hours for small day coolers, overnight for medium camping models, and 12–24 hours for large multi-day coolers. Add extra time in very hot weather.
Do frozen water bottles work as well as bagged ice for pre-chilling?
Yes. Frozen bottles work great for pre-chilling smaller coolers, and they double as backup drinking water once thawed.
Do I need dry ice to pre-chill an empty cooler?
No. Regular ice or frozen water bottles are fully sufficient to chill the interior walls. Dry ice is unnecessary for basic pre-chilling.
Does pre-chilling really make a difference on long trips?
Yes. Independent testing shows pre-chilled rotomolded coolers hold ice ~30% longer in 85°F weather, adding up to 22 extra hours of cold retention on premium models.

 Request a quote
