You want your food and drinks to stay cold as long as possible, right? Using an ice bag for cooler helps you lock in the chill and keep everything fresh for hours. KUER brings years of hands-on experience in cooler manufacturing and design, so you can trust these tips. You do not need special skills or fancy gear. Just a few simple changes can really boost your cooler’s performance.
Prep Cooler
Pre-Chill for Ice Retention
You want your cooler to work at its best, right? The secret starts before you even pack it. When you prechill your cooler, you lower its internal temperature, so it doesn’t steal the cold from your food and drinks. If you skip this step, your ice melts faster, and your snacks warm up sooner. Here’s how you can do it:
- Place a bag of ice or frozen gel packs inside your cooler a few hours before you pack it.
- Let the cooler sit closed, so the cold air can spread throughout the inside.
- Remove the ice or packs just before you load your food and drinks.
This simple trick helps you cool your cooler and gives you a head start on ice preservation. KUER’s advanced insulation works even better when you pre-chill your cooler. You can also prechill your provisions—freeze water bottles or juice boxes and use them as extra ice packs. Layer block ice at the bottom for a solid cold base, then stack frozen foods above it. Fill empty spaces with more ice or pre-chilled drinks. Top everything off with ice packs or a foam mat to lock in the cold. These steps boost ice retention and keep your cooler cold for longer adventures.
Tip: Pre-chill your cooler overnight for the best results, especially before long trips or hot days.
Clean and Dry Before Use
A clean cooler isn’t just about looks—it’s about safety and performance. When you clean and dry your cooler before use, you remove germs and moisture that can spoil your food. Wet insulation can actually reduce ice retention, so always dry your cooler completely after washing. Here’s what you should do:
- Wash all surfaces with warm, soapy water.
- Rinse and dry every part, including corners and the lid.
- Make sure the cooler is totally dry before packing.
This routine helps with ice preservation and keeps your food safe. KUER’s quality materials and expert design make cleaning easy, so you can trust your cooler to perform every time.
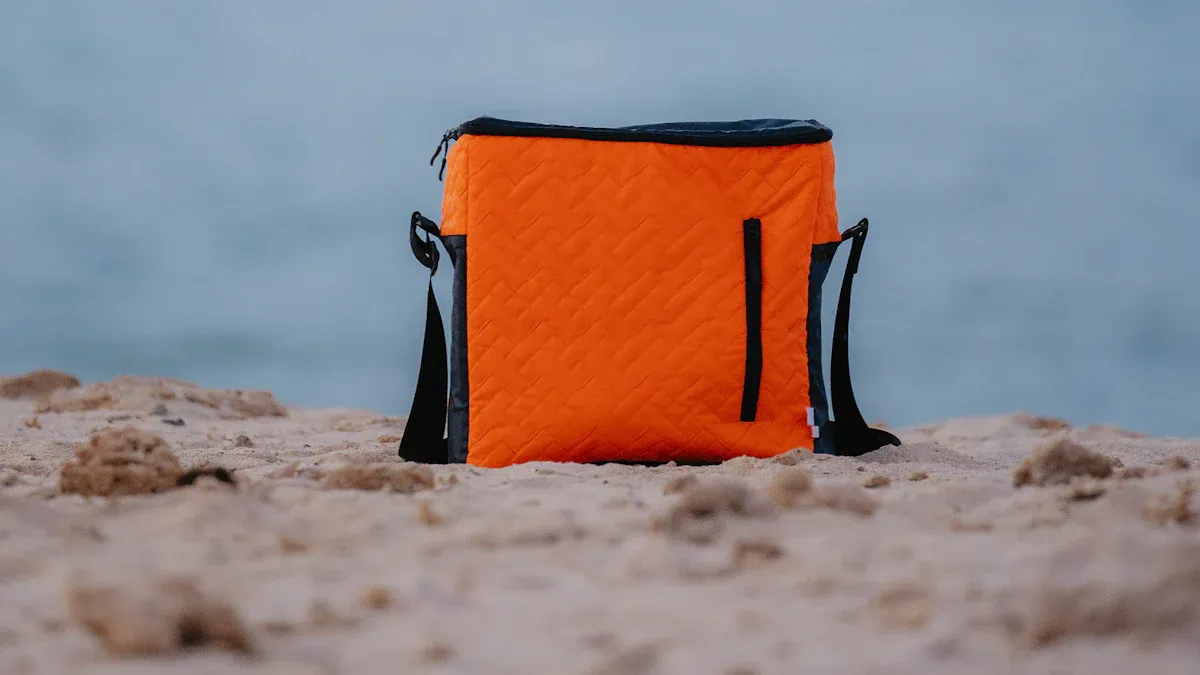
Choose Ice Bag for Cooler
Pick the Right Size and Material
Choosing the right ice bag for cooler can make a big difference in how long your food and drinks stay cold. You want to match the ice bag to your trip and your cooler. Here are some things to think about:
- Trip Length: For a short picnic, a small ice bag for cooler works fine. If you plan a weekend camping trip, you need a bigger bag or even several.
- Cooler Size: Small coolers (up to 20 quarts) need smaller ice bags. Medium coolers (20-50 quarts) fit medium bags. Large coolers (50-75 quarts) hold more ice and keep things cold longer.
- Type of Contents: If you pack lots of drinks, you may want more ice bags to fill the gaps. For food, block ice at the bottom and ice bags on top work well.
- Material Impact: The material of your ice bag for cooler matters. It affects how long the ice lasts and how easy the bag is to handle.
- Durability and Portability: Look for sturdy handles and leak-proof designs. You want a bag that is easy to carry and won’t break.
Here’s a quick look at common materials and their features:
| Material Type | Insulation Properties | Durability and Features |
|---|---|---|
| High-density polyethylene + phase-change liquid | Freezes at 28°F, keeps ice frozen longer | Hard, break-resistant, reusable |
| Multi-layered polymer plastics + gel | Freezes in 2 hours, lasts up to 12 hours | Flexible, reusable, moderate durability |
| Triple-insulated plastic with polyethylene | Lasts up to 20 hours, molds to food and cans | Reusable, good for day trips |
| Gel and polymer (e.g., Ice Brix) | Freezes at 18°F, cools up to 24 hours | Leak-proof, non-toxic, durable |
| Plastic with phase change materials (PCM) | Freezes at 5°F, keeps cool for days | Leak-proof, designed for multi-day use |
If you care about the environment, reusable ice bags help reduce plastic waste. They last longer and keep your cooler organized without single-use plastics.
Benefits of Using Ice Bags
Ice bags do more than just keep things cold. They help you keep your cooler organized and make packing easier. Here’s why outdoor fans love them:
- Ice bags help you fill your cooler properly, so you get the best ice-to-goods ratio for longer ice retention.
- Cubed ice from ice bags chills your cooler fast and fills empty spaces, while block ice melts slower and lasts longer.
- Using both block ice and ice bags together gives you the best of both worlds—quick cooling and long-lasting cold.
- Ice bags are easy to grab and use, especially when you don’t have enough ice at home.
- They help keep food safe by holding steady temperatures, which stops bacteria from growing.
- Many ice bags come with leak-proof and easy-to-clean designs, so you avoid messes and keep everything fresh.
Tip: Reusable ice bags not only save money but also help protect the planet by cutting down on single-use plastics.
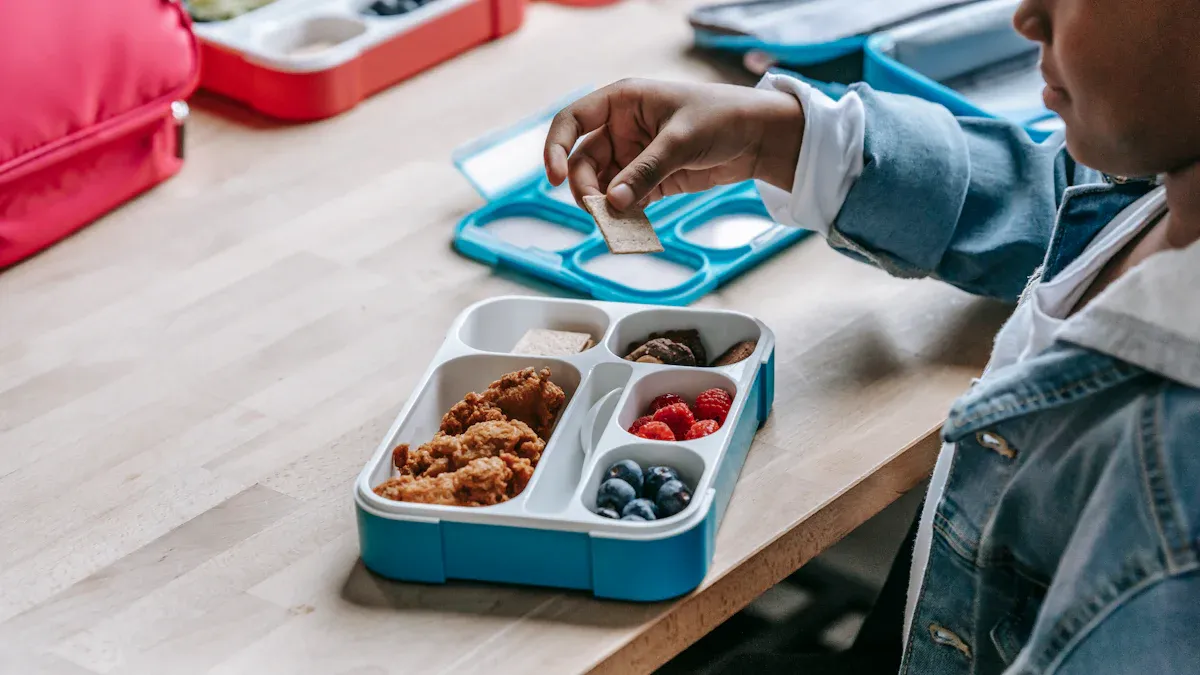
Pack a Cooler Efficiently

Packing your cooler the right way makes a huge difference in how long your food and drinks stay cold. If you want to keep your food colder and boost ice retention, you need to use a few smart tricks. Let’s break down the best ways to pack a cooler for your next adventure.
Layer Ice and Food
The secret to a well-packed cooler is to layer it up. When you add layers of ice and food, you help everything stay cold longer. Here’s a simple way to pack in layers for maximum ice preservation:
- Start with a thick layer of block ice or frozen ice packs at the bottom. Block ice melts slower and gives you a strong cold base.
- Place your pre-chilled drinks and food right on top of the ice. Cold air sinks, so keeping perishables near the bottom helps with cooling.
- Add another layer of ice or an ice bag for cooler on top of your food. This traps the cold air inside and keeps warm air out.
- Use cubed ice or small ice packs to fill spaces between items. This helps reduce airflow and keeps everything snug.
- If you have delicate items or things you’ll need first, put them on top so you don’t have to dig through the whole cooler.
Tip: Always pre-chill your food and drinks before you pack your cooler. This step gives you a head start on ice retention and helps your ice last longer.
When you add layers, you create a cold environment that slows down melting. A good rule is to use the 2:1 ice to contents ratio—two parts ice for every one part food or drink. This method supports ice preservation and keeps your cooler cold for hours.
Fill Gaps for Better Cooling
Empty spaces in your cooler are the enemy of ice retention. Warm air sneaks in and melts your ice faster. To stop this, fill empty space with extra ice, towels, or even clothing. The less air inside, the better your cooler works.
When you fill gaps, you keep cold air trapped and block heat from getting in. You can use loose ice cubes, cold cans, or even reusable ice packs to squeeze between items. This approach helps with maximizing ice retention and makes your cooler packing more efficient.
Note: If you separate food from ice packs using containers or bags, you keep things organized and avoid soggy snacks.
A well-packed cooler with no empty spots means less heat exchange and better ice preservation. You’ll notice your ice lasts much longer when you fill every gap.
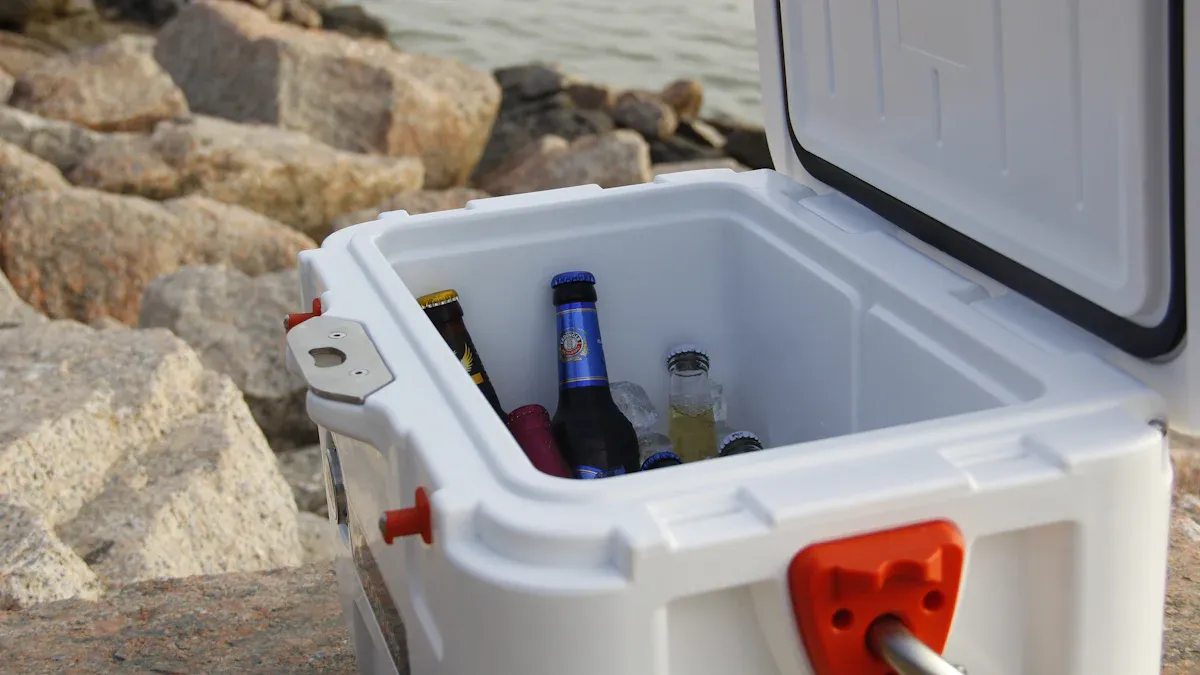
Use Block Ice and Ice Packs
If you want to get the most out of your cooler, use both block ice and ice packs. Block ice melts slowly and keeps things cold for days. Ice packs and cubed ice chill your food and drinks quickly. When you combine them, you get the best of both worlds.
Here’s how to use them together for strategic packing:
- Pre-chill your cooler with cubed ice or ice packs before you start.
- Place block ice at the bottom for long-lasting cold.
- Add your food and drinks in layers, using ice packs or cubed ice to fill spaces.
- Top off with an ice sheet or more ice packs to seal in the cold.
This method helps with ice retention and keeps your food colder for longer trips. Always aim for the 2:1 ice-to-goods ratio. If you use frozen water bottles or ice bags, you add even more cooling power.
Callout: Don’t forget to keep your cooler closed as much as possible. Every time you open it, warm air rushes in and melts your ice faster.
A mix of block ice, ice packs, and a smart layering strategy turns your cooler into a portable fridge. You’ll notice the difference on your next trip—your drinks stay icy, and your food stays fresh.
By following these cooler packing tips, you make sure your ice bag for cooler works its hardest. When you layer it up, fill every gap, and use both block ice and ice packs, you set yourself up for the best ice retention possible. A well-packed cooler means less stress and more fun outdoors!
Maximize Ice Retention
Keep Cooler Closed
You want your ice to last as long as possible, right? One of the easiest ways to extend the life of your ice is to keep your cooler closed. Every time you open the lid, you let cold air out and warm air in. This makes the inside temperature rise and melts your ice faster. Here are some quick tips to help you lock the cold in:
- Plan ahead and grab everything you need in one go.
- Avoid leaving the lid open while you search for snacks.
- Remind your friends to close the cooler quickly after use.
Tip: The fewer times you open your cooler, the better your ice retention will be. Quick, organized access helps with ice preservation and keeps your food safe.
Store in Shade
Where you put your cooler matters a lot. Direct sunlight heats up the cooler and melts your ice quickly. For the best results, follow these cooler placement tips:
- Place your cooler in a shaded spot, like under a tree or a table.
- Keep it off hot surfaces, such as pavement or metal.
- Look for breezy, cool areas to slow down heat transfer.
Sunlight, heat, and warm surfaces all work together to melt your ice. When you store your cooler in the shade, you help extend the life of your ice and keep everything inside colder for longer.
Leave Meltwater In
You might wonder if you should drain the water as your ice melts. Leaving a thin layer of meltwater in your cooler can actually help keep things cold a bit longer. Meltwater surrounds the remaining ice and food, slowing down the warming process. Just don’t let the water get too deep, or you’ll end up with soggy food.
According to experts, a small amount of meltwater can slightly extend the life of your ice, especially in a well-insulated cooler. KUER coolers use advanced multi-layer insulation, so you get top-notch ice retention even in tough conditions.
Here’s how KUER coolers stack up against other brands:
| Brand / Model | Ice Retention Performance | Weight / Portability | Price / Value Summary |
|---|---|---|---|
| KUER 45-Quart Cooler | 5-7 days ice retention | 20-30% lighter than many Western rotomolded coolers | Rugged, durable, strong insulation at a better value |
| KUER 20-Quart Cooler | Multi-layered insulation, up to 7 days cold retention | 21 lbs, ergonomic handles, easy to carry | Durable, leak-resistant, bear-resistant, 5-year warranty |
| YETI Coolers | Up to 10 days ice retention | Heavier, premium build | High price, premium brand, top-tier performance |
| Pelican 50-quart Elite | Outperforms YETI in ice retention | Heavy-duty, rugged design | Superior ice retention, good for demanding outdoor use |
| RTIC 20 QT Hard Cooler | Nearly as good as YETI in ice retention | Lightweight, rotomolded construction | Strong value, durable, significantly cheaper than YETI |
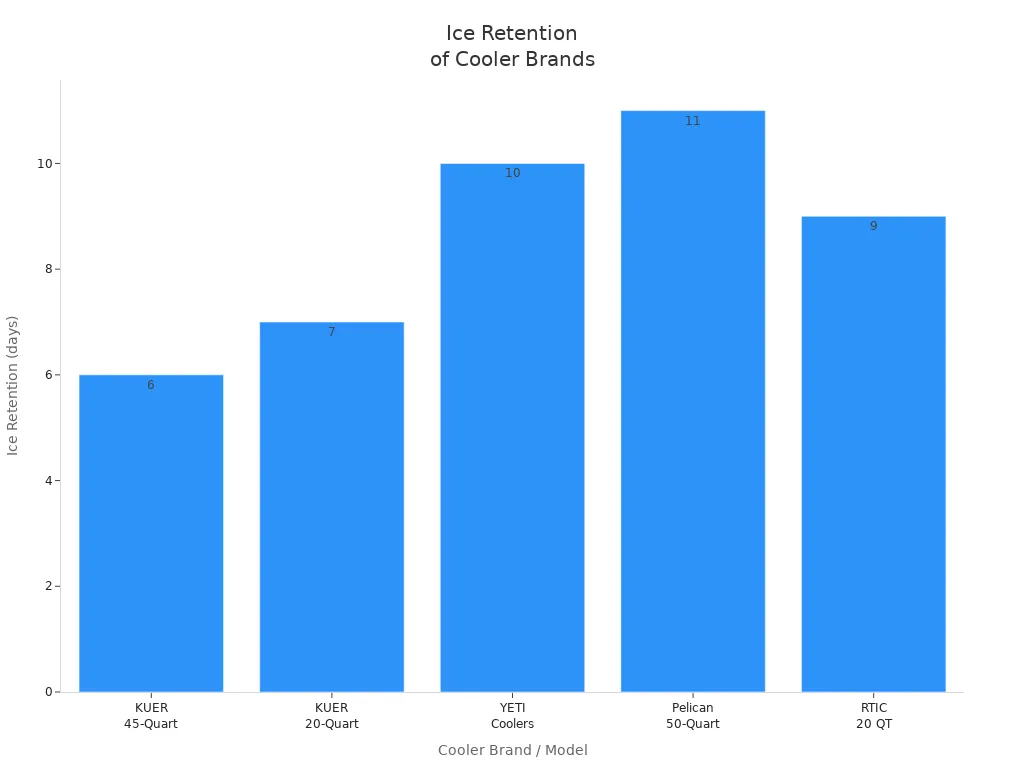
KUER coolers give you reliable ice retention and are lighter than many other brands. This makes them easy to carry and perfect for any adventure.
Pack a Better Cooler: Advanced Tips
Use Dry Ice Safely
Dry ice can take your cooler game to the next level, but you need to handle it with care. Dry ice is much colder than regular ice and keeps things frozen for longer. It turns straight into gas, so you don’t get soggy food. Here’s how you stay safe when using dry ice:
- Always wear insulated gloves or use tongs. Dry ice can cause frostbite if it touches your skin.
- Never put dry ice in an airtight container. The gas needs to escape, or pressure can build up and cause an explosion.
- Use dry ice only in well-ventilated areas. The gas is carbon dioxide, which can be dangerous if it builds up.
- Keep dry ice away from kids and pets. Never leave it unattended.
- Let dry ice disappear on its own in a safe, open space. Don’t throw it in the trash or down the drain.
Dry ice works best when you wrap it in newspaper and place it on top of your food. You can combine it with regular ice to keep things cold even longer. Just remember, dry ice is great for freezing meat or ice cream, but it can freeze sandwiches too hard. Always follow these steps to pack a better cooler and keep your trip safe.
Separate Food and Drinks
If you want to pack a better cooler, try separating your food and drinks. When you group similar items together, you make it easier to find what you need. Use bins or baskets to keep things organized. This helps you grab a drink without digging through all your food. You also keep your cooler cleaner and avoid cross-contamination.
A well-packed cooler with separate sections keeps food at the right temperature and makes your snacks safer. You can even use a divider or a second cooler for drinks. This way, you don’t let out cold air every time someone wants a soda. KUER coolers offer handy dividers and accessories to help you stay organized and make cooler packing simple.
Quick-Reference Checklist
Want to make sure you never forget a step? Here’s a quick checklist for cooler packing that experts recommend:
- Pre-chill your cooler and all your food and drinks.
- Place heavy items like drinks at the bottom.
- Surround everything with frozen gel packs or ice bags.
- Fill empty spaces with towels or napkins to block warm air.
- Use sturdy containers to keep food dry and safe.
- Cover your cooler with a wet towel or reflective pad if you’re out in the sun.
- Bring a separate cooler just for drinks if you can.
- Organize items for fast access so you don’t keep the lid open.
- Add extra insulation inside the lid for longer ice retention.
- For long trips, split food into two coolers—open one at a time.
KUER’s range of coolers and accessories, like slide-in dividers and foam-insulated lids, make it easy to pack a better cooler every time. With these tips, you’ll have a well-packed cooler that keeps everything cold and organized for your whole adventure.
You can keep your food and drinks cold for up to five days by using smart packing tips and a quality ice bag for your cooler. KUER coolers use thick insulation, strong gaskets, and a tough shell to lock in the cold. Try these tips on your next trip:
- Pre-chill your cooler and ice bags
- Pack tightly and fill gaps
- Use a 2:1 ice-to-food ratio
- Keep your cooler in the shade
- Choose a light-colored cooler for sunny days
Give these strategies a shot and see how much longer your ice lasts!
FAQ
How long does ice last in a cooler with an ice bag?
You can expect ice to last 2–7 days in a well-packed cooler with quality ice bags. KUER coolers with thick insulation help you keep ice frozen longer. Block ice lasts longer than cubes. Keep your cooler closed for best results.
Can I reuse ice bags for my cooler?
Yes, you can reuse most ice bags. Just wash and dry them after each trip. Reusable ice bags help you save money and reduce waste. Look for leak-proof and durable designs for the best experience.
What is the best ice-to-food ratio for a cooler?
Aim for a 2:1 ice-to-food ratio. That means you use two parts ice for every one part food or drink. This method keeps everything colder for longer. You can use a mix of block ice, ice bags, and ice packs.
Should I drain meltwater from my cooler?
Tip: Leave a little meltwater in your cooler. Meltwater surrounds the ice and helps keep things cold. Just make sure your food stays dry by using containers or placing items above the waterline.

 Request a quote