

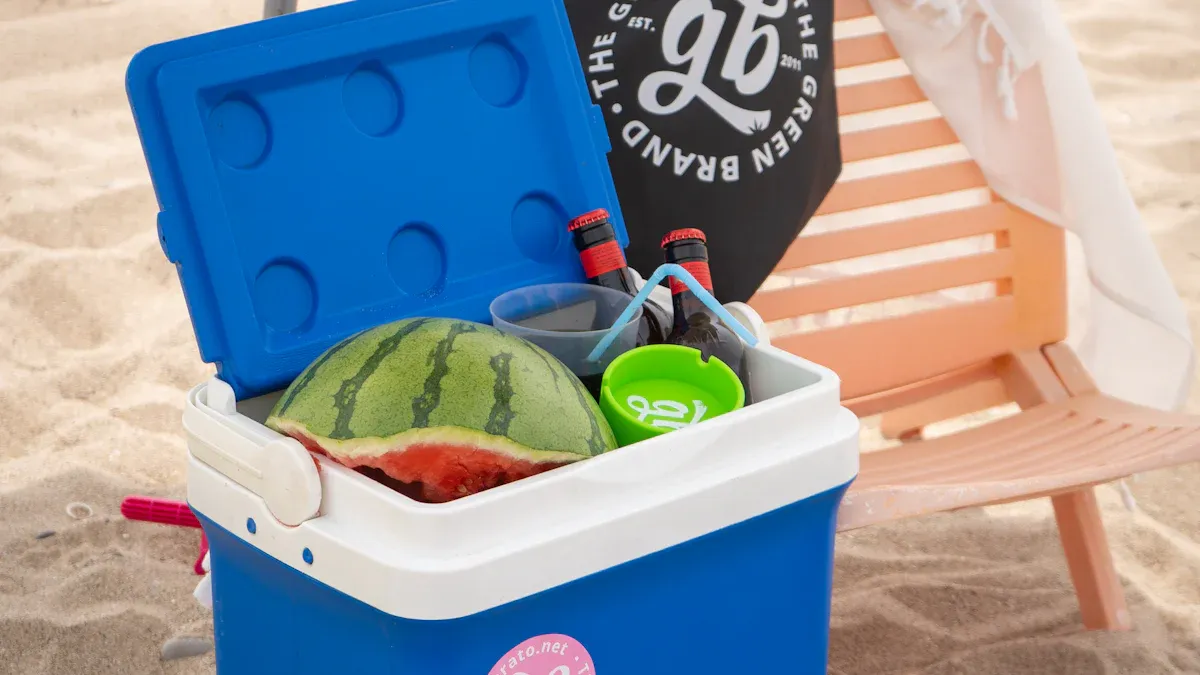
In 2025, custom lunch cooler is more than just a trend—they’re a game-changer. With the global retail ice cooler container market projected to grow at a CAGR of 9.8% and reach $3,168.7 million by 2030, it’s clear that people are embracing personalized solutions for their cooling needs. Whether you’re tackling a cooler project for your backyard or creating a portable unit for outdoor adventures, the demand for cool box designs is skyrocketing.Kuer cooler box manufacturers will provide you with a variety of cooler solutions.
Why are custom coolers so popular? They offer unmatched efficiency and cost-effectiveness. Recent studies show that optimized designs can be 67% cheaper than traditional models while delivering maximum performance. Plus, with easy to follow plans and video tutorials available, building your own custom icebox has never been simpler. You can tailor every detail to fit your lifestyle, from insulation to portability, ensuring your DIY creation meets your exact needs.
So, why settle for generic when you can design something uniquely yours? Dive into the world of custom trailer solutions and discover how a personalized cooler can transform your outdoor experiences.
Tools and Materials for Cool Box Designs
Designing your own cool box cooler starts with gathering the right tools and materials. Whether you’re following ice chest plans or creating your own design, having the essentials on hand will make the process smoother and more enjoyable.
Essential Tools for Construction
To build a durable cooler, you’ll need a few basic tools. These include:
- Measuring tape: Ensures precise dimensions for your box.
- Circular saw or jigsaw: Helps cut materials like wood or plastic.
- Drill and screws: For assembling the outer and inner boxes.
- Caulking gun: Seals gaps to improve insulation efficiency.
- Sandpaper or sander: Smooths edges for a polished finish.
These tools are easy to find and essential for any DIY construction project. They’ll help you bring your plans to life with minimal hassle.
Recommended Insulation Materials
Insulation is the heart of any cool box design. It keeps your ice from melting too quickly and ensures your cooler performs efficiently. Here’s a quick comparison of popular foam insulation options:
| Product Type | Thickness (mm) | Thermal Resistivity (°F-ft²-h/Btu-in) |
|---|---|---|
| Permeably Faced Polyisocyanurate Board | 100 | 6.178 |
| Extruded Polystyrene Board | 100 | 5.607 |
| Spray-in-Place Polyurethane Foam | 100 | 6.197 |
For the best results, consider using spray-in-place polyurethane foam. It offers excellent thermal resistivity, keeping your ice intact for longer periods. Plus, it’s easy to apply and fills gaps effectively.

Additional Accessories for Customization
Once the basics are covered, it’s time to add some flair to your cooler. Accessories can enhance both functionality and style. Here are a few ideas:
- Bottle openers: Attach one to the side for convenience.
- Handles and wheels: Improve portability, especially for larger designs.
- Drain plugs: Make it easy to remove melted ice water.
- LED lights: Add a fun touch for nighttime use.
These extras not only make your cooler more practical but also give it a personalized touch. With the right accessories, your DIY ice chest plans can stand out and become a conversation starter at any gathering.
Key Design Considerations for DIY Patio Cooler Projects
When designing your own diy patio cooler, there are a few important factors to keep in mind. These design considerations will help you create a cooler that’s not only functional but also tailored to your needs.
Selecting Dimensions and Capacity
The first step in your project is deciding how big your cooler should be. Think about how you’ll use it. Will it be a patio outdoor cooler for family barbecues or a portable option for camping trips? For larger gatherings, you’ll want a cooler with enough space to hold plenty of ice, drinks, and snacks. A capacity of 50-70 quarts works well for most backyard events. If portability is key, a smaller 20-30 quart cooler might be a better fit.
Measure the space where you plan to store or use the cooler. This ensures it fits perfectly without being too bulky. Remember, a well-sized cooler is easier to handle and more efficient at maintaining temperature.
Insulation Efficiency and Material Choices
Insulation is the backbone of any cool box design. It determines how long your ice stays frozen and how well your cooler performs. Materials like vacuum insulation panels (VIPs) and aerogels are excellent choices. VIPs are 5-10 times more efficient than traditional fiberglass insulation. Aerogels, with a thermal conductivity as low as 0.013 W/m·K, also outperform fiberglass, which has a conductivity of 0.040 W/m·K.
Here’s a quick comparison of insulation materials:
| Material Type | R-value | Thermal Conductivity (W/m·K) |
|---|---|---|
| Vacuum Insulation Panels | 25 | 0.013 |
| Composite Foam–VIP Boards | >25 | N/A |
| Aerogels | N/A | 0.040 |
| Fiberglass | N/A | 0.040 |
For maximum thermal efficiency, consider using self-healing VIPs. They can recover from small punctures, making them durable and reliable.
Portability and Weight Management
If you plan to move your cooler often, portability is a must. Adding wheels and sturdy handles can make transportation a breeze. Lightweight materials like composite foam or aerogels can reduce the overall weight without compromising performance. Keep in mind that a fully loaded cooler can get heavy, so balance size and weight carefully.
For a portable cooler, focus on compact designs that are easy to carry. A smaller cooler with efficient insulation can still keep your ice intact for hours while being much easier to transport. Whether you’re heading to the beach or a picnic, a well-thought-out design will make your cooler a joy to use.
Airtight Seals for Temperature Retention
When it comes to keeping your cooler ice-cold, airtight seals are a game-changer. They prevent warm air from sneaking in and cold air from escaping. Without a proper seal, even the best insulation won’t perform as expected. So, how do you create an airtight seal that works like a charm? Let’s break it down.
First, choose the right sealing material. Rubber gaskets are a popular choice because they’re flexible and durable. You can find them in most hardware stores. Look for weather-resistant options to ensure they last longer, especially if your cooler will be used outdoors. Silicone seals are another excellent option. They’re easy to install and provide a snug fit.
Next, focus on the lid design. A flat, even surface ensures the seal works effectively. If the lid doesn’t close properly, the seal won’t do its job. Use a latch system to keep the lid tightly shut. Compression latches are particularly effective because they apply consistent pressure, ensuring the seal stays intact.
Here’s a pro tip: Test your seal before finalizing the design. Close the lid with a piece of paper sticking out. If you can pull the paper out easily, the seal isn’t tight enough. Adjust the gasket or latches until the paper stays in place.
Finally, consider adding a double-seal system for extra protection. This involves placing two gaskets around the lid’s edge. It’s a bit more work, but it significantly improves temperature retention. With these design considerations, your cooler will keep ice frozen for days, even in the summer heat.
Tip: Regularly check your seals for wear and tear. Replace them as needed to maintain peak performance.
Step-by-Step Process for Building Cool Box Coolers
Constructing the Outer Box
The outer box forms the foundation of your cooler. It needs to be sturdy enough to handle wear and tear while keeping the inner components safe. Start by selecting a durable material like plywood, high-density polyethylene (HDPE), or even rotomolded plastic if you want a professional finish. Measure and cut the panels according to your desired dimensions, ensuring they fit together snugly.
When assembling the panels, use screws and a strong adhesive to secure them. This combination provides extra strength and prevents gaps. To test the durability of your outer box, consider these methods:
| Testing Method | Purpose |
|---|---|
| Drop Test | Assesses performance after handling during transportation. |
| Salt Fog Test | Evaluates corrosion resistance of materials. |
| Reliability Testing | Determines mechanical integrity and ability to survive in extreme conditions. |
These tests ensure your cooler can withstand real-world challenges, from bumpy car rides to exposure to the elements.
Building the Inner Box
The inner box is where the magic happens—it’s the part that keeps your ice frozen. Use a material with excellent insulation properties, like foam board or vacuum insulation panels (VIPs). Cut the panels to fit snugly inside the outer box, leaving enough space for insulation layers between the two boxes.
Secure the inner box using adhesive or screws, ensuring it’s tightly sealed. Any gaps can reduce insulation efficiency. For added protection, line the interior with a waterproof material like plastic sheeting. This prevents leaks and makes cleaning easier. Remember, a well-built inner box is key to maintaining the cooling capacity of your cooler.
Designing and Attaching the Lid
The lid is more than just a cover—it’s a critical component for temperature retention. Start by cutting a panel that matches the dimensions of your cooler’s opening. Add a layer of insulation to the underside of the lid, using the same material as your inner box. This ensures consistent cooling performance.
To create an airtight seal, attach a rubber gasket around the edge of the lid. Use a latch system to keep the lid securely closed. Compression latches work best, as they apply even pressure across the seal. Test the lid by closing it with a piece of paper sticking out. If you can’t pull the paper out, your seal is airtight.
For a polished look, consider adding handles or hinges. These make the lid easier to use and add a touch of style to your design. With a well-designed lid, your cooler will keep ice frozen for longer, making it perfect for any outdoor adventure.
Tip: Regularly check the lid’s seal for wear and tear. Replacing it when needed ensures your cooler stays efficient over time.
Creating Airtight Seals
Airtight seals are the secret sauce for keeping your cooler ice-cold. Without them, warm air sneaks in, and your ice melts faster than you’d like. Let’s dive into how you can create seals that lock in the chill and keep your cooler performing like a pro.
Why Airtight Seals Matter
Think of your cooler as a fortress. The seal is the gate that keeps the enemy—warm air—out. A tight seal ensures your cooler maintains its internal temperature, making it more efficient. It also reduces the need for extra ice, saving you money and hassle.
Materials You’ll Need
To build a reliable seal, you’ll need the right materials. Here’s a quick list:
- Rubber gaskets: Flexible and durable, these are perfect for cooler lids.
- Silicone strips: Easy to install and great for creating a snug fit.
- Compression latches: These keep the lid tightly closed, ensuring the seal stays intact.
You can find these materials at most hardware stores. Look for weather-resistant options to ensure your cooler lasts through outdoor adventures.
Steps to Create Airtight Seals
- Prepare the Lid: Start by cleaning the edges of your cooler lid. Dust or debris can weaken the seal.
- Attach the Gasket: Use adhesive to secure the rubber gasket around the lid’s edge. Make sure it’s evenly placed.
- Install Compression Latches: Add latches to the lid to keep it tightly shut. Test them to ensure they apply consistent pressure.
- Test the Seal: Close the lid with a piece of paper sticking out. If you can’t pull the paper out, your seal is airtight.
Pro Tip: Double-check the seal every few months. Replace worn-out gaskets to keep your cooler performing at its best.
Bonus: Double-Seal System
For extra protection, consider adding a second gasket around the lid. This creates a double-seal system, which is especially useful for extreme temperatures. It’s a bit more work, but the payoff is worth it.
With these steps, your cooler will stay ice-cold for days, even in the summer heat. You’ll never have to worry about warm drinks again! 😎
Finishing Touches for a DIY Patio Cooler
Installing Hardware and Accessories
Adding hardware and accessories is the final step to make your cooler both functional and stylish. Start by attaching handles to the sides. These make it easier to carry, especially if your cooler is on the heavier side. For larger designs, consider adding wheels. This transforms your cooler into a portable unit, perfect for outdoor adventures or backyard parties.
Next, install a drain plug at the bottom. This small addition makes it simple to remove melted ice water without tipping the cooler. If you want to add a touch of convenience, attach a bottle opener to the side. It’s a small detail, but it’s sure to impress your guests. For nighttime use, LED lights inside the cooler can be a fun and practical upgrade.
Take your time during this step. Properly installed hardware ensures your cooler is durable and easy to use. Plus, these accessories can elevate your cooler from basic to extraordinary.
Sanding and Painting for a Polished Look
Sanding and painting give your cooler a professional finish. Start by sanding the entire surface to remove rough edges and imperfections. Use fine-grit sandpaper for a smooth result. Sanding between paint coats is also essential for achieving a flawless finish.
When painting, follow the manufacturer’s instructions for coating thickness. Multiple thin coats work better than one thick layer. This method ensures a glass-smooth surface free of streaks or bubbles. Choose a weather-resistant paint to protect your cooler from the elements. Bright colors or patterns can add a personal touch, making your cooler stand out.
Tip: Allow each coat to dry completely before applying the next. This patience pays off with a polished, long-lasting finish.
Final Testing and Adjustments
Before declaring your cooler complete, test its performance. Check for air leaks using a simple diagnostic test. Close the lid and feel around the edges for escaping air. If you find any, adjust the seals or latches until the cooler is airtight.
Here’s a breakdown of common testing protocols and their outcomes:
| Testing Protocol | Measured Outcomes |
|---|---|
| Blower-Door Test | Air Changes per Hour (ACH50) |
| Cubic Feet per Minute (CFM50) | |
| Leakage Area | |
| Code Compliance Testing | Must not exceed 5 ACH in climate zones 1 & 2, 3 ACH in zones 3-8 |
| Homeowner Diagnostic Test | Identifies air leakage and provides cost estimates for improvements |
Once the cooler passes these tests, fill it with ice and check how long it stays cold. This final step ensures your cooler is ready for real-world use. Adjust any components as needed, and you’re all set to enjoy your custom creation!
Tips for Success in Cool Box Designs
Avoiding Common Mistakes
When working on your diy cooler project, it’s easy to overlook small details that can affect the final outcome. One common mistake is skipping the planning phase. Without clear plans, you might end up with a cooler that’s too big, too small, or poorly insulated. Take time to measure, sketch, and think through your design before starting.
Another pitfall is using the wrong materials. For example, choosing low-quality insulation can hurt your cooler’s performance. Stick to reliable options like spray-in-place polyurethane foam or vacuum insulation panels. Also, don’t forget to test your seals. A poorly sealed lid can let warm air in, melting your ice faster. Double-check your seals during construction to avoid this issue.
Finally, don’t rush the finishing touches. Sanding and painting might seem minor, but they make a big difference in durability and appearance. A polished cooler not only looks great but also lasts longer.
Maintenance and Long-Term Use
To keep your patio outdoor cooler in top shape, regular maintenance is key. Start by cleaning it after every use. Melted ice and leftover drinks can leave residue that’s hard to remove later. Use warm water and mild soap to wipe down the interior and exterior.
Check the seals and hardware periodically. Rubber gaskets can wear out over time, so replace them if they lose flexibility. Inspect handles, wheels, and latches to ensure they’re secure. If you notice any loose parts, tighten them right away.
Store your cooler in a dry, shaded area when not in use. Exposure to direct sunlight can weaken the materials and fade the paint. With proper care, your diy cooler will stay functional for years.
Creative Customization Ideas
Why settle for a basic cooler when you can make it uniquely yours? Customization is where your creativity shines. Add a splash of color with weather-resistant paint or decals. Bright patterns can turn your cooler into a centerpiece for patio outdoor gatherings.
For added functionality, consider installing a solar-powered USB charger. It’s perfect for keeping your devices charged during outdoor adventures. You can also add compartments inside the cooler for better organization. Separate sections for drinks, snacks, and ice make it easier to find what you need.
Want to impress your guests? Attach LED lights to the interior. They’ll illuminate your cooler at night, making it both practical and eye-catching. With a little imagination, your cool box designs can become a true reflection of your style.
Designing your own cool box cooler is an exciting journey that combines creativity and practicality. You’ve learned how to choose the right tools, materials, and insulation, as well as how to build, seal, and customize your cooler for maximum efficiency. Each step brings you closer to a functional and stylish creation that fits your needs perfectly.
Tip: Don’t be afraid to experiment! Try new designs, add unique features, or play with colors to make your cooler truly one of a kind.
Completing a DIY project like this isn’t just about saving money. It’s about the pride you feel when you see your hard work in action. So, grab your tools, unleash your creativity, and enjoy the satisfaction of building something amazing. You’ve got this! 🎉
FAQ
What’s the best material for cooler insulation?
The best material depends on your needs. Spray-in-place polyurethane foam offers excellent thermal resistance and fills gaps effectively. Vacuum insulation panels (VIPs) are even more efficient but cost more. Choose based on your budget and how long you need to keep items cold.
Tip: For DIY projects, polyurethane foam is affordable and easy to use.
How do I make my cooler more portable?
Add wheels and sturdy handles to your design. Lightweight materials like composite foam or aerogels can reduce the overall weight. For smaller coolers, consider a compact design that’s easy to carry. Portability makes your cooler perfect for camping, picnics, or beach trips.
Can I customize my cooler’s appearance?
Absolutely! Use weather-resistant paint for vibrant colors or patterns. Add decals for a personal touch. You can also install LED lights inside for nighttime use. Customization not only makes your cooler unique but also adds functionality and style.
Pro Tip: Sand the surface before painting for a smooth, polished finish.
How do I test if my cooler is airtight?
Close the lid with a piece of paper sticking out. Try pulling the paper. If it slides out easily, the seal isn’t tight enough. Adjust the gasket or latches until the paper stays in place. Airtight seals are crucial for keeping your cooler ice-cold.
How long will a DIY cooler keep ice frozen?
It depends on the insulation and seal quality. A well-built cooler with polyurethane foam and airtight seals can keep ice frozen for 2-3 days. Using advanced materials like VIPs can extend this to 4-5 days. Regular maintenance ensures long-lasting performance.
Note: Test your cooler with ice before using it for an event.

 Request a quote