
You want your plastic insulated ice box to last for years, right? Keeping it clean and dry helps protect the thick insulation and maintains durability. Regular cooler maintenance means you get better performance every time. When you follow food safety guidelines and handle your ice cooler lunch box with care, you keep your food fresh and your safety a top priority. Remember, proper maintenance supports insulation and boosts longevity.
Tip: Always check your cooler after each use to spot any issues early.
Key Takeaways
- Regular cleaning keeps your cooler fresh and extends its life. Clean after each use to prevent mold and odors.
- Always dry your cooler completely before storing it. This prevents moisture buildup and protects insulation.
- Store your cooler in a cool, shaded area with the lid slightly open. This allows airflow and keeps it in good condition.
- Check seals and hinges regularly. Quick repairs can prevent bigger problems and keep your cooler working well.
- Pre-chill your cooler before packing. This simple step helps keep your food and drinks cold longer.
Cleaning for Plastic Insulated Ice Box Longevity
Keeping your cooler in top shape starts with good cleaning habits. You want your plastic insulated ice box to last, so let’s break down the best ways to keep it fresh, safe, and ready for every adventure.
Daily Cleaning Routine
A simple routine after each use can make a big difference in your cooler’s durability and insulation. Here’s how you can clean your cooler every day:
- Empty your cooler. Take out all food, ice, and water.
- Rinse the inside with warm water to loosen any crumbs or spills.
- Clean with mild soap and warm water using a soft brush or microfiber cloth. This removes dirt and bacteria without scratching the surface.
- Rinse several times to make sure no soap stays behind.
- Dry the cooler completely in a well-ventilated spot to prevent mold and mildew.
- Wipe down after each use with a solution of water and white vinegar. Let it sit for a few minutes, then rinse.
- Check for mold or mildew often and clean immediately if spots are found.
- Use eco-friendly cleaners like vinegar or plant-based products to avoid harsh chemicals.
- Stick to gentle tools like soft cloths and avoid rough sponges.
Tip: Always dry your ice cooler lunch box thoroughly before storing it. This helps protect the insulation and keeps your cooler smelling fresh.
Deep Cleaning Steps
Sometimes, your cooler needs more than just a quick wipe. Deep cleaning helps maintain safety and boosts longevity, especially if you use your cooler often or store strong-smelling foods.
- Schedule deep cleanings every six months. If you use your cooler a lot, clean it more often.
- Make sure you clean every part, not just the inside walls. Pay attention to the lid, seals, and corners.
- For tough stains or odors, try this method:
To begin, mix one tablespoon baking soda and one cup of water into a paste. Baking soda is a mild abrasive that will help break down stains, so if you have any tough stains, this step might help remove them. The water helps spread the baking soda around and dilutes it slightly. Baking soda is also an effective natural deodorizer, so if your cooler smells funky or has mildew buildup, this could also help eliminate odors!
Vinegar is a great cleaner for a variety of materials, including glass. It’s an acid and will help remove stains from your cooler. You can use it on its own or with water. To make sure you get the most out of the vinegar’s cleaning power, fill the cooler with hot water and add 1 cup (240 milliliters) of white vinegar before dumping out the water to neutralize any residual odors and kill off bacteria.
For tough colours, wash out with a mixture of 1 part bleach to 50 parts water.
For a basic, everyday cleaning, you can use mild dish soap and warm water. Mix a few drops of dish soap with warm water in a bucket. This solution will be gentle enough to clean the surfaces without causing damage.
You should always rinse your cooler well after using any cleaning solution. This keeps your food safe and protects the insulation.
Removing Odors
Even with regular cleaning, odors can sometimes stick around. Here’s why that happens and what you can do about it:
- Ice cubes can develop odors due to unclean ice trays or poor-quality tap water.
- Spoiled or pungent food in the cooler can cause odors to linger.
- Strong-smelling foods should be stored in tightly sealed containers to prevent odor transfer.
- Plastic surfaces can absorb smells, which may linger even after cleaning.
- Using baking soda in your cooler can help absorb future odors.
You can try these odor removal techniques:
- Adsorption: Place a small open box of baking soda inside your cooler. It will trap and absorb bad smells.
- Thermal Treatment: Let your cooler sit in the sun for a short time (but not too long, to protect the insulation). The heat can help remove lingering odors.
- Chemical Treatment: Use a vinegar rinse or a mild bleach solution to neutralize stubborn smells.
- Deodorizing Agents: Choose bio-based deodorizing products for a safe and eco-friendly option.
Note: Always store your cooler with the lid slightly open. This allows air to flow and helps prevent odors from building up.
By following these cleaning tips and making them part of your routine, you help your cooler last longer and keep your food safe. Good maintenance means your cooler will be ready for every trip, every time.
Smart Cooler Usage Habits
Building smart habits with your cooler helps you get the most out of every trip. You want your plastic insulated ice box to keep things cold, fresh, and safe. Let’s look at some easy ways to maximize ice retention and boost your cooler’s performance.
Pre-Chilling Your Cooler
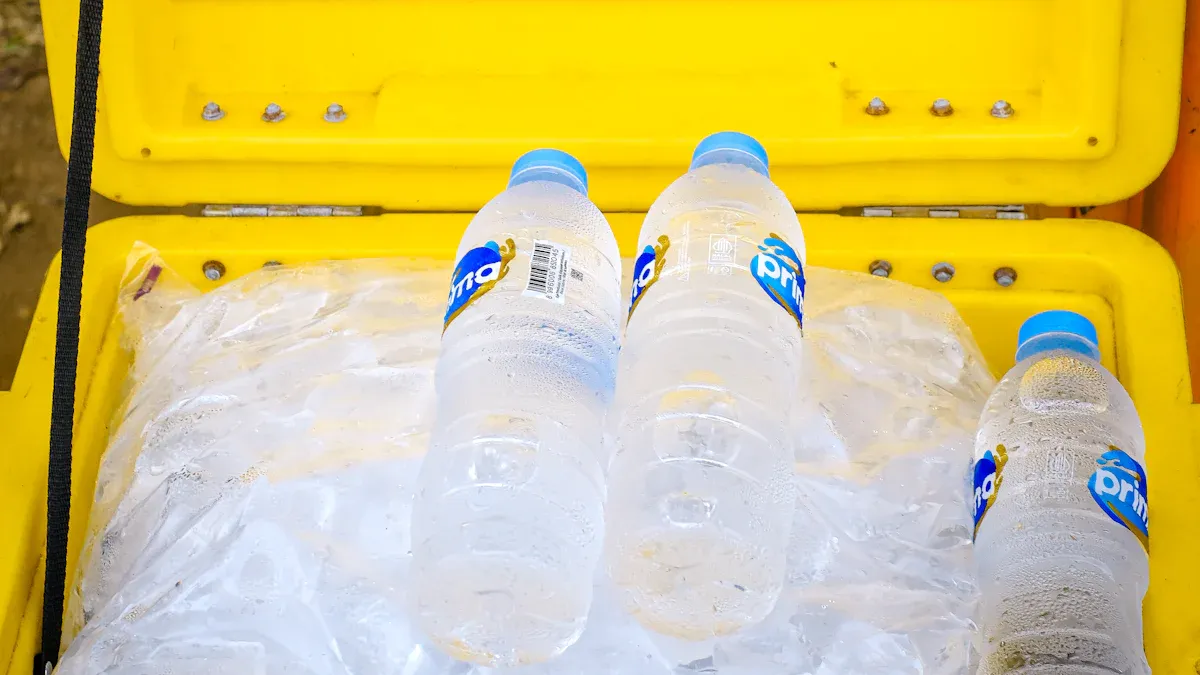
You can start your routine by pre-chilling your cooler before packing. This step makes a big difference. Bring your cooler inside 12–24 hours before you need it. Fill it with 10–20 pounds of sacrificial ice. This cools the insulation and gets your cooler ready for action. After pre-chilling, empty any water left inside. Packing a cool ice cooler lunch box means you don’t waste ice just cooling down the box. Pre-chilling can extend cooling time by 30 minutes to an hour, especially when you use your cooler outdoors.
Tip: Always make sure your cooler is cold before you add food or drinks. This simple habit helps keep everything fresh longer.
Efficient Packing Techniques
Packing your cooler the right way helps you save space and keep things cold. Try these steps:
- Chill your food and drinks before packing. Cold items help your cooler stay cold.
- Dampen a towel with the coldest water you have. Place it between layers of food. This removes air pockets and improves cooling.
- Line the inside of your cooler with aluminum foil. Foil keeps the temperature lower for longer, so you don’t need extra ice.
You can use these packing habits every time. They help you keep food safe and make your cooler work better.
Minimizing Lid Openings
Every time you open your cooler, warm air sneaks in and cold air escapes. This makes your ice melt faster. Try to keep the lid closed as much as possible. When you need something, know what you want and grab it quickly. Don’t leave the lid open while you decide. Every second counts for keeping things cold and safe.
Note: Closing the lid fast helps your cooler keep its temperature steady and your food fresh.
Smart cooler usage habits make every adventure easier. You get better cooling, more safety, and a longer-lasting cooler.
Storage Best Practices for Cooler Longevity
Taking care of your cooler doesn’t stop after cleaning. You want to make sure your cooler stays in great shape, ready for your next adventure. Let’s talk about the best practices for storing your cooler so you get the most out of its insulation, durability, and longevity.
Thorough Drying After Use
You always want to dry your cooler completely before putting it away. Moisture left inside can lead to mold, bad smells, and even damage the insulation. Here’s what you can do:
- Wipe out your cooler with a microfiber cloth after cleaning.
- Use a vinegar and water solution or a mild bleach water mix to wipe down the inside. This helps kill germs and keeps things fresh.
- Leave the cooler open in a well-ventilated spot so it can air dry.
- Check on your cooler during storage to make sure no moisture has built up.
Tip: Always clean your ice cooler lunch box before storing it. This simple step protects your food safety and keeps your cooler ready for next time.
Avoiding Direct Sunlight
Sunlight can heat up your cooler and weaken the plastic over time. You want to store your cooler in a cool, shaded place. This helps protect the insulation and keeps the cooler looking new. Take a look at how different factors affect your cooler’s performance:
| Factor | Description |
|---|---|
| Air Exposure | Less air exposure means ice lasts longer inside your cooler. |
| Environmental Temperature | Cooler temperatures slow down ice melting. |
| Insulation Quality | Good insulation keeps things cold for longer. |
| Thickness and Density | Thicker insulation means better ice retention and durability. |
Ensuring Airflow During Storage
Proper storage means giving your cooler some space to breathe. You don’t want to trap it in a tight spot. Here are some best practices for storing your cooler:
- Store your cooler with the lid slightly open to allow airflow.
- Use breathable materials if you need to cover your cooler.
- Pick a climate-controlled area to manage humidity and temperature.
Note: Good airflow helps prevent mold and keeps your cooler smelling fresh.
When you follow these best practices for storing your cooler, you help maintain its cleaning, insulation, and safety features. Your cooler will be ready for every trip, season after season.
Cooler Care and Maintenance Tips
Taking care of your cooler helps you get the most out of every trip. When you follow key maintenance tips, you protect your investment and keep your food safe. Let’s look at some simple habits that make a big difference.
Gentle Handling and Transport
You want your plastic insulated ice box to last for years. The way you move and carry your cooler matters a lot. Rough handling can cause cracks, dents, or even damage the insulation. Here’s a quick look at what can go wrong during transport:
| Cause | Description |
|---|---|
| Handling Errors | Rough handling or mechanical shocks during loading and unloading can lead to dents, holes, and cracks. |
| Mechanical Failures | Leakage from poor seals and wear and tear can cause significant damage to the cooling systems. |
| Environmental Factors | Fluctuations in temperature and humidity can affect insulation and lead to mechanical failures. |
Always lift your cooler with both hands. Avoid dragging it across rough surfaces. When you pack your ice cooler lunch box in a car, secure it so it does not slide around. These habits help protect your cooler and keep it working well.
Tip: Gentle handling keeps your cooler looking new and protects the insulation inside.
Protecting Seals and Hinges
Seals and hinges are small parts, but they play a big role in cooler maintenance. Good seals keep cold air in and warm air out. Rubber seals, especially those made from silicone or FDA-grade thermoplastic rubber, last longer and keep your cooler watertight. Hinges need to stay strong so the lid opens and closes smoothly.
- Use blended brass corrosion-resistant hinge pins for extra durability.
- Wipe seals and hinges with a damp cloth during your cleaning routine.
- Check for dirt or food stuck in the seals and clean your cooler right away if you find any.
- Avoid slamming the lid shut. This protects seals and hinges from wear.
Note: When you protect seals and hinges, you help your cooler last longer and keep your food safe.
Regular Inspection for Damage
Regular maintenance checks help you spot problems early. You should inspect your cooler after every trip. Look for cracks, broken hinges, or worn seals. If you find any damage, fix it right away to avoid bigger problems later.
- Check the insulation for signs of wear.
- Make sure the airflow around your cooler is not blocked during storage.
- Clean your cooler often to prevent dirt from causing damage.
Proper care and regular inspection save you money. When you maintain your cooler, you can reuse it many times. This makes it more cost-effective than disposable options. You also help the environment by reducing waste.
Callout: Routine cleaning and regular maintenance checks keep your cooler in top shape for every adventure.
Troubleshooting and Cooler Repairs
Fixing Common Issues
You might notice your cooler is not keeping things cold like it used to. Sometimes, you see leaks or hear the lid squeak. These problems can happen if you forget to clean your cooler or skip regular maintenance. Start by checking the seals around the lid. If you spot cracks or dirt, wipe them with a damp cloth. Make sure the hinges move smoothly. If they feel stiff, add a drop of food-safe lubricant. Always check for loose screws or broken handles. Tighten screws with a screwdriver. Replace any broken parts right away to protect your cooler and keep your food safe.
Tip: If you see mold or smell something odd, clean your cooler with vinegar and water. This helps keep the insulation working well.
Replacing Parts (Handles, Seals, Hinges)
Sometimes, you need to swap out old parts to keep your cooler working. Handles, seals, and hinges wear out over time. You can find replacement kits online or at outdoor stores. Here’s a quick look at what you might need:
| Item Description | Quantity | Material | Size | Price |
|---|---|---|---|---|
| Cooler Plastic Hinge Set Replacement | 2 Hinges, 8 Screws | Plastic | 5.7*5 cm, height 1.3 cm | $52.61 |
When you replace seals, make sure they fit snugly. Good seals keep cold air inside and block warm air. Hinges help the lid open and close without trouble. If you change handles, pick sturdy ones that match your cooler. Always check the airflow around the cooler after repairs. This keeps mold away and helps your cooler last longer.
Knowing When to Upgrade
You might wonder when it’s time for a new cooler. If you inspect your cooler and see deep cracks, broken hinges, or seals that won’t stay tight, it may be time to upgrade. Old coolers lose insulation power and can’t keep food cold for long. If you notice your ice melts fast or the lid won’t close, consider a new model. New coolers have better seals, stronger hinges, and improved insulation. Upgrading helps you keep your food safe and makes every trip easier.
Callout: Good habits and regular maintenance help your ice cooler lunch box last longer. Always check your cooler before each trip to make sure it’s ready for action.
You want your plastic insulated ice box to last for years, right? Regular care keeps your cooler working well. Clean your cooler after each trip and dry it before storing. Check the seals often and fix small problems quickly. Store your cooler in a safe spot to protect it from damage. These tips help you keep your ice cooler lunch box ready for every adventure. Good care means better safety and longer life for your cooler.
- Cleaning protects insulation and seals.
- Drying prevents mold and bacteria.
- Proper storage shields your cooler from harm.
- Quick repairs keep seals strong.
Remember, a little care goes a long way!
FAQ
How often should you clean your plastic insulated ice box?
You should clean your ice box after every use. Regular cleaning keeps your cooler fresh and helps prevent mold or odors. Deep clean it every few months if you use it often.
Can you use bleach to clean your cooler?
Yes, you can use a mild bleach solution. Mix one part bleach with fifty parts water. Rinse your cooler well after cleaning to keep it safe for food storage.
What is the best way to store your cooler?
Store your cooler in a cool, dry place. Keep the lid slightly open for airflow. Avoid direct sunlight to protect the plastic and insulation.
How do you remove stubborn odors from your ice box?
Place an open box of baking soda inside your cooler. Let it sit overnight. Baking soda absorbs bad smells and helps keep your cooler fresh.
When should you replace the seals or hinges?
Check seals and hinges after each trip. If you see cracks or they feel loose, replace them right away. Good seals and hinges help your cooler work better.


 Request a quote