You want your drinks cold and your food fresh when you head out on a trip. A portable cooler box can make all the difference. If you pack your cooler box the right way, you keep everything chilled for hours. Place your cooler in a shady spot and check the ice levels now and then. With a little care, you get the most out of every adventure.
Key Takeaways
- Choose the right size cooler for your trip. A cooler that fits your needs makes packing easier and keeps your food and drinks cold.
- Pre-chill your cooler and food before packing. This simple step helps your ice last longer and keeps everything fresh.
- Layer ice and contents properly. Start with a thick layer of ice at the bottom, add pre-chilled items, and cover with more ice to trap cold air.
- Keep your cooler in the shade. This helps maintain a low temperature inside and extends the life of your ice.
- Regularly check and maintain your cooler. Clean it after each use and store it properly to ensure it lasts for many adventures.
Choosing the Right Portable Cooler Box
Size and Capacity
Picking the right size for your cooler box makes your trip much easier. You want enough space for all your food and drinks, but you also want something you can carry. Think about how many people are coming and how long you will be out. If you pack for yourself, a small cooler works fine. For a family or a group, you need something bigger. Here’s a quick guide to help you choose:
| Cooler Size | Suitable For |
|---|---|
| 10-20 quarts | Personal use |
| 50-70 quarts | Families or small groups |
| 100+ quarts | Large events |
You should also consider:
- Number of people
- Duration of the trip
- Types of items you want to keep cold
A cooler that is too small leaves you short on supplies. One that is too big can be hard to move. Find the balance that fits your needs.
Insulation Quality
The insulation in your cooler box keeps everything cold for longer. Not all coolers use the same materials. Some coolers use open-cell microporous polyurethane, which can keep things cold almost three times longer than regular polyurethane. Others use fumed silica, which also works well. If you want your ice to last, look for a cooler box with thick, high-quality insulation. This makes a big difference, especially on hot days.
Lid and Seal Design
A good lid and seal keep the cold air inside your cooler. You want a lid that closes tight and stays shut. Heavy-duty latches help keep the lid secure. Gasket seals made from rubber or silicone create a waterproof barrier. Some coolers use both latches and seals for the best results. Here’s a quick look at what to check:
| Feature | Description | Benefit |
|---|---|---|
| Heavy-duty latches | Keeps the lid closed tightly | Stops cold air from escaping |
| Gasket seals | Rubber or silicone for a tight, waterproof seal | Holds in the cold for longer |
| Both combined | Uses latches and seals together | Keeps your cooler box cold even longer |
Tip: Always check the lid and seal before you head out. A tight seal means your food and drinks stay colder for hours.
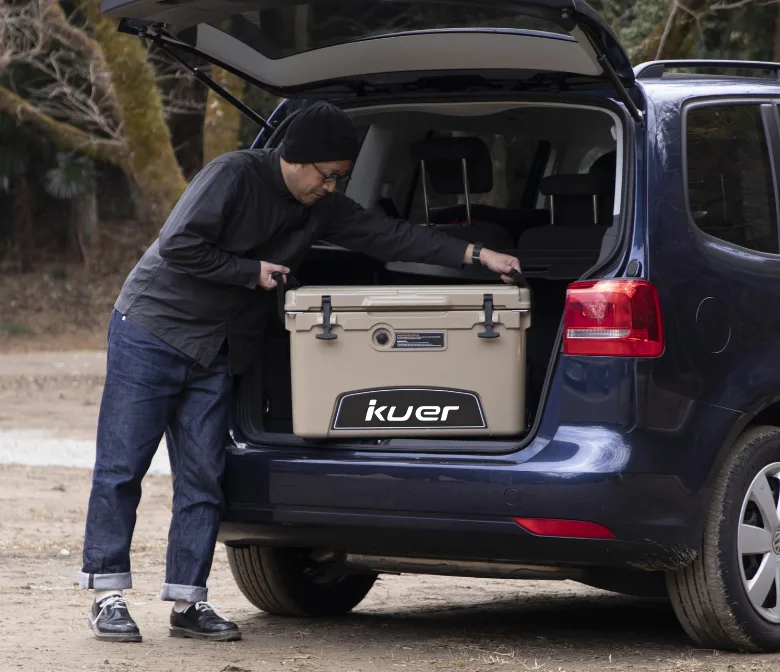
Durability and Portability
When you pick a cooler for your trip, you want something tough and easy to carry. Durability means your cooler can handle bumps, drops, and rough use. Portability means you can move it without trouble, even when it’s full.
- Many users say durable construction and strong insulation help a cooler last for years. You don’t want handles or latches that break after a few uses.
- Some coolers, like the Klein Tools 55600 Work Cooler, stand out because of their rugged build. They work well in tough places, like job sites or campsites.
- Weak handles or latches can cause problems. If these parts fail, your cooler might not close right or could be hard to carry.
- Large coolers give you more space, but they can get heavy. If you need to walk far, a smaller cooler is easier to manage.
Tip: Check the handles, wheels, and latches before you buy. If you plan to carry your cooler a lot, look for one with comfortable grips and sturdy wheels.
Recommended Brands: KUER and Others
You have many choices when it comes to cooler brands. Some brands focus on advanced technology and strong materials. Others offer special features for outdoor use. Here’s a quick look at some top brands and what makes them stand out:
| Brand | Key Features | Performance & Reliability |
|---|---|---|
| KUER | Large-scale manufacturing, advanced technology, 22 rotomolding machines | High quality, innovative design, global service |
| Yeti | Rotomolded construction, premium insulation | Known for toughness, long ice retention |
| RTIC | Rotomolded construction, direct sales | High performance at lower price |
| Pelican | Injection-molded plastic, extreme durability | Certified bear resistance, works in harsh environments |
| Engel | Airtight gaskets, marine-grade hardware | Popular with boaters and anglers |
KUER stands out for its advanced manufacturing and innovative designs. You get a cooler that’s built to last and keeps your food and drinks cold for longer. Other brands like Yeti, RTIC, Pelican, and Engel also offer reliable options for different needs.
Preparation Steps for Your Cooler Box
Pre-Cooling the Cooler Box
You want your cooler to start cold before you pack it. Pre-cooling helps with ice preservation and keeps your food fresh longer. Here’s how you can do it:
- Start a few hours before you leave.
- Fill your empty cooler box with a bag of sacrificial ice or keep it in a cool basement.
- This step chills the insulation inside the cooler.
- When you pack your real ice, it does not have to work as hard to keep things cold.
Tip: Pre-cooling your cooler box means your ice lasts longer and your drinks stay colder.
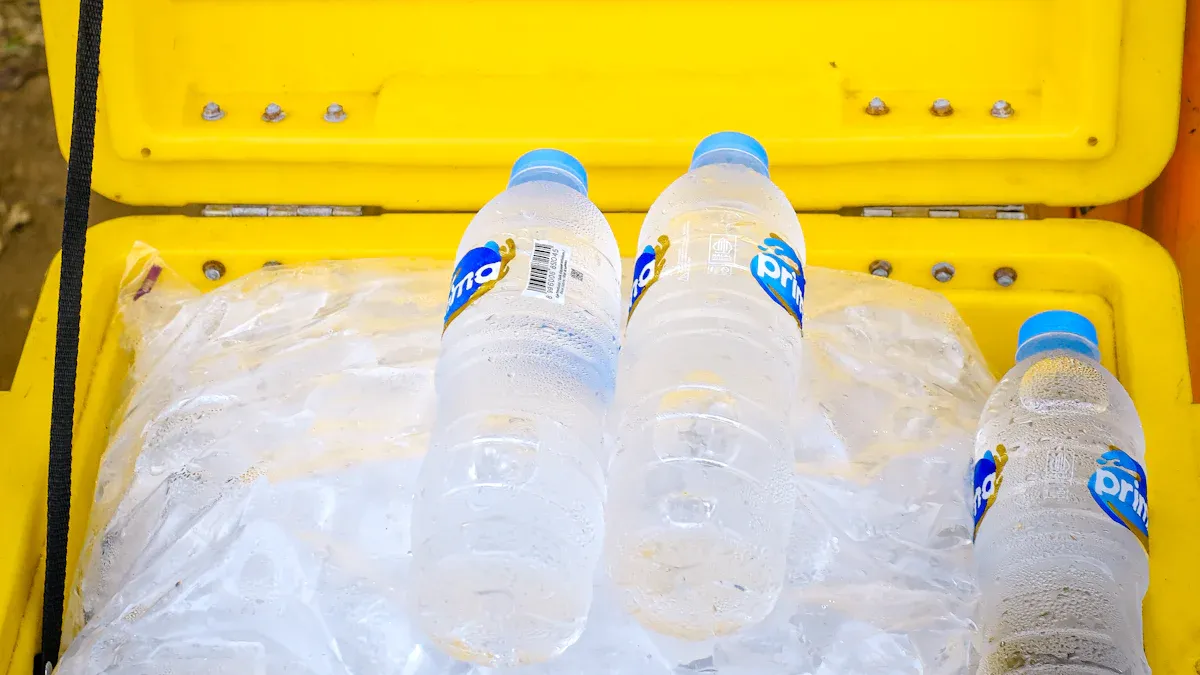
Pre-Chilling Food and Drinks
Packing cold items makes a big difference for ice preservation. If you put warm food or drinks in your cooler, the ice melts faster. You can do a few simple things:
- Put your drinks and food in the refrigerator before you pack them.
- Use ice packs to chill items before they go into the cooler box.
- Cold items help keep the temperature low and slow down melting.
Note: Pre-chilled food and drinks help your cooler work better and keep everything fresh.
Selecting Ice Types: Blocks, Cubes, Dry Ice
Choosing the right ice helps with ice preservation and keeps your cooler box cold for longer. Ice blocks and reusable ice packs melt slower than ice cubes. They give you steady cooling and help with ice preservation. Ice cubes cool things quickly but melt faster. Dry ice stays frozen at much lower temperatures and works well for long trips. You need to check if your cooler can handle dry ice before you use it.
You can mix ice types for better results. Place ice blocks at the bottom of your cooler. Add ice cubes on top for quick cooling. This way, you get both fast chilling and long-lasting ice preservation.
| Ice Type | Melting Rate | Cooling Power | Best Use |
|---|---|---|---|
| Ice Blocks | Slow | Steady | Long trips, big coolers |
| Ice Cubes | Fast | Quick | Short trips, fast chill |
| Dry Ice | Very Slow | Extreme | Extended travel |
Tip: Always add a little water to your ice for better contact and improved ice preservation.
Using Ice Packs and Alternatives
Ice packs can make your cooler work even better. You do not have to use just regular ice. Many people like ice packs because they do not make a mess and last longer. You can find different types of ice packs at the store. Some brands use special materials that keep things cold for a long time.
Here is a quick look at how long some popular ice packs can keep your cooler cold:
| Ice Pack Material | Cooling Duration |
|---|---|
| Cooler Shock | Over 48 hours |
| Yeti Ice | More than 24 hours |
| Igloo MaxCold Ice Block | More than 24 hours |
| Arctic Ice Alaskan Series | More than 24 hours |
You can see that Cooler Shock ice packs last the longest. If you want your food and drinks to stay cold for two days or more, these are a great choice. Yeti Ice, Igloo MaxCold, and Arctic Ice Alaskan Series also work well for day trips or overnight camping.
You do not have to buy ice packs if you want to save money. You can use frozen water bottles, juice boxes, or even frozen sponges in zip bags. These homemade options keep your cooler cold and give you extra drinks when they melt.
Tip: Place your ice packs or frozen bottles at the bottom and along the sides of your cooler. This helps keep everything inside cold for longer.
If you want to try something different, you can use dry ice. Dry ice keeps things frozen, but you need to handle it with care. Always wear gloves and keep your cooler in a well-ventilated spot.
Mixing ice packs with regular ice or frozen bottles gives you the best results. Your cooler will stay cold, and your food will stay fresh.
How to Pack a Cooler for Maximum Cold
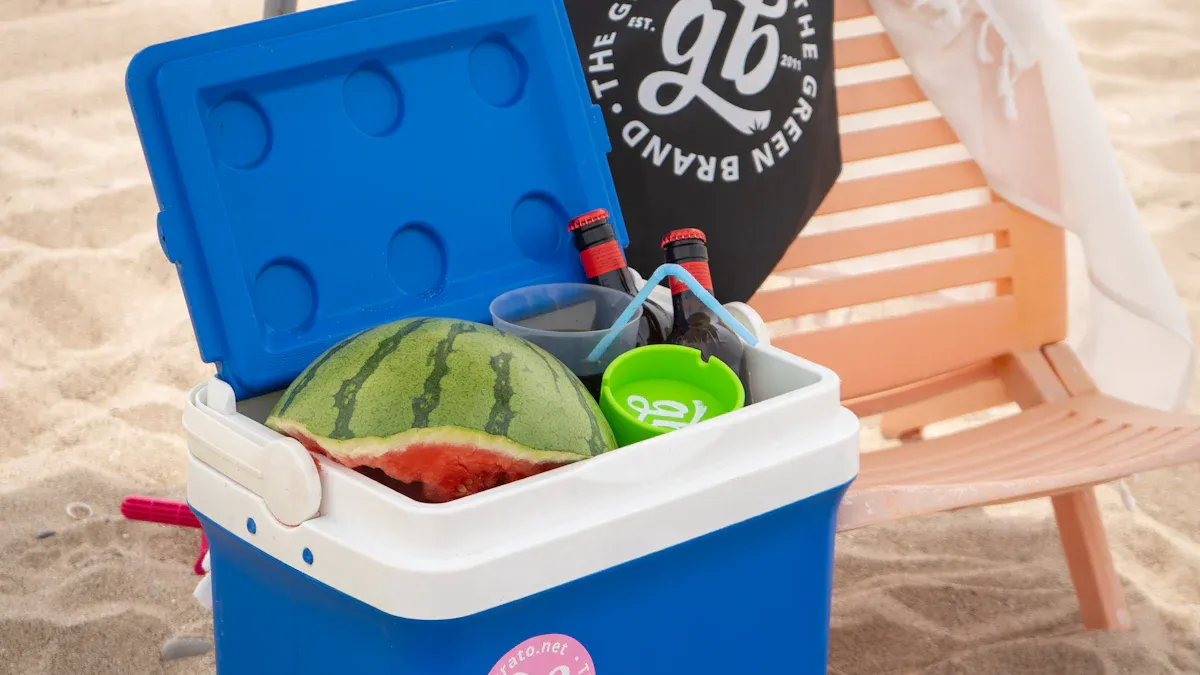
Layering Ice and Contents
When you pack a cooler, the way you layer ice and food makes a huge difference. You want everything to stay cold for as long as possible. Here’s a simple method that experts recommend:
- Start with a thick layer of block ice or frozen ice packs at the bottom. This creates a strong cold base.
- Place your pre-chilled drinks and food on top of the ice. Cold air sinks, so this keeps your perishables cool.
- Add another layer of ice or an ice bag over the food. This traps cold air inside and blocks warm air from getting in.
- Fill any gaps between items with cubed ice or small ice packs. This reduces airflow and keeps everything snug.
- Put delicate items or things you need first on top. You won’t have to dig through the cooler to find them.
Tip: Always pre-chill your food and drinks before cooler packing. If you keep a 2:1 ice to contents ratio, you’ll notice your ice lasts much longer.
Minimizing Air Gaps
Air gaps inside your cooler can make ice melt faster. You want to fill every space so cold air stays trapped. Here are some easy ways to do that:
- Use smaller ice packs or cubed ice to fill spaces between bottles and containers.
- Pack items close together. If you leave empty spots, warm air sneaks in and melts your ice.
- Try using soft-sided containers or zip bags for snacks. These can squeeze into tight spaces and help block air.
A tightly packed cooler keeps everything cold and fresh. You’ll see better results if you avoid leaving open spaces.
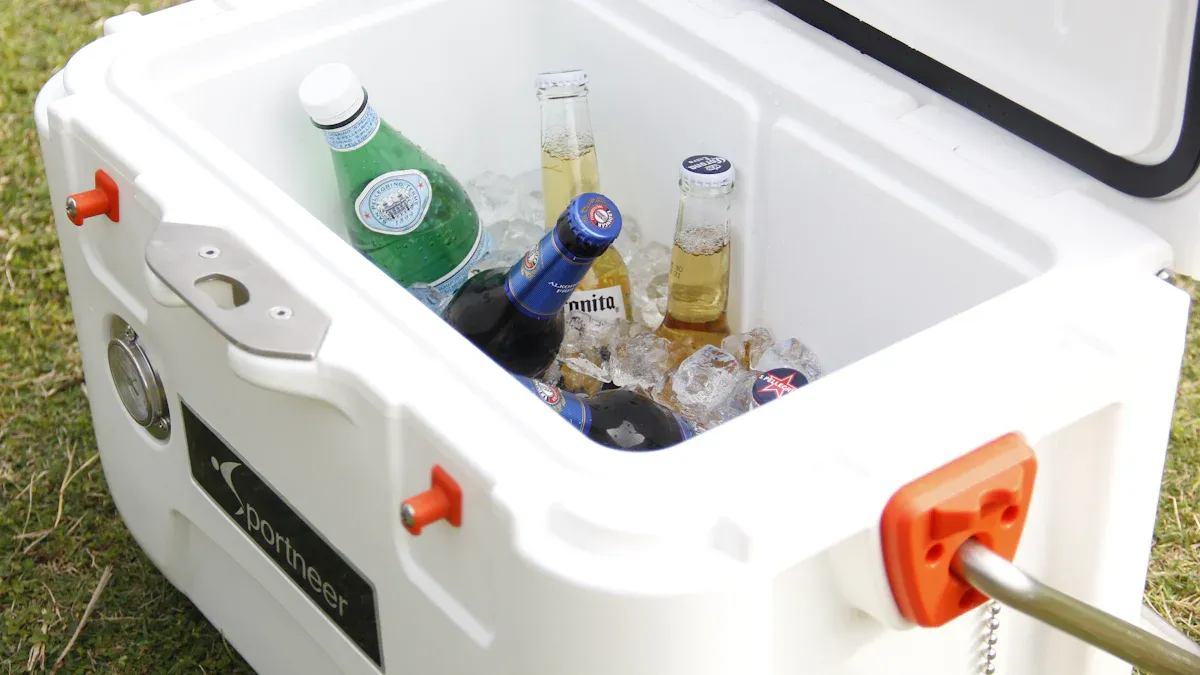
Separating Food and Drinks
You might think it’s easier to toss everything into one cooler, but separating food and drinks helps a lot. Packing beverages away from perishable foods keeps everything safer. When you open the cooler for a drink, you let warm air in. If you use separate coolers, you open the food cooler less often, which helps ice last longer.
- Use one cooler for drinks and another for food if you can.
- Keep raw meat and eggs away from ready-to-eat foods and drinks. This stops cross-contamination.
- If ice melts, it can carry bacteria. Separating items keeps your food safe.
Note: Cooler packing with separate coolers for drinks and food means you keep perishable items at safe temperatures and avoid food safety risks.
You’ll find that these simple steps make your cooler packing much more effective. Your food stays fresh, your drinks stay cold, and you spend less time worrying about melted ice.
Using Containers and Bags
Packing your cooler with containers and bags makes a big difference. You keep things organized, and you help your cooler stay cold for longer. When you use containers, you stop food from getting squished or soggy. You also keep flavors from mixing. No one wants their sandwich to taste like last night’s marinated chicken!
Reusable containers work well for snacks, fruits, and leftovers. You can stack them easily. This helps you use every inch of space. If you use zip-top bags, you can squeeze out extra air. That means less empty space for warm air to sneak in. Less air inside your cooler means your ice lasts longer.
Here are some smart ways to use containers and bags in your cooler:
- Place ice packs at the bottom. This gives you a cold base that keeps everything chilled.
- Layer cold items on top of the ice packs. Cold air sinks, so this setup helps your food stay cold.
- Use containers for things that might leak, like salads or marinated meats. You avoid messes and keep your cooler clean.
- Pack snacks and small items in bags. You can fit them into tight spaces and fill gaps.
- Try using dividers or small bins. These help you group similar items together and make it easy to find what you need.
Tip: Organizing your cooler with containers and bags helps keep the temperature steady. You spend less time searching for things, and your food stays fresh.
You can also use containers to separate raw foods from ready-to-eat items. This keeps your food safe and stops cross-contamination. If you want to grab a drink or snack, you can pull out a container without digging through everything.
A well-packed cooler with containers and bags saves you time and keeps your food cold. You get more out of your ice, and your trip feels easier. Give it a try next time you pack up for an adventure!
Maintaining Cooler Box Performance During Use
Keeping the Cooler in the Shade
You want your cooler to work its best, so always look for a shady spot. When you keep your cooler out of direct sunlight, you help it stay cold for much longer. Studies show that coolers in the shade keep ice for up to three days. The color of your cooler does not matter much when it sits in the shade. The temperature inside stays almost the same, with less than a 1°F difference between coolers of different colors. Your drinks and food stay cold, and you do not have to worry about melting ice too soon.
- Shade helps every cooler keep ice longer.
- Internal temperatures stay steady in the shade.
- Cooler color does not affect performance in shaded areas.
Covering the Cooler for Extra Insulation
You can boost your cooler’s performance by adding an insulation cover. These covers act like a shield, blocking heat from getting inside. When the weather gets hot, an insulation cover helps your cooler keep a stable temperature. This means your food and drinks stay cold for more hours. Insulated covers also make your cooler more efficient, so it does not use up ice as quickly. If you plan to spend time outdoors, an extra cover is a smart choice.
- Insulation covers reduce heat transfer.
- They help your cooler keep things cold for longer.
- High-quality insulation is important for hot weather.
Minimizing Lid Openings
Every time you open the lid, warm air rushes in and cold air escapes. You want to keep the lid closed as much as possible. Try to plan ahead and grab everything you need in one go. If you open the cooler less often, you keep the inside cold and your ice lasts longer. You can also remind your friends or family to close the lid quickly after use. Small changes like this help your cooler stay cold all day.
Tip: Make a list of what you need before opening the cooler. This way, you avoid letting warm air inside.
Adding Extra Ice or Dry Ice
You want your cooler box to stay cold as long as possible. Adding extra ice or dry ice can help you do that. If you notice your ice melting, just toss in more ice blocks or cubes. Dry ice works even better for long trips. It keeps everything frozen for hours. You need to handle dry ice with care. Always wear gloves and keep it away from your skin. Dry ice releases carbon dioxide gas, so make sure your cooler has a little ventilation.
Here are some tips for using extra ice or dry ice:
- Place ice blocks at the bottom of your cooler box. They melt slower than cubes.
- Fill gaps with ice cubes for quick cooling.
- If you use dry ice, wrap it in newspaper. This slows down the melting and protects your food.
- Never put dry ice directly in contact with water bottles or cans. It can freeze them solid.
- Check your cooler box every few hours. Add more ice if you see lots of water at the bottom.
Tip: If you want to keep your drinks icy cold, add a layer of ice cubes on top. For frozen food, dry ice is your best bet.
Creative Cooling Methods
You can get creative to keep your cooler box cold for longer. People have tried different ways to boost cooling power. Some use phase change materials (PCM) that freeze and melt at certain temperatures. Others use vacuum insulation panels (VIP) to block heat. You can also try mixing ice packs with regular ice and water.
Check out this table showing how different cooling setups work:
| Configuration | PCM Location | Melting Point (°C) | Insulation Type | Cooling Duration (h) | Discharging Efficiency (%) | Discharging Depth (%) |
|---|---|---|---|---|---|---|
| Case 1 | 100% Top | 2 | VIP | 46.5 | 90.7 | 99.4 |
| Case 2 | 20% Top, 20% Sides | 2 | VIP | 46.5 | 90.7 | 99.4 |
| Case 3 | 25% Sides | 2 | VIP | N/A | N/A | N/A |
| Case 4 | 20% Sides, 20% Bottom | 2 | VIP | N/A | N/A | N/A |
| Case 5 | 100% Bottom | 2 | VIP | N/A | N/A | N/A |
You can see that placing PCM at the top or sides gives you the longest cooling time. If you want to try this at home, freeze packs of water and place them on top of your food. You can also use frozen water bottles along the sides. This helps keep everything cold and gives you extra water to drink when they melt.
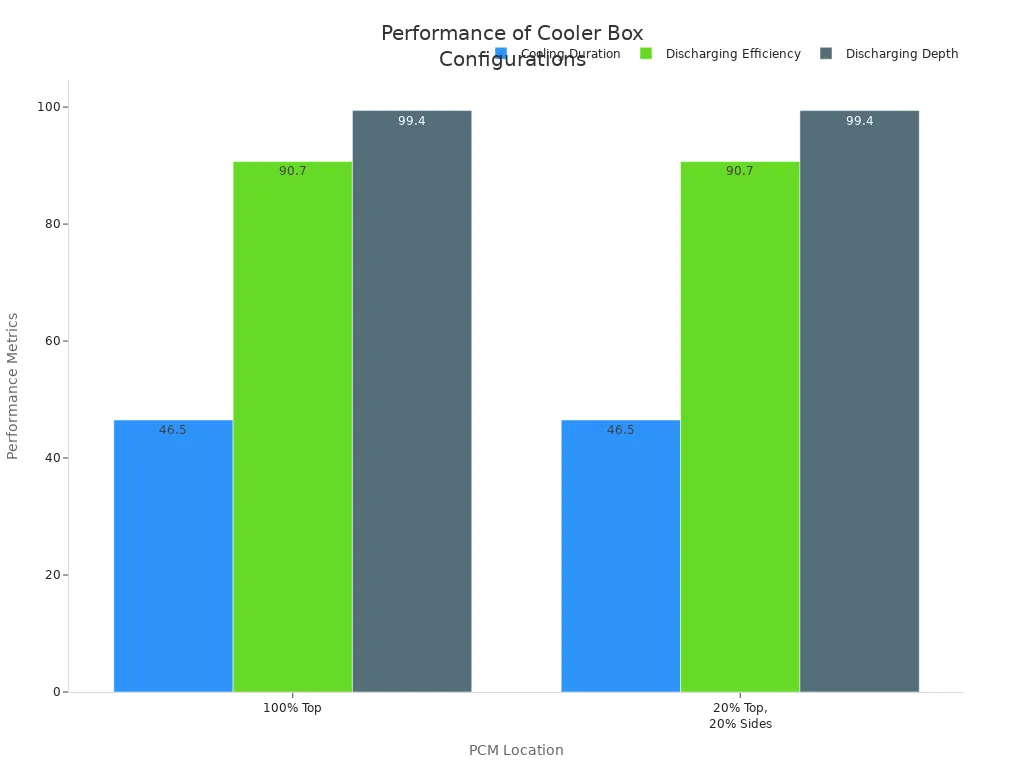
Try mixing ice packs, frozen water bottles, and regular ice. You get steady cooling and fresh water for your trip. If you want to experiment, use vacuum insulation panels or PCM packs. These methods help your cooler box stay cold for hours, even in hot weather.
Note: Always keep a few frozen water bottles in your cooler. They keep your food cold and give you safe water to drink later.
Troubleshooting and Pro Tips for Your Cooler
Dealing with Leaks and Condensation
You might notice water pooling around your cooler or droplets forming inside. This happens when warm, humid air touches the cold surface of your cooler. The air loses its ability to hold moisture, and water collects as condensation.
Start by remembering that air carries water vapor and the cooler it gets, the greater the chance of that water vapor dropping out as condensation.
Common causes include high humidity, uneven placement, and temperature changes. Here are some things you can watch for:
- High humidity can overflow the condensate tray.
- If your cooler sits on an uneven surface, water may not drain properly.
- Sudden temperature changes cause condensation when warm air meets cold surfaces.
To prevent leaks, always place your cooler on a flat surface and check the drain plug. Wipe away condensation with a towel and keep the lid closed as much as possible.
Extending Cooling Time
Want your food and drinks to stay cold longer? Try these cooling tips to get the most out of your cooler:
| Technique | Description |
|---|---|
| Use rotomolded hard coolers | Thick foam keeps ice from melting quickly. |
| Pre-chill cooler and contents | Icing overnight before loading helps ice last longer. |
| Use block ice or large ice packs | These melt slower than small cubes. |
| Limit cooler opening frequency | Fewer lid openings mean less warm air inside. |
| Drain meltwater regularly | Water transfers heat faster than air, so drain it often. |
| Store in shade and use reflective covers | Shade and covers protect your cooler from sunlight. |
You can also cover your cooler with a wet towel for evaporative cooling or freeze your food before packing. If you need extra ice, bring a second cooler just for ice.
Cleaning and Odor Prevention
After your trip, cleaning your cooler keeps it fresh and ready for next time. Follow these steps:
- Rinse the cooler with a garden hose to remove dirt.
- Scrub the inside with dish soap and a sponge, including the drain and lid gasket.
- Rinse again with water.
- Wipe the surfaces with a mix of water and vinegar.
- Air out the cooler outdoors for half an hour, then rinse once more.
- Use lemon juice for tough stains and dry with a towel.
- You can also use warm water, soap, and baking soda to scrub, then rinse well.
- For deep cleaning, use a bleach solution, let it sit for ten minutes, then rinse and dry.
A clean cooler prevents odors and mold, so you always start your next adventure fresh.
Storing Your Cooler Box Properly
You want your cooler box to last for years and keep working like new. Storing it the right way makes a big difference. If you rush through this step, you might find mold, bad smells, or even cracks next time you need it. Let’s walk through some easy steps to keep your cooler in top shape.
First, always clean your cooler after every trip. Use warm water and soap to scrub the inside and outside. Rinse it well so no soap stays behind. Dry your cooler completely before you put it away. If you leave it wet, mold and bacteria can grow fast.
Tip: Leave the lid open in a ventilated spot until all the moisture is gone. This helps air flow and stops bad smells.
Pick a cool, dry place for storage. Avoid leaving your cooler in direct sunlight or places with extreme temperatures. Sunlight can fade the color and weaken the plastic. Heat or cold can cause warping. If you have a garage or shed, that’s a good spot. You can also use a durable cover to protect your cooler from scratches and bumps.
Here’s a quick checklist for storing your cooler box:
- Clean and dry your cooler completely.
- Leave the lid open until all moisture evaporates.
- Store in a cool, dry, and sheltered place.
- Use a cover for extra protection.
- Keep your cooler upright to prevent warping.
- Check for moisture every few weeks.
- Place a desiccant inside to absorb any leftover dampness.
If you follow these steps, your cooler will stay fresh and ready for your next adventure. You won’t have to worry about mold or damage. Your cooler box will always be ready to keep your food and drinks cold.
You can get the most out of your portable cooler box on every trip by making smart choices. Pick a cooler box that fits your camping plans and group size. Pre-chill your cooler box and pack it tight to keep things cold. Place your portable cooler box in the shade during your trip.
- Pre-chilling and tight packing help your cooler box hold cold air longer.
- Keeping your portable cooler box out of the sun makes a big difference on a long trip.
- Good maintenance means your cooler box stays ready for every camping trip.
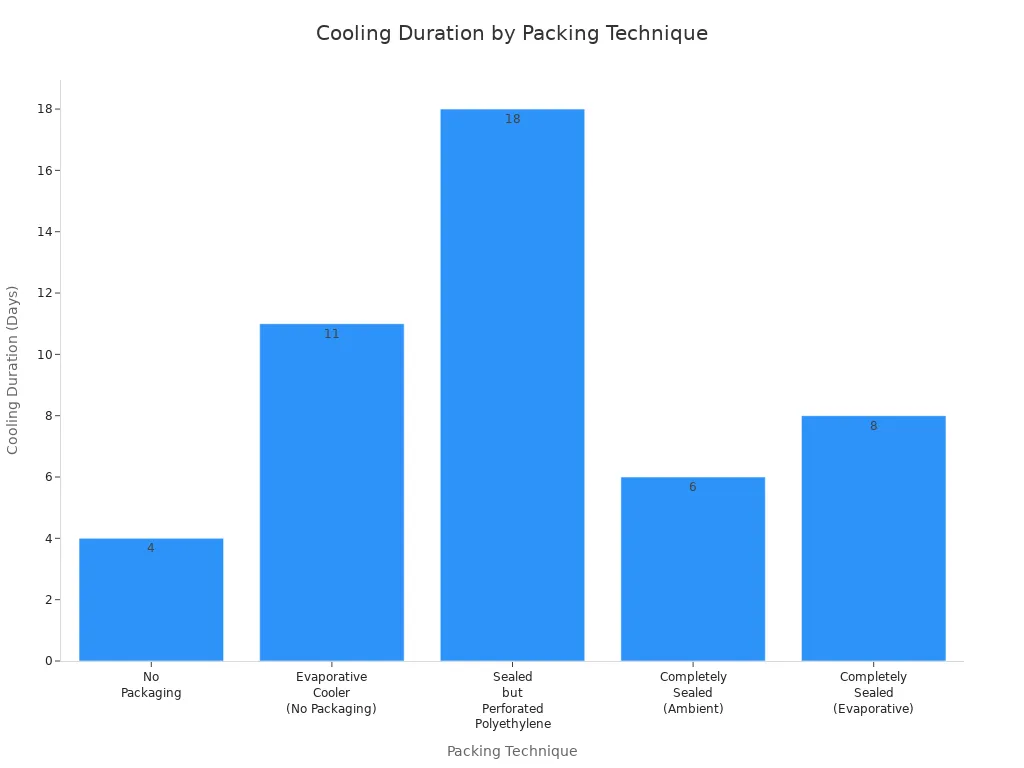
Here’s how small changes can impact your trip:
| Packing Technique | Cooling Duration (Days) |
|---|---|
| No Packaging | 4 |
| Sealed but Perforated Polyethylene | 18 |
You save money, keep food safe, and enjoy every trip more when you care for your portable cooler box.
FAQ
How long can a portable cooler box keep food cold?
Most cooler boxes keep food cold for 1 to 5 days. The exact time depends on the ice you use, how you pack it, and if you keep it out of the sun. Pre-chilling helps a lot!
Can I use dry ice in my cooler box?
Yes, you can use dry ice in many cooler boxes. Always wear gloves when handling dry ice. Make sure your cooler allows for some ventilation. Dry ice keeps things frozen much longer than regular ice.
What is the best way to clean my cooler box?
Wash your cooler with warm water and mild soap. Use a sponge or soft brush. Rinse well and let it dry with the lid open. For tough smells, try a mix of water and baking soda.
How do I stop my cooler from leaking?
Check the drain plug and gasket for a tight seal. Always place your cooler on a flat surface. If you see water outside, wipe it up quickly. Keeping the lid closed helps prevent leaks, too.
Should I store my cooler with the lid open or closed?
Store your cooler with the lid slightly open. This lets air flow inside and stops mold or bad smells from building up. You can also put a dry towel inside to absorb any leftover moisture.

 Request a quote