
Imagine you’re packing for a multi-day trip—maybe you’re heading out camping, tailgating before the big game, or planning a beach outing with friends. You grab your large ice chest cooler, confident it will keep your drinks cold and your food fresh for days. Outdoor recreation surveys highlight that a large ice chest cooler truly excels at big gatherings and extended adventures, thanks to its rugged build and convenient features like wheels or cup holders. When you choose a KUER large ice chest cooler, you enjoy reliable cooling, longer ice retention, and the kind of freshness that elevates every trip. With a few simple steps, you can boost performance and keep your large ice chest cooler ready for anything.
Clean & Prep
Clean Before and After Use
You want your large ice chest cooler to last for years and keep everything fresh. The best way to do this is to clean your cooler after every trip. Start by emptying all the contents and taking out any baskets or dividers. Rinse the inside with water to get rid of crumbs and dirt. Use a soft sponge with mild dish soap and warm water to wash both the inside and outside. If you see stains, make a paste with baking soda and gently scrub. For tough smells, soak the cooler in warm water with a bit of white vinegar for about 15 minutes. Always rinse well so no soap or vinegar stays behind.
Tip: Dry your cooler with the lid open in the sun. This helps stop mold and keeps it smelling fresh.
If you use your cooler a lot, do a deep clean at the end of each season. Check for any mold or mildew and clean it right away. Never use harsh chemicals or rough scrubbers. These can damage the surface and seals.
Pre-Chill Large Ice Chest Cooler
Before you pack for your trip, prechill your cooler. This step makes a big difference in how long your ice lasts. Fill the cooler with cubed ice 12 to 24 hours before you need it. The cubed ice will pull out any heat from the cooler’s walls and insulation. When you’re ready to pack, dump out the old ice and water. Now, add your food, drinks, and fresh block ice for the best results. If you also prechill your cooler’s contents, you’ll keep everything colder for longer.
Note: Prechill your cooler every time for the best ice retention.
Check Seals and Latches
Before every use, inspect the seals and latches on your cooler. Make sure the rubber gaskets are clean and free from cracks. Wipe them down with a damp cloth if needed. A tight seal keeps cold air in and warm air out, which helps your ice last longer. If you spot any damage, replace the gasket right away. Always close the latches firmly to lock in the cold.
A little care goes a long way. With these steps, you’ll keep your cooler in top shape and ready for any adventure.
Pack a Cooler
Packing your large ice chest cooler the right way makes all the difference. You want your food and drinks to stay cold, your ice to last, and your trip to go smoothly. Let’s break down the best pack an ice chest cooler strategy step by step.
Pre-Chill Food and Drinks
Start with cold stuff. If you put warm food or drinks in your cooler, you waste ice and lose cooling power fast. Prechill your provisions by putting them in the fridge or freezer overnight. Freeze food ahead of time if you can. Frozen water jugs work great for keeping things cold and can double as drinking water when they melt. When you pack a cooler, always use frozen items first. This keeps everything colder longer.
Tip: Prechilling your cooler and your food means less ice melts and your drinks stay icy cold.
Here’s why pre-chilling matters:
- Cold food and drinks don’t raise the cooler’s temperature.
- Frozen items help keep the inside cold for longer.
- Ice packs and frozen water jugs add extra chill and cut down on mess.
Ice-to-Content Ratio
How much ice do you need? The answer is simple: use more ice than food and drinks. The best pack an ice chest cooler method uses a 2:1 ice-to-content ratio. That means two-thirds of your cooler should be ice, and one-third should be food and drinks. This keeps everything cold for days.
| Brand | Recommended Ice-to-Content Ratio | Why It Works |
|---|---|---|
| Engel Coolers | 2:1 | More ice means longer ice retention |
| YETI | 2:1 | Twice as much ice as contents keeps things cold |
| Arctic Zone | 2:1 | Two-thirds ice is the rule for best cooling |
If you don’t have enough ice, fill empty spaces with frozen water jugs or ice packs. This helps keep the temperature low and stops warm air from getting in.
Layering for Ice Retention
Layer it up for the best results. Cooler packing is all about how you add layers. Start with ice blocks at the bottom. They melt slower and keep the base cold. Add frozen food and drinks next. Then, pack layers of ice cubes or crushed ice on top. This covers everything and fills gaps.
Here’s a simple layering plan:
- Put ice blocks or frozen water jugs at the bottom.
- Add frozen food and drinks.
- Cover with more ice cubes or crushed ice.
- Fill any empty spaces with extra ice or frozen items.
Note: Keep your cooler full. Less air means better ice retention.
If you want to go further, add layers of foam or reflective insulation between the ice and food. This helps keep the cold in. You can also use bubble foil or towels as extra insulation.
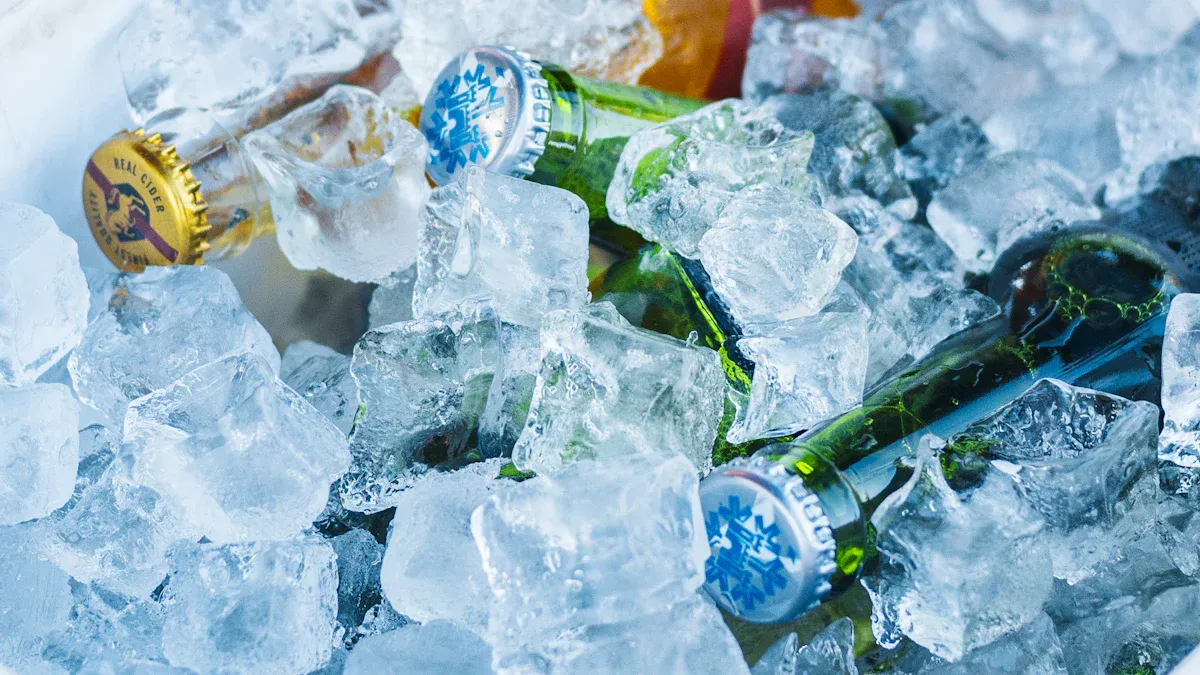
Block Ice vs. Cubes
Choosing the right ice matters. Ice blocks last longer because they melt slower. They are perfect for long trips or big events. Ice cubes cool things faster but melt quicker. They are easy to handle and fill gaps well.
| Feature | Block Ice | Ice Cubes |
|---|---|---|
| Melting Rate | Slower, lasts longer | Faster, melts quickly |
| Cooling Capacity | High, great for large ice chest cooler | Lower, best for quick cooling |
| Availability | Harder to find, needs planning | Easy to buy or make |
| Convenience | Bulky, needs space | Simple, fits anywhere |
For the best pack an ice chest cooler, use both. Put ice blocks at the bottom and ice cubes on top. This way, you get long-lasting cold and quick cooling.
Organize Contents
Smart cooler packing saves time and keeps things cold. Group similar foods together. Use plastic tubs or bags to separate items. Put dinner foods in one container, lunch in another. Keep fruit and veggies in tubs so they don’t get crushed. Place frozen water jugs and loose ice around containers to keep everything cold.
Here are some organizing tips:
- Pack perishable foods straight from the fridge or freezer.
- Fill empty spaces with ice or frozen items.
- Use separate coolers for drinks if you open them often.
- Open and close the cooler lid quickly.
- Shade your cooler or bury it halfway in sand or dirt if you’re outside.
Tip: Organize your cooler before you leave. You’ll spend less time searching and keep the cold air inside.
When you pack layers and add layers of ice, you get the most out of your large ice chest cooler. With these cooler packing tips, you’ll keep your food fresh, your drinks cold, and your ice lasting longer.
Use Large Ice Chest Cooler
Keep Cooler Closed
You want your large ice chest cooler to keep things cool as long as possible. Every time you open the lid, warm air rushes in and the temperature inside rises. This makes the ice melt faster and can put your food at risk. Try to plan ahead. Grab everything you need in one go. If you have a lot of food and drinks, use two coolers—one for items you need often and one for things you want to keep cold for longer. Here’s what happens when you open your cooler too much:
- Ice melts faster.
- Food warms up and may spoil.
- Warm air creates large air pockets, which also speed up melting.
Tip: Fill empty spaces with extra ice or towels to keep things cool and reduce air pockets.
Shade and Insulation
Where you place your cooler matters. Direct sunlight heats up the outside and melts the ice inside. Always put your cooler in the shade or inside your car’s cabin. You can also cover it with a wet, light-colored towel for extra cooling. Want to boost performance? Try these ideas:
- Wrap your cooler in a blanket or sleeping bag.
- Use reflective insulation like bubble wrap to block sunlight.
- Place a wet towel over the lid for evaporative cooling.
- Add foam or a jacket on top of the ice to keep things cool.
If you’re near a stream or lake, set your cooler in the water (make sure it’s stable). Avoid opening the cooler during the hottest part of the day.
Meltwater Management
You might think you should drain the meltwater, but keeping it inside actually helps keep things cool. Cold water surrounds your food and drinks, keeping the temperature low. Use baskets or containers to keep sandwiches and snacks above the water so they don’t get soggy. Only drain the water if you need to add more ice or if it gets too full.
Dry Ice Safety
Dry ice is super cold and can keep your cooler cold for days. Always handle dry ice with gloves to avoid frostbite. Never seal your cooler airtight when using dry ice—leave the drain plug open or crack the lid so gas can escape. Keep dry ice away from kids and pets. Use dry ice on the bottom, separated by cardboard or newspaper, and pack frozen items below it. Make sure you use your cooler in a well-ventilated area. Here are some dry ice tips:
- Wear gloves when handling dry ice.
- Never let dry ice touch your skin.
- Keep the cooler vented to avoid gas buildup.
- Wrap dry ice in paper to slow melting.
- Store dry ice away from children and pets.
With these steps, you’ll get the best performance from your cooler and keep things cool for your whole trip.
Ice Retention Tips
Keeping your cooler cold for days is all about smart ice retention and ice preservation. Here’s how you can get the most out of every trip.
Add Extra Insulation
You can boost ice retention by adding extra insulation around your cooler. Many premium coolers use thick polyurethane foam inside their walls. This material traps air and slows down heat transfer, which helps with ice preservation. Rotomolded coolers, like those from KUER, have thick, seamless walls that keep the cold in and the heat out. You can also wrap your cooler with a towel, foam pad, or reflective cover. These simple steps help block sunlight and keep your cooler colder for longer. Lighter-colored coolers reflect sunlight, which also helps with ice preservation.
Tip: Always keep your cooler in the shade. Less sun means better ice retention and longer ice preservation.
Top Off Ice Regularly
Don’t let your ice run low. Check your cooler often and add more ice when you see it melting. There’s no set schedule for topping off ice—just keep an eye on it. If you notice the ice getting low, toss in fresh ice packs or cubes. This keeps the cold air inside and helps with ice retention. Try not to open the cooler too much. Every time you open the lid, warm air gets in and speeds up melting. Keeping the cooler full of ice helps with both ice retention and ice preservation.
Fill Empty Spaces
Empty spaces inside your cooler can hurt ice retention. Air pockets let warm air move around, which melts ice faster. You want to pack your cooler as full as possible without overfilling it. Use extra ice, frozen water bottles, or even crumpled newspaper to fill gaps. This trick keeps the cold air in and helps with ice preservation. When you fill empty spaces, you slow down the melting and get better ice retention.
| Ice Retention Strategy | How It Helps with Ice Preservation |
|---|---|
| Extra insulation | Slows heat transfer, keeps cold in |
| Topping off ice | Maintains cold air, prevents quick melting |
| Filling empty spaces | Reduces air pockets, slows ice melt |
With these tips, you can master ice retention and ice preservation. Your cooler will stay cold, your food will stay fresh, and your adventures will last longer.
Store & Care
Dry Thoroughly
After every adventure, you want your cooler to stay fresh and ready for next time. Start by wiping down the inside with a soft towel to remove any leftover moisture. Leave the lid open in a well-ventilated spot. Letting your cooler air dry for several hours or overnight is the best way to prevent mold and mildew. If you need to speed things up, use a dry microfiber cloth to soak up extra water. Always make sure the lid and drain plug stay off during drying. This helps air flow through and keeps moisture from building up.
Tip: Complete drying is the secret to stopping mold before it starts.
Store Open
When your cooler is dry, store it with the lid slightly open. You can place a small towel or a spoon under the lid to keep it from closing all the way. This simple trick lets air move inside and stops any musty smells from forming. Keep your cooler in a cool, dry place, away from direct sunlight and extreme temperatures. Good airflow keeps your cooler fresh and ready for your next outing.
Check for Mold and Odors
Before you pack up for your next trip, give your cooler a quick check. Look for fuzzy spots or discoloration, especially in corners or around the gasket. If you notice any strange smells or see signs of mold, put on gloves and clean the area with diluted white vinegar. Use a soft brush or cloth to scrub gently, then rinse with clean water. Dry the cooler completely before storing it again. Regular deep cleaning every few months helps keep mold and odors away.
Inspect Before Use
A quick inspection before each use keeps your cooler working its best. Check the gasket and lid for a tight seal. Make sure there are no cracks or damage. Pre-chill your cooler with ice packs if you have time. Pack heavier items at the bottom and layer ice around your food. Keep the cooler closed as much as possible during your trip. These habits help your cooler maintain low temperatures and keep your food safe.
KUER coolers stand out for their rugged, rotomolded construction and airtight seals. Product tests show that KUER coolers handle drops, water sloshes, and heavy use just as well as other top brands. With regular care, your cooler can last for many years—some even go strong for over a decade. Taking a few minutes to dry, store, and inspect your cooler pays off with long-lasting performance and peace of mind.
You can keep your adventures stress-free by following a few simple steps. Clean and dry your cooler after each use, organize your items, and check seals before every trip. Here’s a quick checklist to help you stay on track:
- Clean and dry after every outing
- Pre-chill and pack smart
- Inspect seals and latches
- Store with the lid open
- Check for mold and odors
Regular care means longer-lasting freshness, safer food, and more fun with KUER on every outing!
| Maintenance Task | Benefit |
|---|---|
| Clean and organize | Prevents spoilage and odors |
| Inspect regularly | Catches issues early |
| Store properly | Extends lifespan |
FAQ
How often should you clean your large ice chest cooler?
You should clean your cooler after every trip. Wipe it down with mild soap and water. Dry it with the lid open. This keeps mold and odors away. Regular cleaning helps your cooler last longer.
What is the best way to pack a cooler for maximum ice retention?
Pack your cooler with a 2:1 ice-to-content ratio. Use block ice at the bottom and cubes on top. Fill empty spaces with frozen water bottles. Pre-chill everything before packing. This method keeps your food and drinks cold for days.
Can you use dry ice in a KUER rotomolded cooler?
Yes, you can use dry ice in KUER rotomolded coolers. Always wear gloves when handling dry ice. Leave the drain plug open for ventilation. Keep dry ice away from children and pets. Dry ice keeps your cooler colder for longer trips.
How do you prevent mold and odors in your cooler?
Dry your cooler completely after each use. Store it with the lid slightly open. Check for mold or strange smells before packing. Clean with diluted vinegar if needed. Good airflow and regular cleaning stop mold and odors from forming.
What makes KUER coolers different from other brands?
KUER coolers use thick rotomolded walls and airtight seals. The design keeps ice longer and protects your food. KUER’s R&D team has over 50 patents. Their coolers handle tough outdoor conditions and last for years.


 Request a quote