

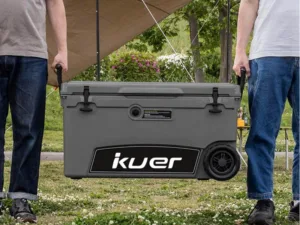
Restoring a metal cooler is a fun project. It helps you save money. You can make old gear useful again. You clean the cooler first. Then you remove rust. Next, you fix dents. After that, you repaint it. You only need simple tools. Many people like the KUER Cooler Box. It is a modern and reliable choice. Look at this comparison:
| Cooler Type | Lifespan |
|---|---|
| Restored Metal Cooler | 3-5 years |
| New KUER Cooler Box | Over 10 years |
Safety is important. Always wear gloves. Work in a place with fresh air.
Key Takeaways
- Begin fixing your cooler by getting all the tools and materials you need. This step helps make the work easier and keeps you safe.
- Take off rust and dents slowly to make the cooler look better. Use rust removers and gentle ways so you do not hurt the cooler more.
- Think about getting a KUER Cooler Box if fixing your old cooler does not work well. This new cooler is strong and keeps things cold for a long time.
Metal cooler restoration steps
Tools and materials
Before you begin, prepare all your tools and materials. This will make the work easier and safer. Most items can be purchased at hardware stores or local suppliers. Some manufacturers also allow you to order custom parts as needed.
Essential tools and materials:
- Screwdrivers (flathead and Phillips)
- Adjustable wrench
- Rubber gloves and dust mask
- Soft cloths and sponges
- Bucket with mild detergent
- Rust remover or converter
- Sandpaper (various grits)
- Hammer and dolly set
- Slapping spoon
- Suction cup or hot glue kit
- Primer and spray paint for metal
- Painter’s tape and drop cloth
- Replacement seal ring (if needed)
- Optional: Spray foam insulation, Reflectix, thermal liner panels
Tip: If your metal cooler is missing parts or is badly damaged, you can use parts from a modern cooler like the KUER Cooler Box. Some suppliers have seals and handles that fit just right.
Recommended rust removers and primers:
| Brand/Product | Type | Features |
|---|---|---|
| XionLab 2-in-1 Rust Converter and Metal Primer | Rust Converter & Primer | Tannic-acid blend, water-based, low-VOC, paintable in under 24 hours |
| Corroseal | Rust Converter | Works well for lighter surface rust |
| Ospho | Rust Converter | Strong phosphoric-acid converter |
| Evapo-Rust | Rust Remover | Chelation-based, non-acid, biodegradable |
| CLR Pro Rust Remover | Rust Remover | Oxalic-acid based, quick on hardware |
| Iron Out Spray Gel | Rust Remover | Sodium-hydrosulfite gel, sticks to vertical surfaces |
| Naval Jelly | Rust Remover | Phosphoric-acid gel, brush on and scrub off |
Cleaning and disassembly
First, thoroughly clean the metal cooler box. Wipe away dust, stickers, and debris using a soft cloth, sponge, and mild soap. Rinse thoroughly with water and then let it air dry.
Next, disassemble the cooler box. Remove the lid, handles, hinges, and other parts. Place all screws and small parts in a safe place. Take photos during disassembly to remember how to reassemble it.
Safety Note: Wear gloves and a dust mask when cleaning. Test cleaners on a hidden spot first to make sure they do not harm the cooler.
Rust removal and sanding
Inspect the metal cooler for rust. Treat these areas with a rust remover or rust converter. Follow the product instructions. For stubborn rust, use a wire brush or steel wool.
After removing the rust, polish the cooler. First, use coarse sandpaper (60-80 grit) to remove rough areas. Then, use fine sandpaper (220-400 grit or higher) to polish until smooth.
Wipe off dust with a clean cloth. Make sure the surface feels smooth and clean.
Dent repair
Fixing dents makes your metal cooler look better. Try these ways to remove dents without making new ones:
- Suction cups work for small dents.
- Hot glue can help pull out soft dents.
- Heat guns might help, but be careful not to hurt the paint.
You can also use these tools for better results:
- Hammers and dollies help shape the metal.
- A slapping spoon smooths out small bumps.
- Neodymium magnets and steel balls can fix tough dents gently.
Tip: Go slow and check your work often. If you need a new lid or handle, try getting one from a wholesale supplier or use parts from a KUER Cooler Box.
Priming and painting
Now your metal cooler can look brand new. Choose a primer and topcoat suitable for the metal surface of your cooler.
| Type of Metal | Primer Recommendations | Paint Recommendations |
|---|---|---|
| Non-Ferrous Metal | HP1100 (High Performance Acrylic Metal Primer) | HP3410 (High Performance Universal Metal Primer), HP3420 (High Performance Pre-Catalyzed Waterborne Epoxy Eggshell) |
| Ferrous Metal | HP1320, HP1420, HP1750 (Various High Performance Primers) | HP2200, HP2400, HP3310, HP3320 (Various High Performance Enamels) |
| Rusting Steel | HP1550 (High Performance Concrete and Metal Epoxy Primer) | HP3000, HP3300 (Various High Performance Acrylic Enamels) |
| White Rusted Galvanized Steel | HP1550 (High Performance Concrete and Metal Epoxy Primer) | HP3000, HP3300 (Various High Performance Acrylic Enamels) |
Steps for priming and painting:
- Clean the cooler again to get rid of dust.
- Check for any rust or old paint you missed.
- Put on a good primer made for metal.
- Pick oil-based or acrylic-latex paint for outside use.
- Paint the cooler with a spray or roller for even color.
- Let the paint dry, then add a sealant to protect it.
Note: Use three light coats of paint for a smooth look. Cover any labels with laminate to keep out water. If you want a vintage style, use steel wool on the corners for a weathered look.
Reassembly and finishing
When the paint is dry, put your metal cooler back together. Do these steps:
- Put all the parts back in the opposite order you took them off.
- Change the seal ring if you need a tighter fit.
- Close the lid and check for leaks to make sure it is airtight.
Add some finishing touches to make your cooler special:
- Put a clear coat over glued labels to protect them.
- Add more insulation with spray foam, Reflectix, or thermal liner panels for better cooling.
- Use velcro tabs to keep insulation in place.
Tip: If your old cooler cannot be fixed, the KUER Cooler Box is a strong, modern choice. You can also use its parts for custom repairs.
Expert Tips for Restoring Your Metal Cooler and Modern Alternatives
Success tips for beginners
Repairing a metal cooler should feel great if you follow expert advice. These tips can help you avoid mistakes and get better results:
- Keep your workspace dry. Humidity under 60% stops mold from growing inside your cooler.
- Use plastic bins or stainless steel racks instead of cardboard. This change gives mold fewer places to grow.
- Clean door gaskets often. A clean gasket keeps the seal tight and stops mold from building up.
- Install UV lighting inside the cooler. UV light controls germs without chemicals.
- If you want to store your metal cooler for a long time, clean it well, dry it fully, and leave the lid a little open. This step keeps the inside fresh and mold-free.
Tip: Go slow with each step. If you rush, you might miss spots or make mistakes.
KUER Cooler Box overview
If you find metal coolers impractical, consider a more modern option. KUER coolers are a reliable choice for outdoor cooling. Many suppliers and manufacturers choose this product because of its durability and superior performance.
| Feature | KUER Cooler Box | Traditional Metal Coolers |
|---|---|---|
| Insulation | Thick foam layer, keeps cold air in | Varies, often less effective |
| Exterior | Waterproof, handles damp conditions | Usually not waterproof |
| Accessories | Cutting board, cup holder, ice packs | Rarely includes accessories |
| Construction | One-piece roto-molded, very durable | Varies, often less durable |
| Ice Keeping Time | Over 5 days | Often less than 5 days |
KUER insulated boxes range in capacity from 20 to 75 quarts. Made using a rotational molding process, they are robust and durable. A PU foam insulation layer keeps ice frozen for up to a week. A sealing ring effectively prevents air from entering, keeping your food and drinks chilled for extended periods. This insulated box is perfect for camping, fishing, and outdoor activities.
You can upgrade your cooler with accessories:
- Chopping board helps you organize better
- Cup holder makes drinks easy to reach
- Basket keeps dry items safe
- Gel pack helps ice last longer
- Cooler lid pocket holds small things
- Cushion adds comfort
- Fishing tube stores gear
- Padlock plate gives extra security
Many wholesale and custom suppliers have these accessories to fit what you need.
Restoring a metal cooler lets you try new things and have fun.
- Being patient and careful helps you do a great job and makes your work last longer.
- Go slow with every step so your cooler looks its best.
If you want something new and strong, think about the KUER Cooler Box:
| Feature | Description |
|---|---|
| Durability | Handles being used every day |
| Easy Cleaning | Easy to wipe clean |
| Insulation | Keeps food cold for many hours |
Tell others your tips and stories about fixing coolers!
FAQ
How long does it take to restore a metal cooler?
Most small garage repairs can be completed within 1-2 days. The drying time for paint or sealant may add a little extra. For best results, plan ahead.
Can you use replacement parts from a modern cooler?
Yes. Many suppliers offer seals, handles, or hinges for older refrigerators. You can also use parts from KUER refrigerators for custom repairs.
What is the best way to improve insulation in a restored cooler?
Spraying foam or installing insulating linings inside the refrigerator can help keep ice from melting for up to 5 days, achieving results comparable to modern refrigerators.


 Request a quote
