Keeping your hard shell lunch box cooler fresh and clean protects your meals from bacteria and keeps odors away. You want your food to taste great and stay safe every day. Regular cleaning also helps your hard shell lunch box cooler last longer. KUER’s coolers use sturdy materials that make cleaning easy for you. You can trust their design because their team has years of experience in outdoor product manufacturing.
Daily Cleaning
Quick Wipe Down
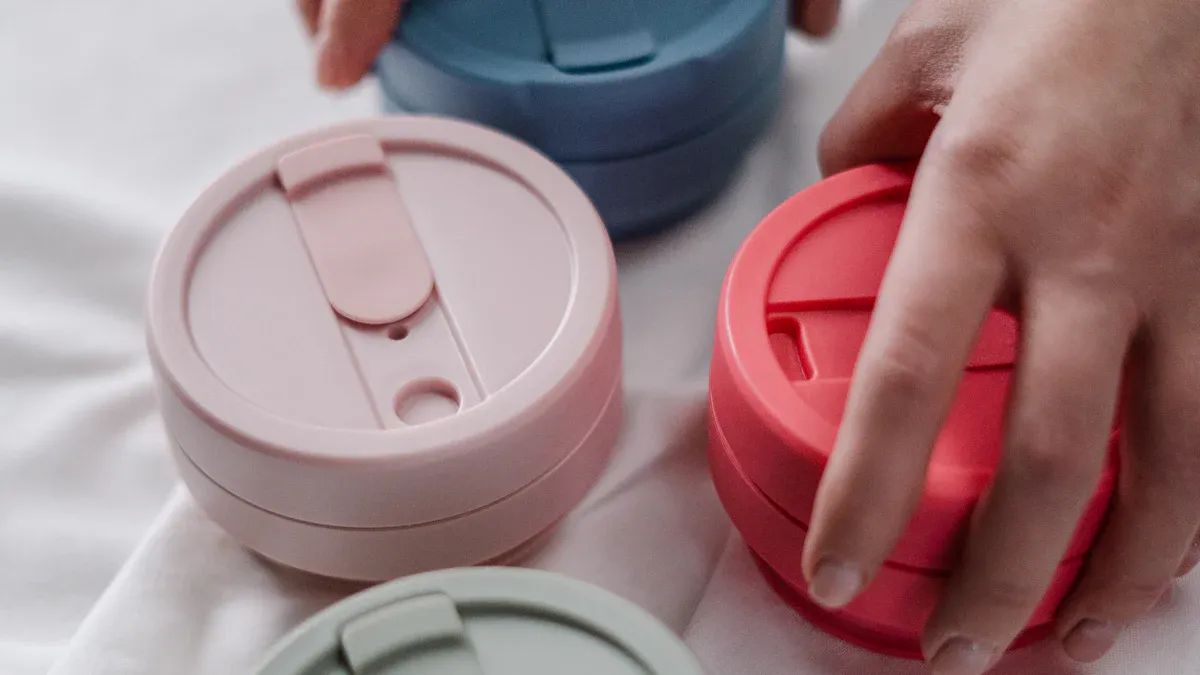
You want your hard sided lunch cooler to stay fresh every day. Start with a quick wipe down after each use. Grab a damp cloth and gently wipe the inside and outside surfaces. This step removes crumbs, spills, and moisture that can cause stains or odors. You slow down bacteria growth and keep your cooler looking new.
- Wipe handles and corners where germs hide.
- Spot clean any sticky spots right away.
- Use a food-safe ice pack to keep food cold and reduce bacteria.
Tip: Always wash your hands before packing or handling your hard sided lunch cooler. This simple habit helps prevent bacteria from getting inside.
A quick wipe down is great for daily maintenance, but it does not replace deeper cleaning. You need to clean your cooler more thoroughly to remove hidden grime and bacteria.
Mild Soap and Water
When you clean your cooler, choose a mild soap that is safe for food storage. Plant-based dish soaps without synthetic fragrances or antibacterial agents work best. Pure castile soap is another good choice because it cuts grease and leaves no harmful residue.
Here’s how you can use mild soap and water for cleaning:
- Fill a bowl with warm water and add a small amount of mild soap.
- Dip a soft cloth or sponge into the soapy water.
- Wipe all surfaces of your hard sided lunch cooler, including rubber gaskets and seals.
- Rinse with clean water to remove soap residue.
- Dry with a clean towel or let the cooler air dry.
Avoid harsh chemicals, bleach, or synthetic dyes. These can damage the insulation and surface of your cooler. Natural cleaning agents like vinegar and baking soda help remove odors and sticky residues.
Note: Never use a dryer to dry your hard sided lunch cooler. Air drying prevents mildew and keeps your cooler in top shape.
Inside and Outside Care
You need to pay attention to both the inside and outside of your hard sided lunch cooler. Daily cleaning keeps your cooler safe for food storage and helps it last longer.
| Area | What to Clean | How Often |
|---|---|---|
| Inside | Crumbs, spills, stains | Every day |
| Outside | Handles, corners | Every day |
| Seals/Gaskets | Rubber parts | Weekly |
- Rinse the inside with warm water to remove food residue.
- Wipe the outside, especially handles and corners, where germs collect.
- Use a food-safe sanitizer if you store raw foods like meat or seafood.
- Let your cooler air dry completely before storing.
If you use your hard sided lunch cooler every day, you should clean your cooler daily. For deep cleaning, aim for once a month or more often if you store raw foods. Regular cleaning keeps your cooler hygienic and ready for your next meal.
Reminder: Don’t overload your hard sided lunch cooler. Too much weight can stress the seams and insulation.
You make your cooler last longer and keep your food safe by following these daily cleaning steps. Your hard sided lunch cooler will always be fresh, clean, and ready for adventure.
Deep Cleaning
Weekly or Monthly Routine
You want your cooler to stay fresh and safe for every meal. Daily cleaning helps, but sometimes you need a deeper clean. Set a schedule to clean your cooler every week or at least once a month. This routine keeps stains, odors, and bacteria away.
Here’s a simple step-by-step guide to deep cleaning:
- Empty your cooler completely. Take out baskets, dividers, and any leftover food.
- Rinse the inside and outside with warm water. This removes crumbs and loose dirt.
- Wash all surfaces using mild soap and a soft sponge. Scrub gently so you don’t scratch the hard shell.
- For tough stains, make a paste with baking soda and water. Spread it on the stain and let it sit for 10 minutes. Wipe away with a damp cloth.
- Rinse your cooler again to remove all soap and baking soda.
- Air dry your cooler with the lid open. Sunlight helps kill germs and keeps mold away.
Tip: Never put your cooler in the dishwasher or use boiling water. High heat can damage the insulation and seals.
A regular deep cleaning routine helps your cooler last longer and keeps your food safe. You’ll notice fewer odors and stains when you stick to this schedule.
Safe Disinfectants
Sometimes you need to disinfect your cooler, especially if you’ve stored raw meat or seafood. You want to use products that are safe for food-contact surfaces. Purell Foodservice Surface Sanitizer works well. It’s certified by the U.S. EPA Design for the Environment, so it’s safe and eco-friendly. You don’t need to rinse after using it, and it doesn’t leave harsh fumes.
You can also use no-rinse sanitizing wipes for quick disinfecting. These wipes are gentle and don’t require gloves. If you prefer homemade solutions, mix a small amount of bleach (1/3 cup per gallon of water) for hard-sided coolers. Scrub, then rinse well with clean water.
Note: Always check the label before using any disinfectant. Make sure it’s safe for food-contact surfaces and won’t harm your cooler.
Disinfecting keeps your cooler free from bacteria and helps prevent foodborne illness. You can use these products as part of your deep cleaning routine or whenever you need extra protection.
KUER Cleaning Tips
KUER designs coolers for easy cleaning and long-lasting durability. Their manufacturing team recommends these best practices:
- Clean your cooler after every use. This stops odors and mold before they start.
- Remove all contents and take out baskets or dividers. Wash these separately.
- Use mild dish soap and warm water with a soft cloth or sponge. Avoid rough scrubbers that can scratch the surface.
- For stubborn stains, apply a baking soda paste and wipe gently.
- Rinse thoroughly to remove all soap and residue.
- Soak your cooler in warm water with white vinegar for 10–20 minutes if you notice strong odors or sticky messes.
- Try enzyme cleaners for greasy or sticky spills.
- Sanitize with disinfectant wipes or a diluted bleach solution, but only on hard-sided coolers. Rinse well after sanitizing.
- Remove and clean rubber gaskets if they smell. These parts can trap moisture and bacteria.
- Deodorize by sprinkling baking soda inside and letting it sit overnight. You can also wipe with a vinegar-water solution.
- Always air dry your cooler with the lid open. Sunlight and fresh air help prevent mold and mildew.
| KUER Deep Cleaning Steps | Why It Matters |
|---|---|
| Hand wash only | Protects insulation |
| Use soft scrubbers | Prevents scratches |
| Avoid harsh chemicals | Maintains durability |
| Air dry completely | Stops mold and odors |
Reminder: Never microwave your cooler or expose it to boiling water. Keep it away from hot surfaces and open flames.
KUER’s cleaning tips help you keep your cooler in top shape. You get the best performance and freshness every time you pack a meal.
Stain and Odor Removal
Tough Stains
You might notice stains inside your cooler after packing lunches with sauces or fruit. These stains can look stubborn, but you can tackle them with simple steps. Start by making a paste with baking soda and water. Spread the paste over the stained area and let it sit for about ten minutes. Use a soft sponge to scrub gently. Rinse the cooler with warm water and dish soap. Dish soap helps break down food residue and lifts stains. If the stain sticks around, repeat the process or let the baking soda sit longer. Avoid using acidic cleaners like vinegar or lemon juice, since they can damage the plastic over time.
Odor Solutions for Cooler
Sometimes your cooler holds onto smells from past lunches. You can get rid of these odors using household items. Try these steps:
- Sprinkle baking soda inside the cooler and let it sit for a few hours.
- Wash away the baking soda with dish soap and water.
- If the smell remains, place odor-absorbing materials like activated charcoal, coffee grounds, or crumpled newspaper inside the cooler for up to three days.
- Set your cooler in direct sunlight. Sunlight and fresh air help neutralize odors.
- For silicone parts, bake them in the oven at 250°F for one hour to remove smells.
- Soak the cooler in a diluted bleach solution (one part bleach to five parts water) for an hour, then wash thoroughly.
Tip: Never use vinegar or tomato juice to clean your cooler. These products can harm the plastic and do not remove odors well.
Preventing Smells
You want your cooler to stay fresh every day. Clean your cooler after each use to stop odors before they start. Always let your cooler dry completely before storing it. Store the cooler with the lid slightly open or the latches flipped back. This allows air to circulate and prevents mildew. Clean the gasket regularly, since it can trap smells. If odors persist, replace the gasket. Use mild soap and water for routine cleaning. For tough odors, scrub with a diluted bleach solution. Never seal your cooler tightly when storing. Airflow keeps your cooler smelling clean and ready for your next meal.
| Preventative Step | Why It Works |
|---|---|
| Clean after every use | Stops odor buildup |
| Dry before storing | Prevents mildew and smells |
| Store with lid cracked | Allows air circulation |
| Clean or replace gasket | Removes trapped odors |
Drying the Cooler
Air Drying
You want your cooler to stay fresh and safe for every meal. After cleaning, always let your cooler air dry with the lid open. This step is simple but very important. Air drying helps remove all the moisture inside and outside your cooler. When you leave the lid open, air can move freely and dry every corner. You do not need to set a timer, but make sure the cooler feels dry before you put it away. If you rush and close the lid too soon, you trap moisture inside. That can lead to bad smells and even mold. So, give your cooler plenty of time to air out. Sunlight can help speed up the drying process, but you should never leave your cooler in direct sun for too long.
Tip: Place your cooler upside down on a clean towel to help water drain out faster.
Avoiding Moisture
Moisture is the enemy of a clean cooler. If you store your cooler while it is still damp, you risk many problems:
- Mold can grow inside your cooler because it loves damp, dark, and closed spaces.
- Bad odors start to build up and make your cooler unpleasant to use.
- Wet insulation can trap bacteria and smells, making your cooler less effective at keeping food cold.
- Storing a damp cooler in a humid place makes mold and mildew grow even faster.
- Moisture can damage the lining and insulation, which shortens the life of your cooler.
You can avoid these problems by always drying your cooler completely before storage. Store your cooler in a cool, dry, and well-ventilated spot. If you want extra protection, leave the lid slightly open or place a small packet of desiccant inside.
Mold Prevention
Mold is a common problem if you do not dry your cooler well. Mold likes warm, humid places and can grow quickly on leftover food or wet surfaces. Mold spores float in the air and settle on anything damp. If you forget to clean or dry your cooler, mold can appear in just a few days.
Here are some easy ways to prevent mold in your cooler:
- Clean your cooler after every use to remove food and moisture.
- Dry your cooler with the lid open before storing.
- Keep your cooler in a dry place and avoid leaving it in hot, humid rooms.
- Do not leave perishable food in your cooler for a long time.
- Check your cooler often for any signs of mold or musty smells.
Remember: A clean, dry cooler keeps your food safe and your cooler ready for your next adventure!
Storing Your Hard Sided Lunch Cooler
Storage Tips
You want your hard sided lunch cooler to stay fresh and last a long time. The way you store your cooler matters. Always clean your hard sided lunch cooler with warm, soapy water and a soft sponge. Dry your cooler completely before you put it away. Moisture can cause mold and bad smells. Store your hard shell lunch box cooler in a cool, dry place. If you have a fabric bag, use it to cover your cooler. This lets air move around and keeps dust away.
Here’s a simple checklist for storing your hard sided lunch cooler:
- Remove all food and trash after each use.
- Wash the inside and outside with mild soap.
- Rinse well and air dry upside down.
- Keep your cooler out of direct sunlight.
- Store in a spot with good airflow.
Tip: Never put your hard sided lunch cooler in the dishwasher or microwave unless the label says it’s safe. High heat can damage the insulation.
Preventing Damage
You want your hard sided lunch cooler to stay strong. Don’t stack heavy items on top of your cooler. This can bend the lid or crack the shell. Avoid overpacking your hard shell lunch box cooler. Too much weight can hurt the seals and insulation. Cut food before packing so you don’t scratch the inside. Keep your cooler away from sharp objects and rough surfaces.
| What to Avoid | Why It Matters |
|---|---|
| Heavy stacking | Prevents cracks and warping |
| Overpacking | Protects seals and insulation |
| Sharp objects inside | Stops scratches and leaks |
| Sunlight exposure | Keeps insulation strong |
KUER Storage Advice
KUER designs hard sided lunch coolers with tough BPA-free plastic and nylon. These materials make cleaning easy and help prevent stains. KUER recommends you always remove all food and trash after use. Clean your cooler inside and out with warm, soapy water. Rinse and air dry your cooler upside down. For quick cleaning, use antibacterial wipes. Store your hard shell lunch box cooler only when it’s completely dry. Never stack heavy items on top. KUER’s advice helps you keep your hard sided lunch cooler fresh and ready for your next adventure.
Note: Following these steps keeps your hard sided lunch cooler in top shape. You get the best performance every time you pack a meal.
Care and Maintenance
Seals and Hinges
You want your cooler to work smoothly every time you open it. Seals and hinges play a big role in keeping your food fresh and safe. After each use, wipe the seals with a damp cloth to remove crumbs and sticky spots. Check for dirt or debris that might get stuck in the gasket. If you spot anything, clean it right away. Never use sharp tools near the seals. You could damage the gasket and cause leaks. Hinges need gentle care too. Open and close the lid slowly. If you hear squeaks, add a drop of food-safe lubricant. This keeps the hinges moving easily and helps your cooler last longer.
Tip: Inspect the seals and hinges once a month. Look for cracks or wear. Replace any damaged parts to keep your cooler airtight.
Hard Shell Maintenance
Your cooler’s hard shell protects your food from bumps and drops. You want to keep it strong and clean. Always wash the cooler after every use with mild soap and warm water. Dry the cooler completely before you put it away. Moisture can cause mold and bad smells. Store the cooler in a dry, well-ventilated spot. Avoid direct sunlight. Sunlight can weaken the plastic over time. Handle your cooler gently. Lift it with both hands and never drop it. Don’t sit on the lid or overload the cooler. These habits prevent cracks and keep the shell in good shape.
Here’s a quick checklist for cooler maintenance:
- Clean after every use.
- Dry thoroughly before storage.
- Store in a cool, dry place.
- Leave the lid slightly open for airflow.
- Handle with care.
If you notice stains, spot clean with a mild detergent mixed with oxyclean. For odors, place baking soda or charcoal packs inside overnight. These steps help your cooler stay fresh and ready for your next adventure.
When to Replace
Sometimes, even with good care, your cooler shows signs of wear. You should check for cracks in the shell, broken hinges, or damaged seals. If the cooler no longer keeps food cold or you see mold that won’t go away, it’s time for a new one. A cooler with a warped lid or loose gasket can’t protect your food. Replace your cooler if you notice these problems. Regular cooler maintenance helps you spot issues early. You get the best performance and keep your food safe by knowing when to upgrade.
| Sign to Replace Cooler | What It Means |
|---|---|
| Cracked shell | Loss of insulation |
| Broken hinges | Lid won’t close tightly |
| Damaged seals | Air leaks, less cooling |
| Persistent mold | Health risk |
| Warped lid | Poor fit, less fresh |
Remember: A well-maintained cooler lasts longer. When you care for your cooler, you enjoy fresh meals and safe storage every day.
You can keep your hard shell lunch box cooler fresh and ready by following a few simple steps:
- Clean with mild soap after every use to stop stains and odors.
- Dry your cooler fully to prevent mold.
- Store it in a cool, dry place with the lid slightly open.
- Check seals and handles often for damage.
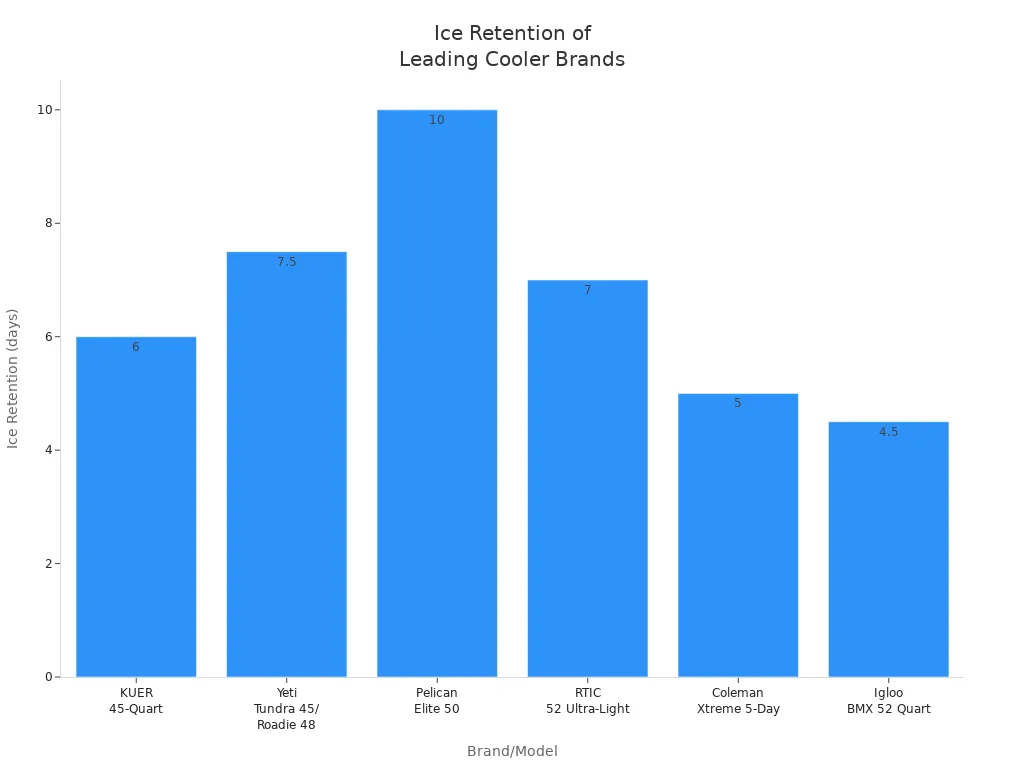
KUER coolers use tough, food-safe materials and smart designs, making cleaning and care easy. Stick with these habits and your cooler will stay fresh, strong, and reliable for every adventure!
FAQ
How often should you deep clean your hard shell lunch box cooler?
You should deep clean your cooler at least once a month. If you use it for raw foods or notice strong odors, clean it more often. Regular deep cleaning keeps your cooler safe, fresh, and ready for every meal.
What is the best way to remove strong odors from your cooler?
Try sprinkling baking soda inside and let it sit overnight. You can also use activated charcoal or coffee grounds to absorb smells. For tough odors, soak your cooler in a vinegar-water mix for 20 minutes, then rinse and air dry.
Can you put your hard shell lunch box cooler in the dishwasher?
No, you should not put your cooler in the dishwasher. High heat and strong detergents can damage the insulation and seals. Always wash your cooler by hand with mild soap and warm water for the best results.
How do you keep the seals and hinges working well?
Wipe the seals and hinges after each use. Check for crumbs or dirt and clean them right away. If the hinges squeak, add a drop of food-safe oil. Inspect these parts monthly to make sure your cooler stays airtight and easy to open.

