
You want your food and drinks to stay cold, fresh, and safe every time you pack a hard lined cooler bag. That’s why using the right tips makes a big difference. When you choose a cooler made with KUER’s expert design and manufacturing, you get strong performance for any outdoor adventure. Look for simple advice that works every time you head outside.
Choosing a Hard Lined Cooler Bag
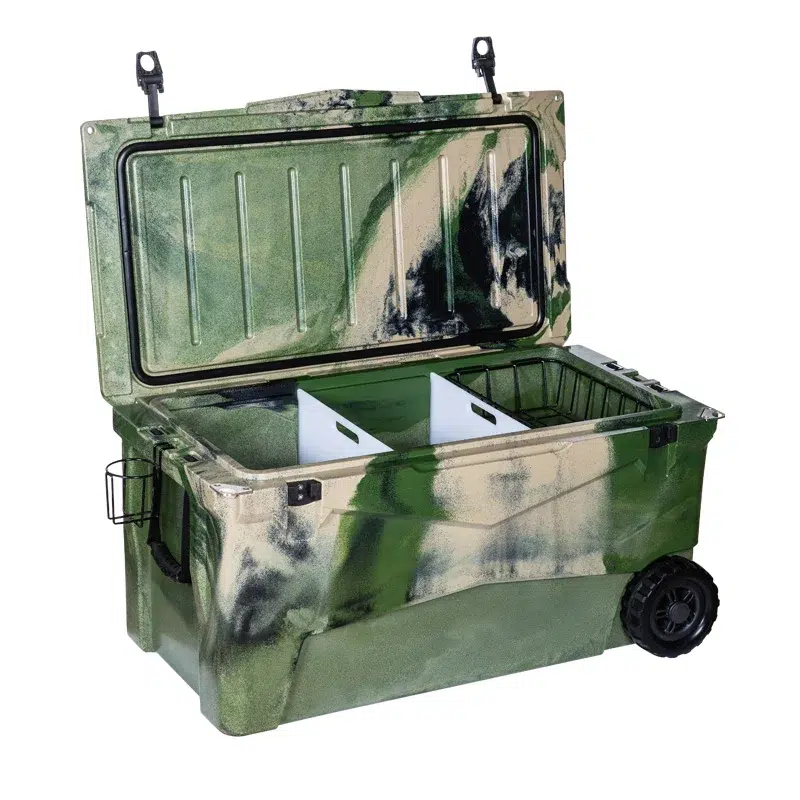
When you pick a hard lined cooler bag, you want something that is easy to use, keeps your food cold, and lasts for many trips. KUER’s cooler bags stand out because of their strong manufacturing standards and attention to detail. Their team uses advanced technology and holds over 70 patents, so you know you’re getting a product that meets high expectations.
Size and Capacity
You need to think about how much space you need before you buy. Here are some things to keep in mind:
- Cooler capacities are measured in quarts. Think about how many people you’re packing for and how long your trip will last.
- Larger coolers usually have better insulated walls, so they keep things cold longer. This is great for longer travel or group outings.
- If you want something easy to use, balance size with how heavy the cooler will be when full.
- Some travel cooler bags come with handy extras like dividers or built-in bottle openers, making them even more easy to use.
Durability and Materials
The right materials make your cooler bag last longer and keep your food safe. Check out this table to see what goes into a high-quality insulated cooler:
| Material Type | Description | Durability | Insulation |
|---|---|---|---|
| Insulation Foams (PE, XPE, PU) | Thick foams for thermal retention | Strong and wear-resistant | Keeps items cold for hours |
| Radiant Barriers (Aluminum Foil, PEVA) | Reflects heat away | Protects against outside heat | Boosts insulation |
| Outer Fabrics (Polyester, Nylon) | Tough shell | Resists tearing and abrasion | Guards inner layers |
| Inner Linings (PEVA, PVC, TPU) | Food-safe, leak-proof | Handles spills and leaks | Helps maintain cold |
Many insulated cooler bags use 600D or 900D Oxford fabric for the outside. These fabrics are tough, resist damage, and help your bag keep its shape. That means you get a cooler that is easy to use and ready for any travel adventure.
Portability Features
You want your cooler to be easy to use and carry, especially when you’re on the move. Look for these features:
- Handles and straps make travel cooler bags simple to carry. Padded or adjustable straps add comfort.
- Backpack-style insulated coolers are perfect for longer walks or hikes.
- Wheels can help if you have a bigger cooler or lots of items to bring.
KUER’s cooler bags are designed with these easy to use features in mind, so you can focus on enjoying your trip instead of struggling with your gear.
Pre-Chilling Tips
Getting your cooler bag ready before you pack it can make a huge difference. If you want your food and drinks to stay cold for hours, you need to start with a cold cooler and cold items. Here’s how you can do it:
Pre-Chill the Cooler Bag
You don’t want to put cold drinks into a warm cooler. That’s like pouring ice water into a hot mug—it just doesn’t work as well. You can pre-chill your hard lined cooler bag with these easy steps:
- Place a bag of ice inside your cooler a few hours before you plan to use it. This ice is called “sacrificial” because you’ll throw it out before you pack your real food and drinks.
- If you don’t have extra ice, store your cooler in a cool spot, like a basement or garage, before you pack it. This helps lower the temperature inside.
- Make sure you close the lid tightly while pre-chilling. This keeps the cold air in and helps the cooler work better later.
Tip: The colder your cooler starts, the longer your food and drinks will stay fresh and safe.
Pre-Chill Food and Drinks
You want to pre-chill everything you plan to pack. Warm cans or snacks will melt your ice faster and make your cooler less effective. Here’s what you can do:
- Put your drinks and snacks in the fridge or freezer the night before your trip.
- If you have time, chill water bottles or juice boxes until they’re icy cold.
- Pack your coldest items at the bottom of the cooler. This helps keep everything else cold, too.
When you take a few minutes to pre-chill your cooler bag and your food, you set yourself up for success. Your ice will last longer, and your snacks will taste better on your adventure.
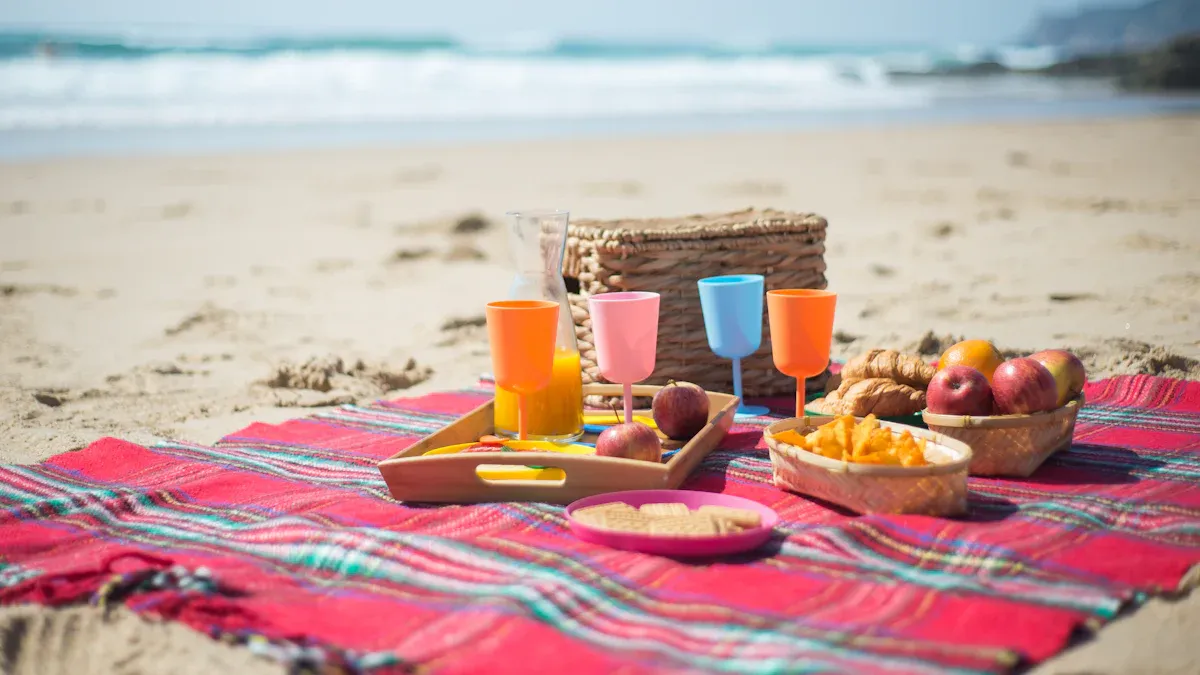
Packing Tips for Organizing Your Cooler Bag
Packing your hard lined cooler bag the right way makes a huge difference. You want everything to stay cold, fresh, and easy to grab. Let’s break down the best packing strategy so you get the most out of your cooler bag organization.
Layering Items
Layering is the secret to efficient packing and keeping your food safe. You want to layer strategically so cold air moves through the cooler bag and keeps everything chilled. Here’s a simple way to do it:
- Start with ice packs or frozen items at the bottom. Cold air sinks, so this helps keep the temperature low.
- Put perishable foods like meats, dairy, and salads in the middle layer. These need the most cooling.
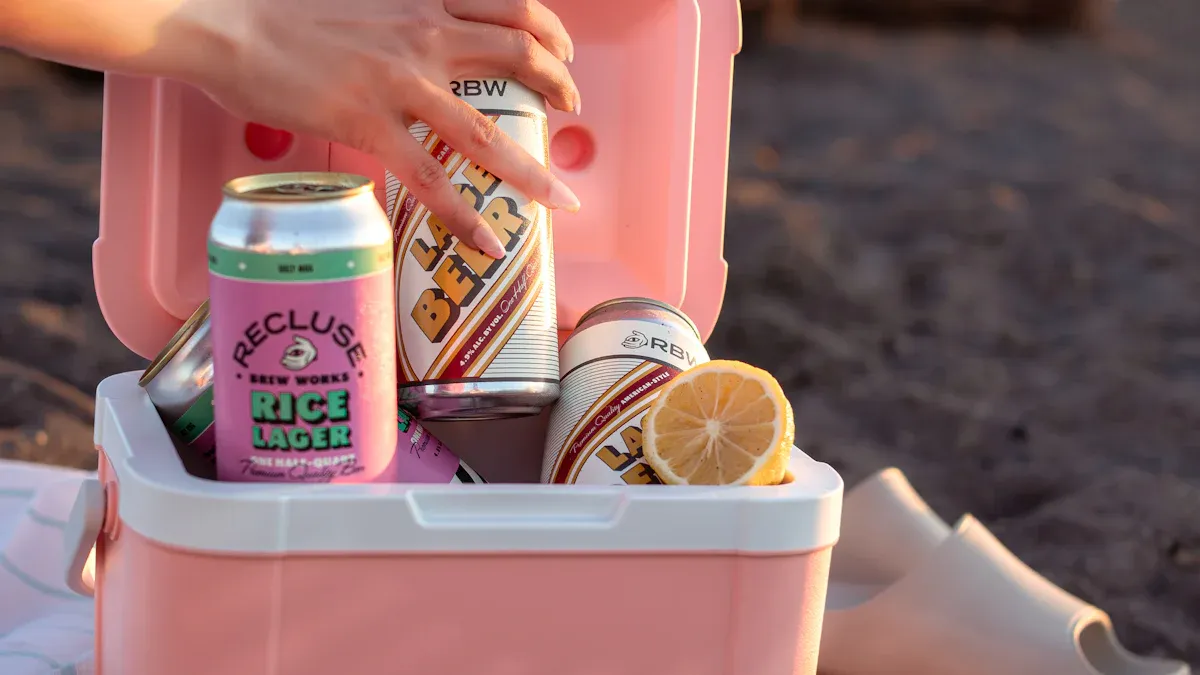
- Place drinks and snacks on top. You’ll reach these more often, so you won’t have to dig through everything.
- Fill any gaps with extra ice. This stops warm air pockets from forming and boosts cooling efficiency.
Tip: Use a 2:1 ice-to-food ratio. That means you should pack twice as much ice as food and drinks. This keeps everything at a safe temperature for longer.
A well-packed cooler bag keeps your food fresh and makes your trip easier. When you layer items the right way, you get better cooling and less spoilage.
Using Compartments
Compartments help you stay organized and make packing simple. You can use compartments and containers to separate different types of food and drinks. This packing strategy keeps things neat and stops items from getting crushed.
- Use built-in compartments for meats, cheeses, and salads. These stay cold and don’t mix with other foods.
- Pack dry items like crackers or chips in separate containers. This keeps them from getting soggy.
- Place drinks in their own section. You can grab them quickly without moving other items.
- If your cooler bag has removable dividers, use them to create custom compartments for your trip.
Here’s a quick table to show how compartments boost organization and efficiency:
| Item Type | Best Compartment Location | Benefit |
|---|---|---|
| Meats/Dairy | Middle compartment | Maximum cooling |
| Drinks | Top compartment | Easy access |
| Dry Snacks | Side compartment | Prevents sogginess |
| Ice Packs | Bottom compartment | Maintains coldness |
When you use compartments, you get better cooler bag organization and less mess. You also protect lighter items from getting squished by heavier ones.
Easy Access Organization
Easy access is key when you’re packing for a day out. You want to grab snacks or drinks without letting out too much cold air. Here are some tips for efficient packing and organization:
- Put the items you’ll use most often on top. This way, you don’t have to dig through everything.
- Pre-chill all your food and drinks before packing. This helps keep the cooler bag cold and fresh.
- Keep wet and dry items separate. Use containers or compartments to avoid sogginess.
- Distribute ice packs throughout the cooler bag. This keeps the temperature even and boosts efficiency.
Note: Every time you open the cooler bag, cold air escapes. If you organize your cooler bag for easy access, you spend less time searching and keep everything colder.
Cooler bag organization is all about smart packing. When you layer strategically, use compartments, and plan for easy access, you get a cooler that works better and keeps your food safe. Try these tips next time you pack for an adventure, and you’ll see how much easier your trip can be.
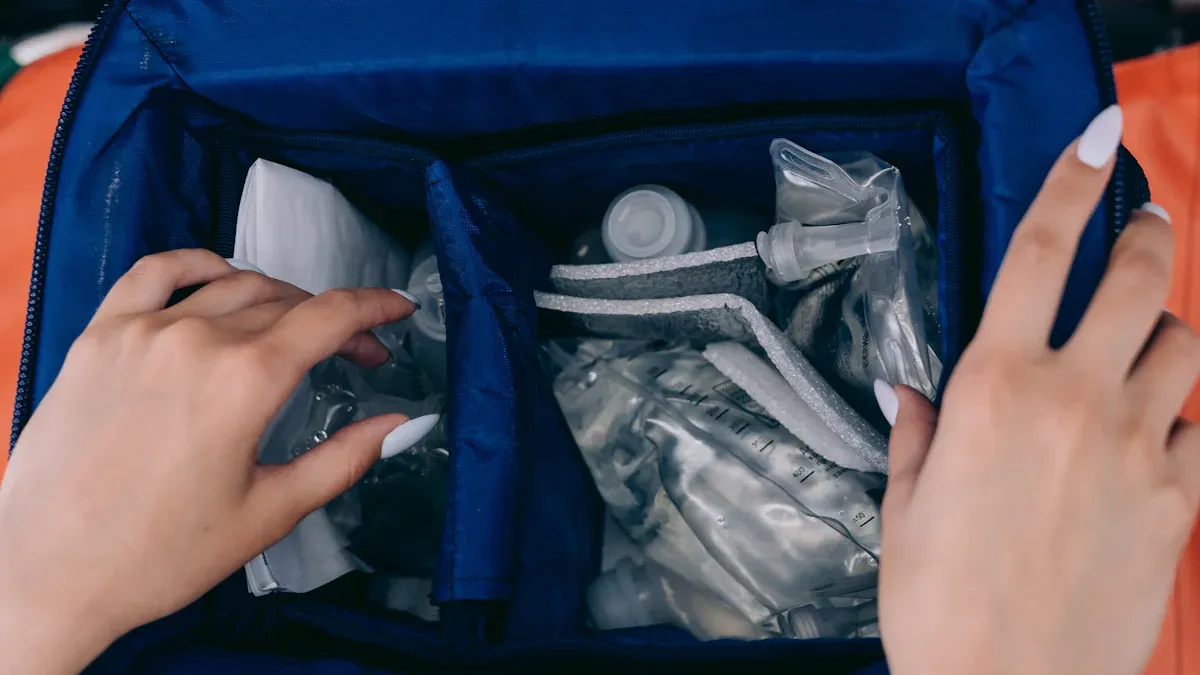
Separating Wet and Dry Items
Preventing Sogginess
No one likes soggy sandwiches or snacks. When you pack a hard lined cooler bag, you want to keep everything fresh and tasty. The best way to do this is to keep dry and wet items separate. If you mix them, moisture can ruin your chips, cookies, or bread. You can use a few simple tricks to stop this from happening.
- Place wet items like drinks, ice packs, or fruit in waterproof bags or sealed containers. This keeps any leaks or condensation away from your dry food.
- Choose leak-proof containers for foods that might spill, such as salads or marinated meats.
- If your cooler bag has a separate compartment for wet items, use it. This helps you organize your food and keeps everything in its place.
Tip: Always check that your containers are closed tight before you pack them. A little extra care goes a long way in keeping your snacks dry.
Using Dividers
Dividers make a big difference when you want to organize your cooler bag. They help you keep wet and dry foods apart, so nothing gets soggy or crushed. Some cooler bags come with built-in dividers, but you can also add your own.
- Removable dividers let you create custom spaces for different foods. You can move them around to fit your needs.
- Some products, like the Tirrinia 2-Bottle Wine Carrier, use dividers to keep bottles from clinking together. You can use similar dividers in your cooler bag to protect fragile items and keep things neat.
- You can also use small boxes or containers as makeshift dividers. These work well for snacks, fruit, or sandwiches.
Keeping your cooler bag organized with dividers saves time and keeps your food in perfect shape. You spend less time searching and more time enjoying your outing.
Maintain the Right Temperature
Keeping your food and drinks cold is all about how you maintain the right temperature inside your cooler bag. You want everything to stay safe and fresh, even on a hot day. Here’s how you can do it like a pro.
Ice Packs and Placement
High-quality ice packs make a big difference in how long your cooler stays cold. Not all ice packs work the same way. Some last longer and keep the temperature lower for hours. Here are a few top choices:
- Engel Ice keeps 10 pounds of ice cold for 24 to 36 hours.
- Cooler Shock holds the chill for 18 to 26 hours, but starts to lose power after 12 hours.
- Techni Ice works for 12 to 18 hours and does best in an empty cooler.
You want to use these ice packs the right way. Start by placing ice packs or frozen items at the bottom of your cooler bag. Put your meats and dairy in the middle, then surround them with more ice packs. Add drinks and snacks on top. This setup keeps the cold air moving and protects your most perishable foods.
Tip: Layering ice packs above and below your food helps keep the temperature steady and your snacks safe.
Monitoring Temperature
You need to keep an eye on the temperature inside your cooler bag. Food stays safe when the temperature stays below 40°F. You can use special tools to help you check. Many temperature monitors come with real-time tracking, built-in sensors, and easy-to-read displays. Some even connect to your phone with Bluetooth or cellular features. Here’s a quick look at what these devices offer:
| Feature | Description |
|---|---|
| Real-time temperature tracking | Lets you see the temperature as it changes |
| Built-in sensors | Gives you accurate readings |
| Intuitive display | Shows the temperature clearly |
| Bluetooth and Cellular | Sends updates to your phone |
| Durable construction | Easy to clean and built to last |
Try to open the lid as little as possible. Every time you open it, warm air gets in and the temperature goes up. Keep your cooler bag sealed tight to lock in the cold.
Shade and Storage
Where you put your cooler bag matters. Always store it in the shade. Direct sunlight heats up the outside and raises the temperature inside. Find a cool spot under a tree, picnic table, or even a car trunk. If you can, cover your cooler with a towel or blanket for extra protection.
Remember: The less you move your cooler bag, the better it holds its temperature. Keep it closed, keep it shaded, and you’ll enjoy cold drinks and fresh food all day.
Cooler Bag Cleaning Tips
Routine Cleaning
Keeping your hard lined cooler bag clean helps you enjoy fresh food and drinks every time. You should clean your cooler bag after each use. This simple habit stops bacteria and odors from building up. For quick cleanups, grab some disinfecting wipes and give the inside a good wipe-down. Once a week, mix one tablespoon of bleach with a gallon of water. Use this solution to clean the interior. Let it air dry with the lid open. This routine keeps your cooler bag safe and ready for your next adventure.
Tip: Always remove leftover food and drinks as soon as you get home. This step makes cleaning much easier.
Odor Prevention
No one wants a smelly cooler bag. You can stop odors before they start with a few easy tricks. After cleaning, sprinkle some baking soda inside the cooler. Let it sit for a few hours, then wipe it out. Baking soda absorbs bad smells and leaves your cooler fresh. You can also use charcoal as an odor absorber. Just place a small bag of charcoal inside and close the lid. For a deeper clean, mix water and white vinegar, wipe down the inside, and let it air dry. Always empty your cooler bag right away and avoid leaving it outside in the heat. These steps help prevent spoilage and keep your cooler smelling great.
Inspecting for Damage
Regular checks help your cooler bag last longer. Look for frayed stitching, torn seams, or cracks in the insulation or lining. Pay close attention to zippers and straps. If you spot any worn parts, fix them before your next trip. Handle your cooler bag with care and avoid overloading it with sharp or heavy items. Store it in a cool, dry place to protect the seams and lining. By inspecting and maintaining your cooler bag, you make sure it stays strong and reliable for many outings.
You now have the best tips for making your hard lined cooler bag a success. When you follow these steps, you get safe, organized, and cold storage every time. Here’s what you gain:
- You keep everything organized and easy to grab.
- Carrying your cooler bag feels lighter and more comfortable.
- Cleaning up is quick and simple.
| KUER Quality | What You Get |
|---|---|
| 100% Inspection | Reliable cooler every trip |
| Great Feedback | Trusted by many users |
Try these tips on your next outing. Share your favorite hard lined cooler bag tricks in the comments!
FAQ
How long does a hard lined cooler bag keep food cold?
You can expect your cooler bag to keep food cold for 12 to 24 hours. The exact time depends on how much ice you use, the outside temperature, and how often you open the cooler.
What is the best way to pack a cooler bag for a day trip?
Start with pre-chilled items. Place ice packs at the bottom of the cooler. Layer perishable foods in the middle. Put snacks and drinks on top. Fill empty spaces with extra ice to keep everything cold.
Can I use regular ice or should I use ice packs in my cooler bag?
You can use both. Ice packs last longer and do not make a mess. Regular ice works well if you need extra cooling. Try to keep ice in sealed bags to avoid water pooling in your cooler bag.
How do I clean my cooler bag after use?
Remove all food and ice. Wipe the inside of the cooler with warm, soapy water. Rinse and let it air dry with the lid open. For tough odors, sprinkle baking soda inside and wipe it out after a few hours.
Is it safe to store both drinks and raw meat in the same cooler bag?
Yes, but you should separate them. Use sealed containers for raw meat. Place meat at the bottom of the cooler bag. Keep drinks and ready-to-eat foods on top. This prevents cross-contamination and keeps your food safe.

 Request a quote