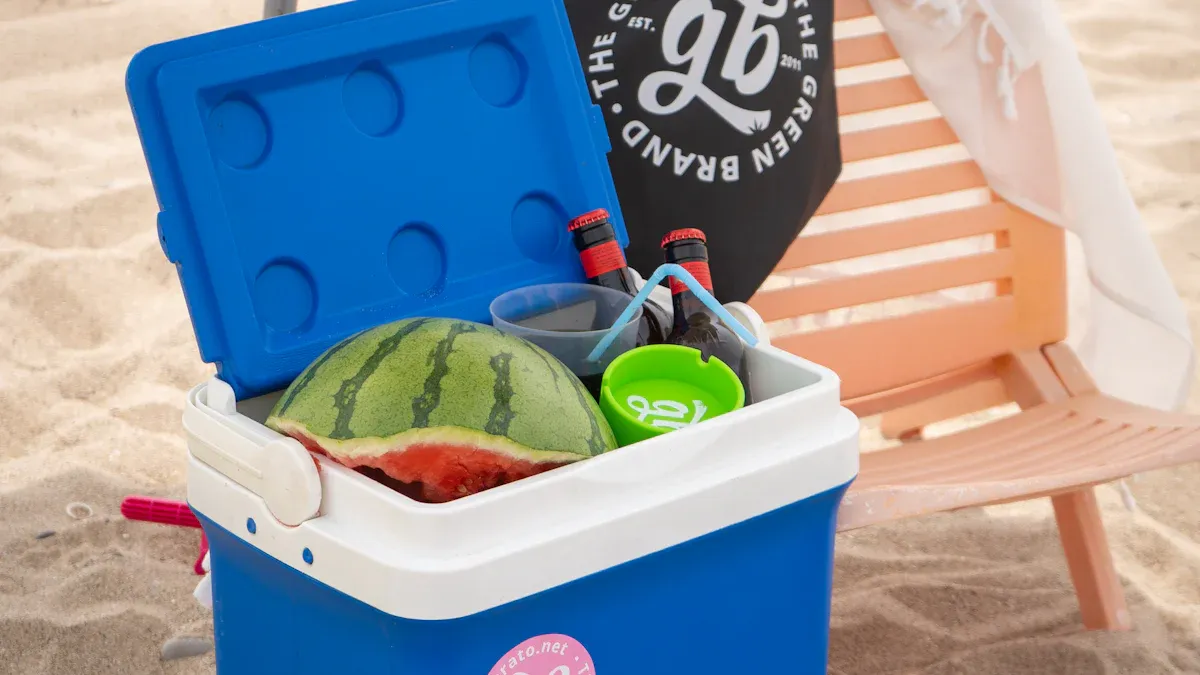

You want your food and beverages to stay cold and fresh, whether you’re heading to a picnic or just running errands. A small insulated cooler bag makes this easy. You can carry it over your shoulder or tuck it under your arm, so it never slows you down. Many cooler bags come with handy pockets for extra storage. Because they are lightweight, you can use them for quick trips or outdoor adventures. Your snacks keep their freshness, and you enjoy every outing even more.
Key Takeaways
- Pre-chill your cooler bag for at least 30 minutes to maximize cold retention. This simple step helps keep your food and drinks cold longer.
- Use high-quality ice packs instead of ice cubes. Ice packs last longer, keep your cooler dry, and are reusable, making them ideal for extended trips.
- Pack your cooler with cold items. Starting with chilled food and drinks helps maintain a low temperature and keeps your ice from melting too quickly.
- Organize your cooler by layering ice packs at the bottom, cold items in the middle, and fragile snacks on top. This method keeps everything fresh and prevents sogginess.
- Keep your cooler bag closed as much as possible. Each time you open it, you lose cold air, which can shorten the time your ice lasts.
Pre-Chill Your Small Insulated Cooler Bag
Why Pre-Chilling Boosts Cold Retention
You want your snacks and drinks to stay cold as long as possible. Pre-chilling your cooler bag makes a big difference. When you start with a cold cooler, you slow down the warming process. The insulation inside your cooler bag, like foam, acts as a shield against heat. Some cooler bags have shiny linings that reflect heat away from your food. Airtight zippers keep warm air out and cold air in. Gel-filled ice packs add extra cooling power and help your cooler stay cold for hours.
Here’s how these features work together to maximize cold retention:
- Foam insulation blocks heat from getting inside.
- Reflective linings push heat away from your snacks and drinks.
- Sealed zippers keep the cold air trapped inside.
- Advanced ice packs boost the cooling effect.
When you pre-chill your cooler bag, you give these features a head start. Your food and drinks stay cold longer, and you enjoy fresh snacks wherever you go.
Simple Steps to Pre-Chill Your Cooler Bag
Getting your cooler bag ready is easy. You can follow these steps before you pack your food:
- Place your empty cooler bag in the fridge or freezer for at least 30 minutes.
- Add a few ice packs or frozen water bottles to the cooler while it chills.
- Remove the ice packs right before you pack your food and drinks.
- Fill your cooler with cold items to keep everything fresh.
- Close the cooler bag tightly to lock in the cold.
Tip: If you don’t have space in your freezer, use ice packs or frozen gel packs inside the cooler bag. This method works well and helps you maximize cold retention.
Pre-chilling your cooler bag is a simple trick. You get better results every time you use your cooler for a picnic, lunch, or outdoor adventure.
Use the Right Ice Packs for Your Cooler Bag

Ice Packs vs. Ice Blocks vs. Cubes
Choosing the best ice for your cooler can make a big difference in how long your food and drinks stay cold. You might wonder if you should use ice packs, ice blocks, or ice cubes. Each option has its own benefits for ice preservation.
Here’s a simple table to help you compare:
| Feature | Ice Packs | Ice Cubes |
|---|---|---|
| Cooling Duration | Longer cooling duration (over 24 hours) | Shorter cooling duration |
| Cooling Temperature | Lower cooling temperature | Higher cooling temperature |
| Storage Flexibility | Flexible and space-efficient | Takes up more space |
| Messiness | No melting water | Melting water can create a mess |
| Reusability | Reusable | One-time use |
| Ideal for | Long-term picnics, camping, food storage | Quick beach days, short camping trips |
You get better ice preservation with ice packs because they last longer and keep your cooler dry. Ice cubes work well for short trips, but they melt fast and leave water at the bottom of your cooler. Ice blocks can stay cold for a while, but they take up more space and are harder to fit in a small cooler.
Tip: If you want less mess and longer ice preservation, go with ice packs. You can reuse them and keep your cooler organized.
Top Ice Pack Choices, Including KUER
You want the best ice packs for your cooler, so you get the most out of every trip. KUER offers high-quality ice packs designed for strong ice preservation. These ice packs fit easily into small cooler bags and keep your food cold for hours. KUER uses advanced materials that freeze quickly and stay cold longer than regular ice cubes.
Here are some top choices for ice packs:
- KUER ice packs: Great for daily use and outdoor adventures. They are durable and easy to clean.
- Gel ice packs: Flexible and perfect for wrapping around bottles or snacks.
- Hard-sided ice packs: Good for stacking at the bottom of your cooler.
You can mix different types of ice packs for even better ice preservation. Place KUER ice packs on the bottom, then add gel packs around your food. This method keeps your cooler cold and your snacks fresh.
Note: Always choose ice packs that fit your cooler bag. You get better results when you fill all the spaces and keep the lid closed.
With the right ice packs, you enjoy longer ice preservation and less hassle. Your cooler stays cold, your food stays fresh, and your day goes smoothly.
Pack a Cooler with Pre-Chilled Items
Benefits of Packing Cold Food and Drinks
You want your snacks and beverages to stay cold for as long as possible. When you pack a cooler bag with cold items, you help keep the inside temperature low. Cold food and drinks work together with ice packs to boost preservation. If you put warm or room-temperature items in your cooler, the temperature rises quickly. This makes your ice melt faster and your food lose freshness.
Packing cold items helps you:
- Keep your beverages crisp and refreshing.
- Maintain the preservation of your snacks and meals.
- Make your ice last longer inside the cooler bag.
- Avoid soggy sandwiches or spoiled food.
- Enjoy every bite and sip during your trip.
When you pack a cooler for food and drinks, starting with cold items gives you better results. You get longer preservation and less worry about spoilage.
Tip: Always chill your beverages and snacks before cooler packing. This simple step helps your cooler bag work at its best.
Quick Ways to Pre-Chill Your Contents
You don’t need fancy equipment to pre-chill your food and beverages. You can use your fridge or freezer to get everything cold before you pack a cooler. Here are some easy ways to do it:
- Place drinks and snacks in the fridge overnight.
- Freeze water bottles or juice boxes to use as extra ice.
- Put your food in the freezer for 30 minutes before cooler packing.
- Use ice packs to chill items while you get ready.
- Stack cold items together to keep them cold longer.
If you skip pre-chilling, your cooler bag won’t keep things cold as long. The insulated walls need to be cool to start with. Pre-chilling all food and beverages helps you avoid raising the internal temperature. You get better preservation and your ice lasts longer.
Note: Pre-chill your cooler by placing ice packs or a bag of ice inside for an hour or two before packing. This helps the cooler bag stay cold and improves preservation.
Packing a cooler with cold items is a smart move. You get the most out of your cooler bag, and your food and beverages stay fresh and cold for hours.
Organize Your Cooler Bag for Maximum Cold
Layering: Cold on Bottom, Fragile on Top
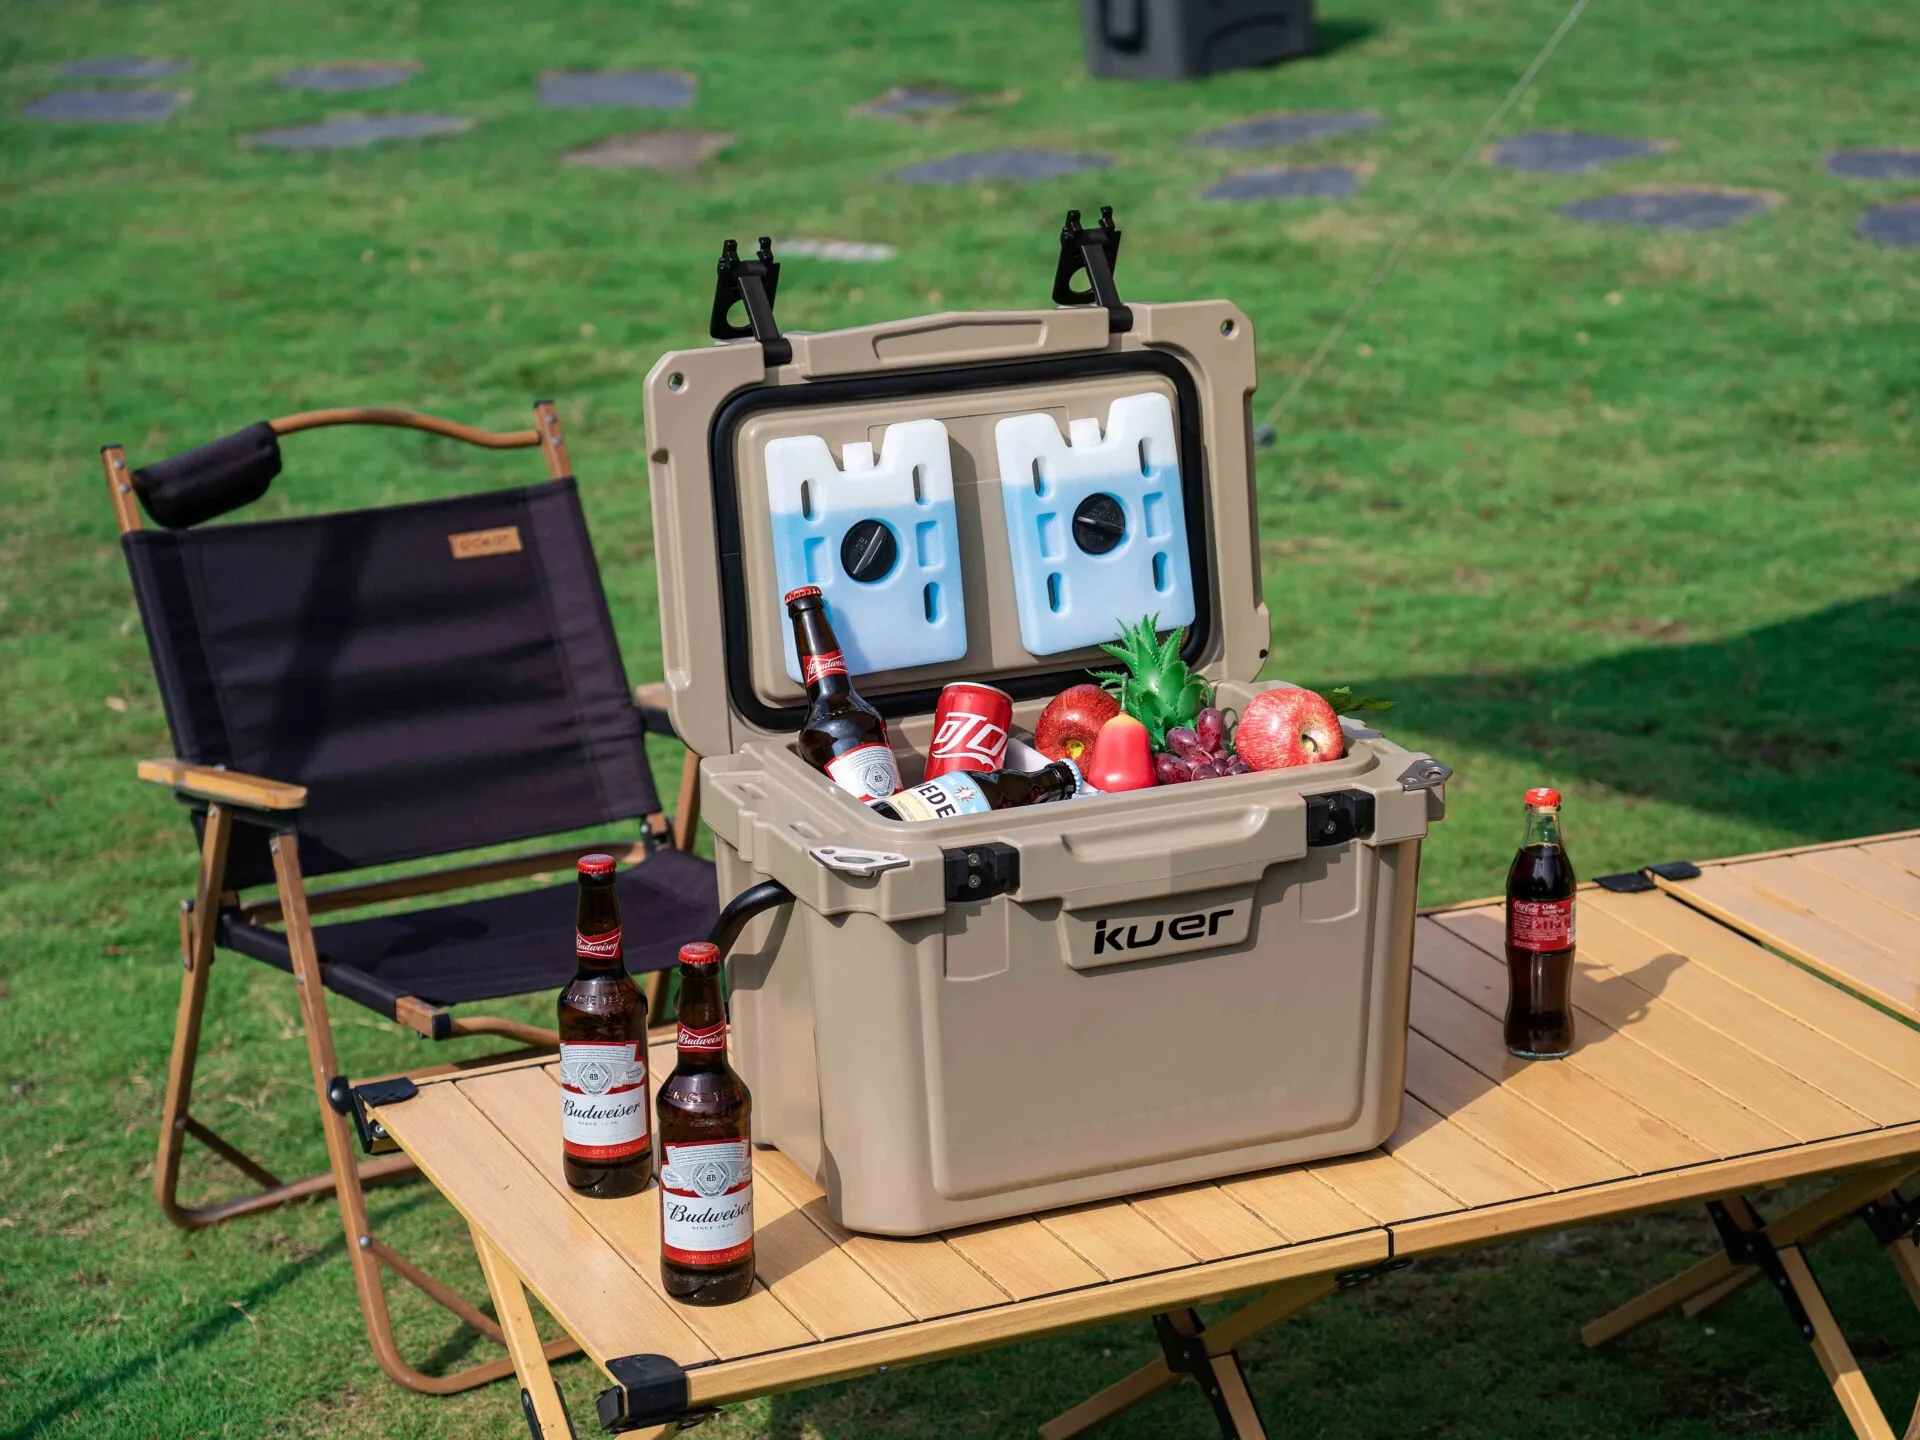
You want your snacks and drinks to stay cold and fresh. The way you pack your cooler bag makes a big difference. Start by placing ice packs or large ice blocks at the bottom of your cooler. This creates a strong base of cold that keeps everything chilled from below. Next, add your cold drinks and heavier food items right on top of the ice packs. These items help press the cold down and keep the temperature low.
Now, place another layer of ice packs or frozen water bottles above your food. This sandwich method surrounds your snacks with cold from both sides. If you have soft or fragile items, like sandwiches or fruit, put them on the very top. This keeps them from getting squished and helps them stay cool without getting soggy.
Here’s a quick way to remember the best order:
- Ice packs or blocks on the bottom
- Chilled drinks and food in the middle
- More ice packs on top
- Fragile snacks at the very top
Tip: Fill any empty spaces with soft items or extra cold packs. A full cooler bag holds the cold better and slows down heat from getting inside.
Separating Wet and Dry Items
No one likes soggy snacks. You can keep everything fresh by separating wet and dry items in your cooler bag. Use containers or zip-top bags for foods that might leak or sweat. Place wet items, like drinks or fruit, near the ice packs. Dry snacks, such as chips or cookies, should go in their own section, away from melting ice.
A few simple steps help you stay organized:
- Use containers for wet foods and drinks
- Keep dry snacks in sealed bags or boxes
- Place wet items close to the cold source
- Store dry items higher up or in side pockets
Packing this way keeps your cooler bag neat and your food tasting great. You get the most out of your cooler, and your snacks stay cold and crisp all day.
Fill All Gaps in Your Small Insulated Cooler Bag
Why Air Gaps Reduce Cooling Power
You might not notice, but empty spaces inside your cooler bag can make your food warm up faster. Air gaps let warm air move around, which melts your ice and makes your snacks less cold. When you pack your cooler, you want to keep everything close together. This helps the cold stay trapped inside and keeps your drinks and food fresh.
Take a look at this table to see how filling gaps helps your cooler work better:
| Evidence | Explanation |
|---|---|
| Use of towels and ice packs | Filling gaps with these items minimizes air pockets, which enhances cooling efficiency. |
| Packing the cooler full | A full cooler reduces air space, making ice last longer. |
| Avoiding over-filling | Properly sizing the cooler prevents air pockets that can speed up warming. |
If you leave too much space, the ice melts quickly and your cooler bag loses its cold power. You want to make sure every inch of your cooler is used.
Using Towels or Extra Ice Packs
You can fill empty spots in your cooler bag with small towels or extra ice packs. This simple trick helps keep everything cold for longer. When you use towels, they fill the gaps and stop air from moving around. Extra ice packs do the same thing, but they also add more cold to your cooler.
Here are some easy ways to fill those gaps:
- Place towels between food containers to stop them from sliding.
- Add extra ice packs in corners or along the sides of your cooler bag.
- Use small items, like fruit or snack bars, to fill tiny spaces.
- Make sure your cooler is full, but not so packed that you can’t close it.
A cooler bag that is packed tight keeps the cold in and the heat out. You get better cooling and your ice lasts longer. Next time you pack your cooler, remember to fill every gap. Your food and drinks will stay cold and fresh all day.
Keep Your Cooler Bag Closed for Longer Cold
How to Minimize Temperature Loss
You want your snacks and drinks to stay cold as long as possible. The best way to do this is by keeping your cooler bag closed. Every time you open the cooler, warm air rushes in and pushes the cold air out. This makes your ice melt faster and your food warm up sooner. If you open your cooler bag often, you can lose up to 1-2 hours of cold retention. Each time you unzip the bag, you might lose about 30 minutes of cold time.
Here are some easy ways to help you keep things cold:
- Use high-quality ice packs. These last longer and do not make a mess as they melt.
- Pre-chill your cooler bag in the freezer for at least one hour before you pack it.
- Fill your cooler with cold items and ice to start strong.
- Keep the cooler bag zipped up tight when you are not using it.
Tip: The less you open your cooler, the longer your ice will last and the colder your food will stay.
Planning Access to Your Cooler Bag
You can make your day easier by planning how you use your cooler bag. Think about what you will need first and pack those items on top. This way, you do not have to dig around and let cold air escape. Try to organize your snacks and drinks in the order you will use them. This helps you grab what you want quickly and close the cooler right away.
Here are some smart ways to plan your access:
- Put drinks or snacks you want first at the top.
- Use small containers or bags to keep things organized.
- Only open the cooler bag when you really need something.
- Remind your friends or family to close the cooler bag right after they use it.
By planning ahead, you help with maintaining temperature inside your cooler bag. Your ice stays solid, your food stays cold, and your drinks stay refreshing. You get the most out of your cooler every time you use it.
Store Your Cooler Bag in the Shade
Effects of Sunlight on Cold Retention
You want your cooler bag to keep everything cold for as long as possible. Sunlight can make this tough. When you leave your cooler in direct sunlight, the outside heats up fast. This heat moves inside and melts your ice. Your drinks get warm, and your snacks lose their chill.
If you store your cooler bag in the shade, you help it stay cold much longer. Here’s what happens when you keep your cooler out of the sun:
- The inside air temperature stays in the low 70s, even on a hot day.
- The color of your cooler bag does not matter much in the shade. Both light and dark coolers keep things cold almost the same.
- Ice lasts up to 3 days when you keep your cooler in full shade.
You can see that shade makes a big difference. Your ice melts slower, and your food stays cold and fresh.
Best Outdoor Storage Practices
You can use a few simple tricks to get the best results from your cooler bag. First, always look for a shady spot. Trees, tents, or even the side of your car work well. Next, try these outdoor storage tips:
- Keep a 2:1 ice-to-food ratio in your cooler. More ice means longer cold times.
- Pre-chill your cooler bag by filling it with ice for a few hours before you pack your food.
- Use both block ice and cubed ice. Block ice melts slower, while cubed ice cools things down fast.
- Place your cooler on grass or dirt, not on hot pavement. The ground stays cooler and helps your ice last.
Tip: Cover your cooler bag with a towel or blanket for extra shade and insulation. This helps keep the cold inside and the heat out.
When you follow these steps, your cooler bag works at its best. You get cold drinks, fresh snacks, and ice that lasts all day.
Add Extra Insulation to Your Cooler Bag
Using Towels or Blankets for More Cold
You want your cooler bag to keep everything cold for as long as possible. Sometimes, you need a little extra help. Towels and blankets work great for adding more cold to your cooler. You can wrap a towel around the outside of your cooler bag. This simple trick blocks heat and helps your ice last longer. If you have a blanket, drape it over the cooler bag when you set it down. The extra layer slows down warming from the sun or hot air.
You can also use towels inside the cooler. Place a towel on top of your food and drinks. This keeps the cold air trapped and stops warm air from sneaking in when you open the cooler bag. If you have space, tuck small towels between containers. This fills gaps and keeps ice from melting too fast.
“Closed-cell foam insulation is a great choice for improving the performance of cooler bags. Its packed structure helps maintain cold temperatures for longer. Brands like YETI and Engel use this material to keep contents at the right temperature, proving its reliability and high quality.”
Here are some popular types of extra insulation you might see:
- Closed-cell foam: Superior thermal performance and durability, keeps items cooler for longer.
- Open-cell foam: More flexible and affordable but has lower cold retention.
- Polyurethane foam: High insulation in thinner profiles but heavier.
- Vacuum insulation panels: Ultra-thin and high performance but fragile and expensive.
When to Add Extra Layers
You might wonder when you should add more layers to your cooler bag. If you plan to spend the day outside or expect hot weather, extra insulation helps a lot. You can add towels or blankets before you leave home. If you notice your ice melting faster than usual, add another towel or blanket right away.
You should also use extra layers if you pack your cooler bag with lots of ice and cold drinks. This keeps everything cold for hours. If you travel or camp overnight, wrap your cooler bag in a blanket before you go to sleep. The extra insulation helps your ice stay solid until morning.
Adding extra layers is easy. You just need a towel or blanket and a little planning. Your cooler bag works better, your ice lasts longer, and your food stays cold and fresh.
Clean and Dry Your Cooler Bag After Use
Preventing Odors and Mold
You want your cooler bag to smell fresh every time you use it. If you leave moisture or crumbs inside, odors and mold can build up fast. Mold loves damp places, especially after a day with melting ice. The insulation in your cooler bag works best when it stays clean and dry. You can stop bad smells and mold by following a few simple habits.
Here’s a quick look at the most effective ways to keep your cooler bag fresh:
| Cleaning Method | Description |
|---|---|
| Regular Cleaning | Clean the cooler bag after each use to prevent odors and bacteria growth. |
| Baking Soda Deodorizing | Sprinkle baking soda inside the bag and leave it overnight to absorb smells. |
| Diluted Bleach Solution | Use a mixture of 1 tbsp of bleach per gallon of water for sanitization once a week. |
| Air Drying | Always let your cooler bag air dry completely before storing or using it again. |
If you use your cooler bag every day, wipe it down often. For occasional trips, always clean it before and after each use. This keeps your cooler ready for the next adventure and helps your ice stay cold longer.
Easy Cleaning Steps
Cleaning your cooler bag does not take much time. You just need a few supplies and a little effort. Start by emptying out any leftover ice or water. Shake out crumbs and wipe away spills. Use mild soap and warm water to scrub the inside and outside of your cooler. Pay extra attention to seams and corners where water can hide.
Follow these steps for a spotless cooler bag:
- Remove all food, drinks, and ice.
- Wash the inside and outside with soapy water.
- Rinse well to get rid of soap.
- Sprinkle baking soda inside if you notice any smells.
- Let the cooler bag air dry with the lid open.
Tip: Never store your cooler bag while it is damp. Air drying stops mold and keeps the insulation working well.
If you want to sanitize your cooler, mix one tablespoon of bleach with a gallon of water. Wipe down the inside, then rinse and dry. This keeps your cooler bag safe and ready for your next picnic or trip.
You can keep your cooler in top shape by cleaning it regularly. For daily use, wipe it down every evening. For occasional use, clean it before and after each outing. This simple routine helps your cooler last longer and keeps your ice and food cold and fresh.
Check Your Cooler Bag for Wear and Tear
Inspecting Zippers, Seams, and Liners
You want your cooler bag to last a long time and keep your food cold. Regular checks help you spot problems before they get worse. Start by looking at the zippers. If they stick or feel loose, they might not seal your cooler well. Next, check the seams and stitching. Frayed threads or torn seams can let warm air inside. Look at the liner, too. Cracks or peeling in the lining mean your cooler bag might not hold the cold as well.
Here are some common signs of wear and tear you should watch for:
- Frayed stitching or torn seams
- Cracks or peeling in the lining
- Flattened padding
- Water stains or mold spots
- Broken zippers or loose seams
- Worn straps
If you see any of these, your cooler might not work as well as before. Over time, the materials can break down. This makes it harder for your cooler to keep things cold.
When to Repair or Replace
Sometimes, a small fix can make your cooler bag last longer. You can sew up a loose seam or clean a zipper that sticks. If you spot mold, clean it right away so it does not spread. But if you see big cracks in the liner or the insulation feels flat, it might be time for a new cooler bag.
Wear and tear can cause leaks at the seams. This lets cold air out and warm air in. When the structure of your cooler gets weak, it cannot keep your food cold for long. Most cooler bags last for years if you take care of them. Simple habits, like drying your cooler after each use and storing it in a cool place, help it last even longer.
Tip: Check your cooler bag after every trip. Quick repairs and good cleaning keep your cooler working well and ready for your next adventure.
You can get the most out of your small insulated cooler bag by following a few smart tips. Check out this table for quick reminders:
| Maintenance Tip | Why It Matters |
|---|---|
| Regular Cleaning | Stops odors and keeps your lunch bag germ-free. |
| Proper Storage | Protects insulation and keeps food fresh. |
If you use extra insulation, layer ice packs, and organize your cooler, you keep everything cold and boost freshness. Try these strategies every time you pack your cooler bag. A little preparation makes your cooler work better and helps your snacks stay cool all day.
FAQ
How long will my cooler bag keep food cold?
Most small insulated cooler bags keep food cold for 4–8 hours. If you use high-quality ice packs and pre-chill everything, you can stretch that time. Always keep your cooler closed to help the cold last longer.
Can I put my cooler bag in the washing machine?
You should not put your cooler bag in the washing machine. Hand wash it with mild soap and water. Wipe the inside and outside, then let it air dry. This helps your cooler bag last longer.
What’s the best way to pack drinks in my cooler bag?
Pack drinks at the bottom with ice packs around them. Use soft-sided bottles or cans. If you want your drinks extra cold, freeze them for an hour before packing. Keep fragile snacks on top so nothing gets crushed.
Is it safe to use ice cubes instead of ice packs?
You can use ice cubes, but they melt faster and make your cooler wet. Ice packs work better for keeping things cold and dry. If you use ice cubes, put them in a sealed bag to avoid leaks.
How do I stop my cooler bag from smelling bad?
Clean your cooler bag after every use. Sprinkle baking soda inside and let it sit overnight. Always dry your cooler bag with the lid open. This stops odors and keeps your bag fresh for your next trip.


 Request a quote