Imagine having a stylish and functional outdoor bench that doubles as an icebox cooler for your next gathering. Building a deck box cooler not only saves you money but also lets you personalize it to match your outdoor space. With this diy tutorial, you’ll see how simple it is to make the patio cooler box of your dreams. Whether you’re using pallet wood deck cooler plans or exploring free plans online, this project is beginner-friendly. You’ll love the satisfaction of crafting your own patio cooler ice chest that’s practical, durable, and uniquely yours.
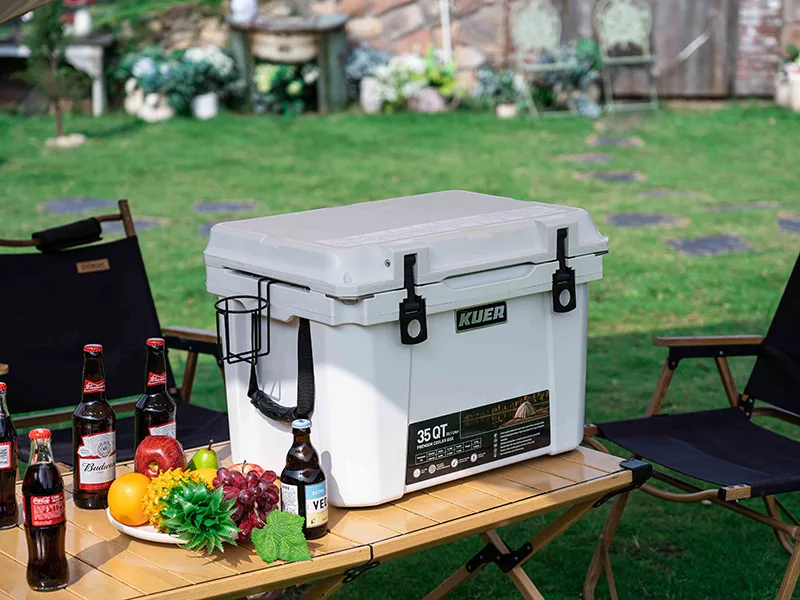
Kuer, one of the leading cooler box manufacturers will provide you with a variety of plastic insulated ice box solutions.
Tools and Materials for Your DIY Deck Box Cooler
Before you dive into building your cooler bench, it’s important to gather the right tools and materials. Having everything ready will make the process smoother and more enjoyable. Let’s break it down step by step.
Essential Tools
You don’t need a professional workshop to build your cooler box. Most of the tools required are common household items or easy to find at your local hardware store. Here’s what you’ll need:
- Measuring tape: For accurate measurements of wood and other materials.
- Saw: A hand saw or circular saw works great for cutting wood to size.
- Drill and drill bits: To create holes for screws and hardware.
- Screwdriver: For assembling the parts securely.
- Sandpaper: To smooth out rough edges and prepare the wood for finishing.
- Clamps: To hold pieces together while you work.
- Paintbrush or roller: For applying stain or paint to your finished project.
These tools are beginner-friendly and easy to use. If you don’t already have them, consider borrowing or renting to save costs.
Materials You’ll Need
The materials you choose will determine the durability and style of your diy cooler box. Here’s a handy table to guide you:
| Tools/Materials | Description/Usage |
|---|---|
| Wood | Various types used for constructing the cooler box. |
| Screws | Used for assembling the parts of the cooler. |
| Sandpaper | Different grits used for smoothing the wood surface. |
| Stain | Applied for finishing the wood with a natural look. |
| Latches and Handles | Hardware for securing and handling the cooler box. |
You’ll also need a plastic cooler insert or an old cooler to fit inside your box. This will keep your drinks and snacks cold while protecting the wood from moisture.
Tips for Selecting Durable and Aesthetic Supplies
Choosing the right materials is key to building a cooler box that lasts. Here are some tips to help you make the best choices:
- Pick the right wood: Cedar and redwood are excellent options because they resist rot and weather damage. If you prefer a more affordable option, pressure-treated pine works well too.
- Consider composite materials: Composite boards are durable and water-resistant, making them perfect for outdoor projects. They’re a bit pricier but require less maintenance over time.
- Don’t skimp on hardware: Invest in stainless steel screws, latches, and hinges. These won’t rust and will keep your cooler bench looking great for years.
- Think about aesthetics: If you want a polished look, choose a wood stain that complements your outdoor space. For a pop of color, go with outdoor-grade paint.
Pro Tip: If you’re building your cooler box for a sunny spot, avoid materials like aluminum that can absorb heat. Instead, opt for wood or composite materials that stay cool to the touch.
By carefully selecting your tools and materials, you’ll set yourself up for success. Plus, you’ll enjoy a cooler box that’s not only functional but also a stylish addition to your patio.
Step-by-Step Guide to Build a DIY Patio Cooler
Step 1: Preparing Your Materials and Workspace
Before you start building, preparation is key. A well-organized workspace and properly gathered materials will save you time and frustration. Here’s how you can set yourself up for success:
- Choose a workspace: Pick a flat, spacious area where you can spread out your tools and materials. A garage, driveway, or backyard patio works well.
- Gather your tools and supplies: Refer back to the list of tools and materials mentioned earlier. Double-check that you have everything, including your cooler insert, screws, and wood.
- Measure twice, cut once: Use your measuring tape to double-check all dimensions. This ensures accuracy when cutting wood and assembling parts.
- Safety first: Wear safety goggles and gloves to protect yourself while working with tools. Keep a first-aid kit nearby, just in case.
Pro Tip: Label your wood pieces after cutting them. This makes it easier to identify which part goes where during assembly.
By preparing thoroughly, you’ll avoid common pitfalls like running out of materials or making incorrect cuts. Plus, you’ll enjoy a smoother and more enjoyable building process.
Step 2: Assembling the Base Structure
The base structure is the foundation of your cooler box. It provides stability and support, so it’s important to get this step right. Follow these steps to build a sturdy base:
- Cut the wood pieces: Based on your cooler’s dimensions, cut the wood for the base frame. Ensure the sides are slightly taller than the cooler lid to allow for proper fitting.
- Assemble the frame: Use 1-1/4″ pocket hole screws to join the wood pieces. A Kreg jig can help you create clean and secure joints.
- Attach the lower shelf: Cut and attach fence pickets or slats to create a lower shelf. This shelf can be used for extra storage, like holding drinks or supplies.
- Check for stability: Use clamps to hold the frame together temporarily. Test the structure to ensure it’s level and doesn’t wobble. Adjust as needed before securing everything permanently.
Avoid This Mistake: Don’t underestimate the complexity of this step. Take your time to ensure all joints are tight and the frame is square. A wobbly base can lead to issues later on.
Once your base is complete, you’ll have a solid foundation to build the rest of your cooler bench.
Step 3: Building the Frame for the Cooler
Now it’s time to create the frame that will house your cooler insert. This step involves precise measurements and careful assembly. Here’s how to do it:
- Measure and cut the frame pieces: Build the frame around the cooler lid, ensuring the sides are 3/4″ taller than the lid. This allows the lid to open and close smoothly.
- Attach lid support cleats: Cut and attach cleats to the front and back of the frame. These will support the lid and enhance stability.
- Create the lid top: Cut wood pieces for the lid top and attach them to the cleats. Make sure the lid fits snugly but isn’t too tight.
- Install the cooler insert: Place the cooler inside the frame to check the fit. Adjust the frame if necessary to ensure the cooler sits securely.
Tip for Success: If you plan to add a drainage system, now is the time to install it. Drill a hole at the bottom of the cooler and attach a spigot or plug for easy water removal.
With the frame complete, your cooler box is starting to take shape. You’re well on your way to creating a functional and stylish diy outdoor patio cooler!
Step 4: Installing and Securing the Cooler
Now that your frame is ready, it’s time to install and secure the cooler. This step ensures your cooler stays in place and functions effectively. Follow these steps to get it done:
- Position the cooler insert: Place the cooler inside the frame you’ve built. Make sure it fits snugly without wobbling. If it feels loose, add small wooden spacers to fill the gaps.
- Secure the cooler: Use screws or brackets to attach the cooler to the frame. Drill through the cooler’s lip (the edge that rests on the frame) and into the wood. This keeps it stable, even when it’s full of ice and drinks.
- Seal the edges: Apply a waterproof sealant around the edges where the cooler meets the frame. This prevents water from seeping into the wood and causing damage over time.
- Add drainage: If you haven’t already, drill a hole at the bottom of the cooler and attach a spigot or drain plug. This makes it easy to empty melted ice without lifting the cooler.
Pro Tip: Double-check the stability of your cooler bench before moving on. Give it a gentle shake to ensure everything is secure. A wobbly cooler box can lead to spills or accidents during use.
To ensure your installation meets safety standards, here’s a quick reference table:
| Requirement | Description |
|---|---|
| Location and Mounting | Ensure the cooler is properly located and mounted with secure connections. |
| Flashing | Seal all openings to prevent moisture from entering the wood. |
| Duct Insulation | Use insulation if needed to maintain cooling efficiency. |
| Sealing | Seal all joints and seams to prevent leaks and maintain durability. |
By following these steps, you’ll have a sturdy and functional cooler box that’s ready for action.
Step 5: Adding Finishing Touches for Style and Functionality
This is where your cooler box truly comes to life. Adding finishing touches not only enhances its appearance but also improves its functionality. Here’s how you can make your cooler bench stand out:
- Paint or stain the wood: Choose a wood stain for a natural, polished look or outdoor-grade paint for a pop of color. This protects the wood from weather damage and adds personality to your project.
- Install handles and latches: Attach sturdy handles to the sides for easy transport. Add latches to the lid to keep it securely closed when not in use.
- Add wheels for mobility: If you want to move your cooler around, install caster wheels on the base. Look for wheels with locks to keep the cooler stationary when needed.
- Enhance the lid: Attach hinges to the lid for smooth opening and closing. You can also add a soft-close mechanism to prevent the lid from slamming shut.
- Incorporate decorative elements: Use stencils to add designs or patterns to the wood. You could even personalize it with your family name or a fun phrase like “Chill Zone.”
Did You Know? Techniques like the Bomanite Antico Process can give your cooler box a unique texture that mimics natural materials. It’s an affordable way to add a touch of elegance to your project.
Here’s a quick look at some finishing techniques and their benefits:
| Technique | Benefits |
|---|---|
| Bomanite Antico Process | Adds unique textures that resemble natural materials at a lower cost. |
| Bomanite Exposed Aggregate Systems | Provides durability, slip-resistance, and easy maintenance while enhancing aesthetics. |
By adding these finishing touches, you’ll transform your cooler box into a stylish and functional centerpiece for your outdoor space. It’s not just a cooler—it’s a conversation starter!
Customizing Your DIY Patio Cooler Cart
Adding a Drainage System for Easy Maintenance
A drainage system makes your cooler box much easier to maintain. Instead of lifting the cooler to empty melted ice, you can simply let the water flow out. Here’s how you can add one:
- Drill a drainage hole: Use a drill to create a small hole at the bottom of your cooler. Make sure it’s positioned at the lowest point so all the water drains out.
- Install a spigot or drain plug: Attach a spigot or plug to the hole. You can find these at most hardware stores. Look for one with a secure seal to prevent leaks.
- Seal the edges: Apply waterproof sealant around the hole to keep the cooler watertight. This step is crucial for preventing water damage to the wood frame.
Pro Tip: Choose a spigot with a twist-off cap for easy cleaning. It’ll keep your diy patio cooler cart in top shape for years.
Painting or Staining for a Polished Look
Painting or staining your cooler box not only enhances its appearance but also protects it from the elements. Here’s what you need to know:
- Water-based exterior stains last 3-8 years and are great for a natural look.
- Oil-based stains typically last 1-5 years and soak into the wood for added protection.
| Type of Stain | Durability (Years) | Characteristics |
|---|---|---|
| Semi-transparent oil | 3-6 | Soaks into wood, protects from weathering, does not peel, partially shields from sun. |
| Solid stains | 4-5 | Stronger colors, forms a film, may peel, requires more prep work. |
| Semi-transparent water | 3-8 | Good performance, combines oil-based resins in a water solution. |
For the best results, consider using brands like Defy or Valspar. Defy is highly durable and resists fading, while Valspar offers good mildew resistance. Whether you prefer a natural wood finish or a bold pop of color, these options will keep your diy outdoor patio cooler looking fresh.
Did You Know? A semi-transparent water-based stain combines the durability of oil with the easy cleanup of water-based products. It’s a win-win for outdoor projects!
Installing Wheels for Mobility
Adding wheels to your cooler cart makes it easy to move around your patio or yard. This is especially handy when hosting gatherings. Follow these steps to install wheels:
- Choose the right wheels: Look for caster wheels that can support the weight of your cooler bench. Opt for ones with locks to keep the cart stationary when needed.
- Attach the wheels: Secure the wheels to the bottom corners of the base using screws. Make sure they’re evenly spaced for stability.
- Test the mobility: Roll the cart around to ensure the wheels move smoothly. Adjust or tighten screws if necessary.
Quick Tip: If you plan to use your diy cooler box on uneven surfaces, choose larger wheels for better maneuverability.
By customizing your diy patio cooler cart with these features, you’ll create a functional and stylish addition to your outdoor space. Whether it’s the drainage system, polished finish, or mobility, these upgrades will make your cooler the star of every gathering.
Adding a Lid or Hinges for Easy Access
Adding a lid to your cooler bench makes it more functional and keeps your drinks cold for longer. Hinges make opening and closing the lid smooth and effortless. Here’s how you can do it step by step.
-
Measure and cut the lid: Start by measuring the top of your cooler frame. Cut a piece of wood that matches these dimensions. Make sure it’s slightly larger than the cooler opening to create a snug fit.
-
Choose the right hinges: Pick hinges that are sturdy and weather-resistant. Stainless steel hinges work great for outdoor projects. You can find them at your local hardware store.
-
Attach the hinges: Position the hinges on one side of the lid and the corresponding side of the frame. Use a drill to secure them with screws. Make sure the lid opens smoothly without catching on the frame.
-
Test the lid: Open and close the lid a few times to check its movement. If it feels stiff, loosen the screws slightly. If it wobbles, tighten them for a secure fit.
-
Add a handle: Install a handle on the front of the lid for easy access. Choose a design that matches the style of your diy patio cooler cart. Handles come in various shapes and finishes, so pick one that complements your outdoor space.
Pro Tip: For extra convenience, consider adding a soft-close hinge. It prevents the lid from slamming shut and makes your cooler bench safer to use.
If you want to take it up a notch, you can add a latch to keep the lid securely closed. This is especially useful if you plan to move your cart around or store it outdoors. A latch will prevent the lid from accidentally opening during transport.
By adding a lid and hinges, you’ll make your diy patio cooler cart more practical and stylish. It’s a simple upgrade that adds a lot of value to your project.
Tips to Build a Wood Deck Cooler That Lasts
Choosing the Right Type of Wood
The type of wood you choose can make or break your project. It affects not only the look of your deck box cooler but also its durability and cost. Here’s what you should consider:
- Budget: If you’re looking to save money, softwoods like pine or cedar are great options. They’re affordable and easy to work with, making them perfect for beginners. However, if you want something more durable, hardwoods like oak or maple are worth the investment.
- Aesthetics: Cedar and redwood have natural beauty and rich tones that look stunning in outdoor spaces. If you prefer a modern vibe, composite materials can mimic wood while offering a sleek finish.
- Durability: Outdoor furniture faces harsh conditions. Hardwoods resist wear and tear better than softwoods. Cedar and redwood also naturally repel insects and resist rot, making them ideal for outdoor use.
- Environmental Concerns: Look for wood certified by the Forest Stewardship Council (FSC) or similar organizations. This ensures your materials come from sustainable sources.
Pro Tip: If you’re building your cooler bench for a humid area, avoid untreated wood. It absorbs moisture and can warp over time.
Ensuring Proper Insulation for Cooling Efficiency
Good insulation keeps your cooler cold for hours, even on hot days. Here are some techniques to maximize cooling efficiency:
| Insulation Technique | Description | Cost Range |
|---|---|---|
| Polyurethane Foam | Effective for filling gaps in insulation, improving thermal efficiency. | $19 for Froth-Pak |
| Polyurethane Board | Used to fill larger gaps (3/4” or more) for better insulation. | $10 – $26 per sheet |
| Minimum Thickness Requirement | At least 2” of polyurethane is recommended for optimal cooling efficiency. | N/A |
When insulating your deck box cooler, aim for at least 2 inches of polyurethane foam or board. This thickness ensures your drinks stay icy cold. Fill any gaps between the cooler insert and the wooden frame with foam to prevent air leaks.
Quick Tip: If you’re using a pre-made cooler insert, check its insulation rating. High-quality inserts often come with built-in insulation, saving you extra work.
Weatherproofing Your Deck Box Cooler
Weatherproofing protects your cooler from rain, sun, and temperature changes. Here’s how you can make it last:
- Seal the wood: Apply a waterproof sealant to all wooden surfaces. This prevents water from seeping in and causing rot.
- Use outdoor-grade paint or stain: Choose a product designed for exterior use. It adds a protective layer while enhancing the look of your cooler cart.
- Protect the joints: Pay extra attention to seams and joints. Use silicone caulk to seal these areas and keep moisture out.
- Cover it up: When not in use, store your cooler under a weatherproof cover. This reduces exposure to the elements and extends its lifespan.
Did You Know? UV rays can fade and weaken wood over time. A UV-resistant finish can help your deck box cooler maintain its color and strength.
By following these tips, you’ll build a wood deck cooler that’s not only functional but also built to last. Whether it’s choosing the right wood, insulating properly, or weatherproofing, these steps ensure your cooler bench stays in top shape for years to come.
You’ve got everything you need to build your own deck box cooler. Imagine the satisfaction of creating a cooler bench that’s both functional and stylish. It’s not just a project—it’s a chance to add a personal touch to your outdoor space. Plus, you’ll save money and have a unique piece that stands out.
Why wait? Gather your tools, pick your materials, and start building today. Once you’re done, roll your cart out to the patio and enjoy a cold drink with friends. Don’t forget to share your masterpiece with others—it might inspire their next DIY adventure! 🍹
FAQ
What is the best type of wood for a deck box cooler?
Cedar and redwood are excellent choices. They resist rot and weather damage, making them ideal for outdoor use. If you’re on a budget, pressure-treated pine works well too. Always choose wood that matches your climate and style preferences.
Tip: Look for FSC-certified wood to ensure it’s sustainably sourced.
How do I make my cooler bench last longer?
Weatherproofing is key. Apply a waterproof sealant, use outdoor-grade paint or stain, and cover it when not in use. These steps protect your cooler bench from rain, sun, and temperature changes, ensuring it stays in great shape for years.
Can I add wheels to my cooler cart?
Absolutely! Adding wheels makes your cart mobile and easy to move around. Choose caster wheels with locks for stability. Attach them securely to the base, and test the mobility to ensure smooth movement on your patio or yard.
How do I maintain the cooling efficiency of my cooler?
Proper insulation is essential. Use at least 2 inches of polyurethane foam or board to fill gaps. This keeps the cold air in and the warm air out. If you’re using a pre-made cooler insert, check its insulation rating for optimal performance.
Is it possible to customize my deck box cooler?
Yes, customization is one of the best parts of this project! Add a drainage system for easy maintenance, paint or stain it to match your outdoor space, and install handles or latches for added functionality. You can even personalize it with stencils or designs.
Pro Tip: Adding soft-close hinges to the lid prevents it from slamming shut, making your cooler safer and more user-friendly.

 Request a quote