
You open your insulated lunch box cooler and notice a strange smell. Leftover moisture and food particles can create an unhygienic environment inside your bag. Keeping your insulated bag fresh and clean is simple with the right habits.
This guide provides easy and effective tips to protect your investment. You will ensure a pleasant and healthy lunch experience every day.
Daily Cleaning Tips
A quick daily wipe-down is the single most important habit for a fresh and hygienic insulated lunch bag. It prevents small messes from becoming big problems. This simple routine is one of the best tips you can follow.
The Problem With Skipping a Wipe-Down
You might think a few crumbs or a little moisture are harmless. However, your insulated lunch bag can quickly become a breeding ground for bacteria and mould. Leftover food particles and dampness create the perfect environment for germs to multiply. Common bacteria that thrive in these conditions include:
- Staphylococcus aureus: Found on many surfaces, it can contaminate meats, salads, and dairy.
- Bacillus cereus: Often grows on leftover rice or pasta.
- Clostridium perfringens: Contaminates leftover meats like turkey or roast beef.
Exposure to this mould can cause respiratory issues and other health problems. A dirty cooler also leads to stubborn odors that are hard to remove. This makes daily cleaning essential, not just a task for your weekly lunch bag cleaning schedule.
The Correct Daily Cleaning Method
You can clean your insulated cooler in just a few minutes each day. Following these steps will keep your bag sanitary and odor-free. This process helps you properly clean insulated lunch bags.
- Empty Completely: First, remove all food, containers, and ice packs from your insulated lunch bag. Shake out any loose crumbs or debris.
- Wipe the Interior: Use a soft cloth with a simple solution of mild soap and warm water. Thoroughly wipe down the entire interior lining. Pay special attention to seams and corners where food particles can get trapped.
- Rinse and Dry: Wipe the interior again with a clean, damp cloth to rinse away any soap residue. Finally, leave the insulated bag open to air dry completely.
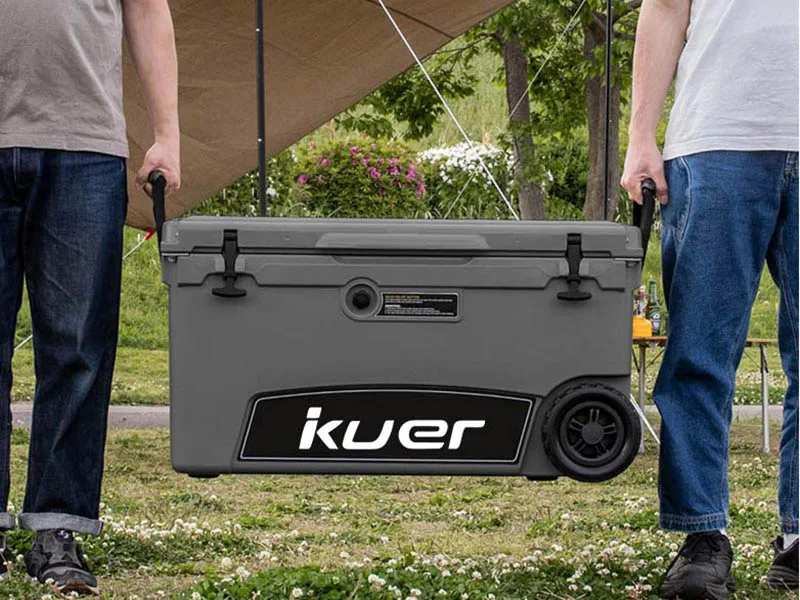
Pro Tip: To make this process even faster, choose high-quality insulated lunch containers. Experienced manufacturers like KUER design their insulated products with food-grade, easy-to-clean liners, which helps you maintain a clean and safe space for your meals.
The Importance of Complete Drying
After you clean your cooler, the job is only halfway done. Proper drying is just as critical as washing. Skipping this step can undo all your cleaning efforts and create new problems inside your insulated lunch bag.
Why Trapped Moisture Is an Issue
You might think your insulated cooler is clean after wiping it, but trapped moisture is a major issue. Microscopic mould spores are always in the air. They remain dormant until they find the right conditions to grow. A damp, dark space with humidity above 60% is the perfect environment for these spores to activate and form mould colonies, sometimes in as little as 24 hours.
This hidden mould is more than just an ugly stain. Inhaling mould spores can cause a range of health problems, especially for sensitive individuals.
Health Risks from Mould Exposure:
- Nasal and sinus congestion
- Coughing and throat irritation
- Wheezing or difficulty breathing
- Triggering asthma attacks
A damp interior negates the benefits of a clean bag, turning your safe space for food into a health hazard.
How to Air Dry Your Cooler Properly
Properly air-drying your insulated cooler is simple and ensures its long-term freshness. The key is to maximize air circulation. Increased air movement helps moisture evaporate quickly, which stops bacteria and mould from growing.
Follow these simple steps every time you clean your bag:
- Prop It Open: Always leave your insulated lunch bag wide open after washing. This allows air to circulate freely inside, drying out every corner and seam.
- Find a Ventilated Spot: Place the open bag in an area with good airflow, like on a kitchen counter away from the wall. You do not need a strong fan; gentle, consistent air movement is enough.
- Avoid Direct Sunlight: While sunlight has sanitizing properties, its UV rays can degrade and weaken the materials of your insulated bag over time. It is best to dry it in a shady, well-ventilated spot.
Never seal or store your cooler until you are certain it is completely dry. This final, simple step keeps your bag clean, safe, and ready for your next meal.
Deep Cleaning and Stain Removal
While daily wipes are essential, your insulated lunch bag also needs a regular deep clean to tackle tougher grime and prevent lingering odors. A weekly deep clean is a good rule for bags you use every day. This routine keeps your insulated bag fresh and hygienic.
How to Clean Insulated Lunch Bags
Learning how to clean insulated lunch bags properly protects them from damage. You should avoid harsh chemicals like bleach. These products can strip the waterproof lining and degrade the tape adhesives that keep your bag leak-proof. Instead, follow these simple steps for a safe and effective deep clean.
- Empty the Bag: Remove all contents and shake out any loose crumbs.
- Prepare a Solution: Mix a gentle, food-safe disinfectant. A simple solution of one tablespoon of baking soda per cup of warm water works well.
- Clean the Interior: Dip a soft brush or sponge into your solution. Gently scrub the entire insulated interior, paying extra attention to seams and corners.
- Wipe the Exterior: Use the same solution to wipe down the outside of your insulated lunch bag.
- Rinse Thoroughly: Use a clean, damp cloth to wipe away all soap or baking soda residue from both the inside and outside.
- Air Dry Completely: Pat the bag with a towel and leave it open to air dry.
Safe Solutions for Stains and Odors
Spills and smells happen, but you can handle them without damaging your cooler. For stubborn stains, create a paste with baking soda and a little water. Apply it to the spot, let it sit for 15-20 minutes, and then gently wipe it away. This method is a great way to clean insulated lunch bags.
For strong odors, a vinegar solution is an excellent natural disinfectant.
- Mix equal parts white vinegar and water in a spray bottle.
- Lightly spray the inside of the insulated bag.
- Let it sit for a few minutes to disinfect the bag.
- Wipe it clean with a damp cloth to remove any vinegar smell.
These gentle methods are perfect for how to clean insulated lunch bags. Quality insulated lunch containers from brands like KUER are built with durable materials. Their advanced R&D and quality control ensure the insulated lining stands up well to approved, gentle cleaning, helping you maintain a clean and safe bag for years.
Proper Storage for Your Lunch Box Cooler
How you store your lunch box cooler between uses is just as important as how you clean it. A common mistake can turn your clean bag into a breeding ground for harmful bacteria. Proper storage is simple and key to long-term use.
The Mistake of Storing It Sealed
You might zip your insulated lunch bag shut after cleaning it. This seems like a tidy way to store it, but it creates a dangerous, oxygen-free environment inside. This sealed space is perfect for anaerobic bacteria, which are germs that thrive without oxygen.
Dangerous pathogens can grow in these conditions, especially if any moisture is left behind.
- Clostridium botulinum: This bacteria can cause botulism and grows well in moist, low-oxygen environments at room temperature.
- Listeria monocytogenes: This pathogen can also multiply in oxygen-free conditions and poses a serious health risk.
Sealing your insulated bag traps moisture and air, creating the ideal home for these invisible threats. Your clean insulated bag quickly becomes unhygienic.
The Right Way to Store for Freshness
Proper storage ensures your insulated lunch bag stays safe and odor-free. The goal is to promote air circulation and prevent any moisture from being trapped inside. Follow these simple rules for storing your lunch box cooler.
- Keep It Open: Always store your insulated cooler with the lid or zipper completely open. This allows air to move freely, keeping the interior dry.
- Choose a Dry Location: Place your open bag in a well-ventilated area like a pantry shelf or kitchen cabinet. Avoid damp basements or cramped spaces.
- Ensure It’s Empty: Double-check that your bag is completely empty and dry before putting it away.
This simple habit prevents the growth of harmful bacteria. It preserves the freshness of your insulated bag, ensuring it is always ready for your next healthy meal.
Protecting Your Insulated Lunch Bag
Proper care for your insulated lunch bag goes beyond just cleaning the inside. You must also protect its structure to ensure it works effectively for years. The exterior and how you pack your bag play a huge role in its longevity and performance.
Don’t Ignore the Exterior
You often place your insulated lunch bag on various surfaces throughout the day, like car seats, office desks, or breakroom tables. These surfaces can transfer dirt and germs to the outside of your bag. When you handle the bag, you can then transfer these germs to your hands or food. You should wipe down the exterior with a damp, soapy cloth as part of your cleaning routine. This simple step prevents cross-contamination and keeps your entire lunch experience hygienic.
Quick Tip: Pay special attention to the handles and zippers. These are high-touch areas that collect the most germs. A quick wipe keeps them clean and safe to handle.
Avoid Overloading and Sharp Objects
You might be tempted to stuff your insulated cooler to its limit, but this can cause serious damage. Using proper packing techniques is crucial for maintaining your bag’s insulated properties. Overloading your bag can lead to several problems:
- It compresses the insulated lining, which reduces its ability to keep contents cool.
- The reduced effectiveness of the insulation leads to poor thermal performance.
- It puts stress on zippers and seams, causing them to break over time.
Sharp objects like forks or knives can puncture the waterproof inner liner. A tear allows moisture to seep into the insulated core, which can lead to mold and ruin the bag’s effectiveness. Always use protective covers for sharp utensils. Good layering and insulation inside the bag are key. Effective pre-chilling strategies and the right placement of ice packs and gel packs are part of how to keep food cold without overstuffing. Thoughtful packing protects your insulated bag and keeps your food safe.
Keeping your lunch box cooler clean is simple. A little care protects your health and your investment. Packing lunch can save you over $1,500 a year, so a clean bag is smart. Remember these key habits:
- Perform a quick daily clean.
- Dry your bag completely after every wash.
- Use safe methods for a deep clean.
- Store your lunch box cooler open.
- Protect the bag from damage.
Following these tips ensures the long-term freshness of your cooler. You can enjoy a safe and clean lunch experience every day.
FAQ
How often should I clean my insulated lunch bag?
You should wipe the inside of your bag daily after each use. This quick clean prevents germs and odors. A deeper clean is a good idea once a week, especially if you use the bag every day.
How do you get mould out of an insulated lunch bag?
You can remove mould with a simple paste.
- Mix baking soda and a small amount of water.
- Apply the paste to the mouldy spots.
- Let it sit for 20 minutes, then gently scrub and wipe it clean.
How do you get the smell out of an insulated lunch bag?
A vinegar solution works well for bad smells. Mix equal parts white vinegar and water in a spray bottle. Lightly spray the inside, wait a few minutes, and then wipe it clean with a damp cloth.
Is it okay to wash an insulated lunch bag?
Yes, it is okay to wash an insulated lunch bag. You should always hand wash it with mild soap and water. Avoid using a washing machine, as it can damage the insulation and waterproof lining.


 Request a quote