You might not realize it, but small mistakes can really cut down the life and performance of your large hard cooler. Think about how you usually clean, pack, or store your cooler. Are you following the right steps to maximize the lifespan and cooling power? Industry studies show that using smart habits—like pre-chilling your large hard cooler, packing it with two-thirds ice, and keeping it out of the sun—can help your cooler keep things cold for days. With KUER’s advanced manufacturing and attention to quality, you get a large hard cooler that’s built to last when you give it the right care.
Cleaning Your Large Hard Cooler
Regular Cleaning
You want your cooler to last for years and keep everything fresh. The best way to do that is to clean it after every use. Start by emptying out all the contents and rinsing away any loose dirt or crumbs. Use warm water and a little mild dish soap with a soft sponge or brush. Scrub every surface, including the corners and the lid. If you notice any tough stains or lingering smells, sprinkle some baking soda or use a bit of white vinegar or lemon juice. These natural cleaners break down grime and help neutralize odors without harming your cooler.
Tip: Never use harsh chemicals or abrasive cleaners. They can scratch or damage the surface. If you need to disinfect, mix one tablespoon of bleach with a gallon of water, wipe down the inside, and rinse thoroughly.
After cleaning, rinse the cooler well with clean water. Make sure you remove all soap or cleaner residue. Then, let the cooler air dry completely with the lid open. This step is important because trapped moisture can lead to mold or mildew.
Preventing Mold and Odors
Mold and odors can sneak up on you if you skip regular cleaning. To keep your cooler fresh, always dry it fully before storing. Leave the lid propped open and, if possible, store it in a well-ventilated area. For extra protection, you can place a moisture absorber inside.
Here’s a quick table to help you remember when to clean your cooler:
| When to Clean | What to Do | Why It Matters |
|---|---|---|
| After each use | Wipe, rinse, and dry | Stops odors and bacteria |
| Every 3-6 months | Deep clean with soap and baking soda | Removes stains and tough smells |
| After storing raw food | Deep clean and disinfect | Prevents bacteria and foodborne risks |
| Before long-term storage | Dry completely, lid open, use moisture absorber | Prevents mold and mildew |
Regular maintenance keeps your cooler in top shape and ready for your next adventure.
Avoiding Sun Exposure
Shade Placement
You might think your cooler can handle anything, but direct sunlight can make a big difference. When you keep your cooler out of the sun, you help it stay colder for longer. Placing your cooler in the shade can drop the temperature inside by 10 to 15°F almost right away. That means your ice lasts longer, and your drinks stay cold even on hot days.
Tip: Always look for a shady spot under a tree, picnic table, or even use a towel or jacket to cover your cooler. If you camp or picnic in open areas, try using a reflective blanket or tarp to block the sun.
When you keep your cooler out of the sun, you stop the outside from heating up. This slows down how fast the ice melts inside. Even a little shade can make a big difference in how well your cooler works.
Protecting Cooler Integrity
Sunlight does more than just warm things up. Over time, the sun’s UV rays can fade or crack the outside of your cooler. If your cooler sits in the sun too long, it can lose its strength and good looks. KUER coolers use injection molded technology and a UV-resistant finish to fight off damage from the sun. These features help your cooler keep its shape and color, even after many trips outdoors.
Here are some simple ways to protect your cooler:
- Cover it with a blanket, towel, or reflective material when you can’t find shade.
- Avoid placing your cooler on hot surfaces like asphalt or metal tables.
- Store your cooler in a cool, shaded spot when not in use.
- Use towels or sleeping bags to insulate your cooler if you must leave it in a hot car or bear box.
The insulation inside your cooler works best when the outside stays cool. Heavy-duty latches, strong handles, and non-slip feet also help your cooler last longer, even when you use it a lot. By following these steps, you help your cooler stay tough and keep things cold, no matter where your adventure takes you.
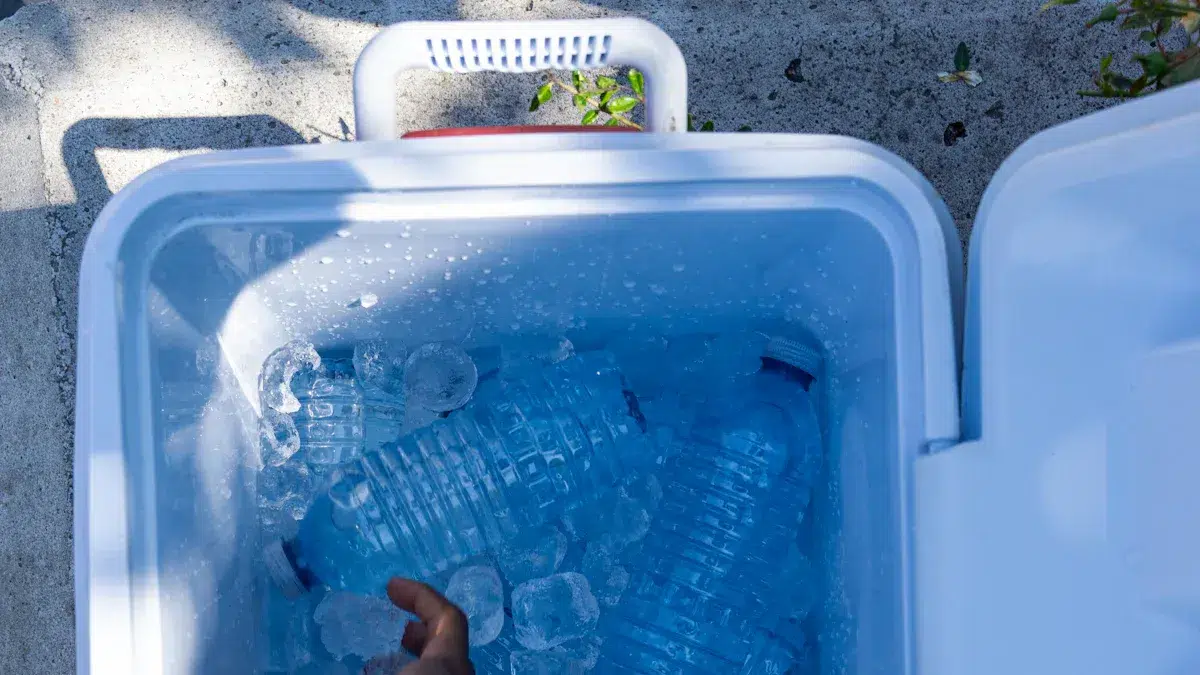
Packing a Cooler Correctly
Ice-to-Contents Ratio
Getting the ice-to-contents ratio right is the secret to keeping your cooler cold for days. Most outdoor experts recommend using twice as much ice as the volume of your food and drinks. That means if you fill one-third of your cooler with contents, you should fill the remaining two-thirds with ice. This ratio helps chill the cooler walls and reduces air space, which is key for ice retention. You want to keep contents cold, so don’t skimp on ice.
Here’s what you should remember when you pack your cooler:
- Use a 2:1 ice to contents ratio by volume.
- Fill empty spaces with ice packs, frozen water bottles, or towels to minimize air pockets.
- Block ice lasts longer, but mixing in smaller cubes helps fill gaps and cool everything faster.
- Prechill your provisions before packing to give your cooler a head start.
Tip: If you use dry ice, you can reduce the amount of regular ice needed. Dry ice keeps a cooler cold for even longer, but always handle it with care.
Packing Order
How you layer it up inside your cooler makes a big difference. Start with a base layer of ice at the bottom. Place pre-chilled food and drinks on top of this ice. Add another layer of ice over your contents. This sandwich method keeps everything surrounded by cold and helps maintain a low temperature.
Try this cooler packing order for best results:
- Lay down a thick layer of ice at the bottom.
- Add pre-chilled or frozen items next. These help keep a cooler cold and reduce the work your ice needs to do.
- Top off with another layer of ice, filling any gaps.
- Place frequently used items, like drinks, near the top for easy access.
- Fill any remaining spaces with ice packs or frozen water bottles.
Packing your cooler this way keeps contents cold and prevents warm air from sneaking in. Overpacking strains the seals and can let cold air escape. Underpacking leaves air gaps that speed up ice melt. Aim to fill your cooler about 75-80% full, without compressing the seals.
| Packing Condition | Risks to Ice Retention and Food Safety | Recommended Practice |
|---|---|---|
| Overpacking | Strains seals, lets cold air escape, uneven cooling | Fill to 75-80% capacity, avoid compressing seals |
| Underpacking | Air gaps allow warm air, faster ice melt | Fill gaps with ice packs or blocks, minimize air pockets |
Cooler packing is all about layers and smart organization. If you keep the lid closed after each use, you’ll help keep a cooler cold even longer. With these steps, you can pack a cooler for any adventure and keep contents cold from start to finish.
Pre-Chilling Your Cooler
Pre-Chill Methods
If you want your cooler to perform at its best, you need to prechill your cooler before you pack it. This step makes a big difference in how long your ice lasts. Here’s how you can do it:
- Place a bag of ice or a few large ice packs inside your cooler the night before your trip. Let them sit for at least an hour, but overnight works even better.
- Freeze as much food and drinks as possible before you pack them. Cold items help the ice last longer.
- Use block ice or frozen water bottles instead of crushed ice. Block ice melts slower and keeps everything cold for a longer time.
- Avoid putting warm or room temperature items into your cooler. Always chill your drinks and food first.
- Cover your cooler with a wet, light-colored towel or reflective insulation. This trick helps reduce heat from the sun.
- Fill every empty space in your cooler with ice or frozen items. Less air inside means less heat sneaking in.
Tip: If you have two coolers, use one just for ice. You can use this extra ice to refill your main cooler during your trip.
Benefits for Ice Retention
When you prechill your cooler, you give your ice a head start. The inside walls of the cooler start out cold, so the ice does not have to work as hard. This means your ice will last much longer. You can keep a cooler cold for days if you follow these steps.
Check out this table to see how pre-chilling helps:
| Method | Effect on Ice Retention |
|---|---|
| No pre-chilling | Ice melts quickly, less cooling |
| Pre-chilled overnight | Ice lasts up to 50% longer |
You also save money because you do not need to buy as much ice. Your food and drinks stay safe and fresh. You will not have to worry about soggy sandwiches or warm sodas. Prechill your cooler every time, and you will notice the difference on every adventure.
Maximizing Ice Retention
Keeping your cooler cold for as long as possible can make or break your multi-day trip. If you want to lock the cold in and get the most out of your cooler, you need to know which ice types work best and how to use dry ice safely. Here are some ice retention tips that will help you retain ice and keep your food and drinks fresh.
Ice Types
Not all ice is created equal. The type of ice you use can change how long your cooler stays cold. Here’s how you can maximize ice retention:
- Place block ice at the bottom of your cooler. Block ice melts slower than cubed or crushed ice, so it keeps everything cold for longer.
- Pour crushed or cubed ice over your food and drinks. Crushed ice fills gaps and cools items quickly, while cubed ice offers a balance between fast cooling and longer retention.
- Fill your cooler completely with ice and contents. Less air inside means less heat sneaking in.
- Use frozen water bottles or ice packs instead of loose ice. Frozen bottles act like block ice, save space, and give you cold water to drink as they melt. Ice packs, especially those that freeze below 32°F, can extend cooling even more.
- Avoid draining melted ice water unless you need to keep things dry. The cold water helps retain ice and keeps the temperature low.
Tip: If you want the best results, use a mix of block ice or cubed ice and frozen water bottles. This combo helps you keep your cooler cold for days.
Using Dry Ice Safely
Dry ice can take your cooler’s performance to the next level. It keeps things frozen much longer than regular ice. KUER coolers are compatible with dry ice, making them perfect for long adventures. Here are some dry ice tips to help you stay safe and get the most out of your cooler:
- Always wrap dry ice in towels, cardboard, or newspaper before placing it in the cooler. This protects both the cooler and your food.
- Never let dry ice touch the cooler walls or your food directly.
- Place the wrapped dry ice on top or in the middle of your contents for the best cooling effect.
- Fill empty spaces with crumpled newspaper to help the dry ice last longer.
- Use a cooler that allows gas to escape. Never seal dry ice in an airtight container.
- Handle dry ice with insulated gloves and safety goggles. Never touch it with bare hands.
- Only use dry ice in well-ventilated areas. Carbon dioxide gas can build up and become dangerous in closed spaces.
Dry ice stays at -78.5°C and turns straight from solid to gas, so it does not leave any water behind. This deep freeze effect helps you retain ice and keep your cooler cold for much longer than regular ice. If you follow these steps, you can enjoy cold food and drinks on every adventure.
Maintaining Seals and Latches
Inspection Tips
You want your cooler to work its best every time you use it. Checking the seals and latches is a smart step in any cooler maintenance guide. Look for dirt, sticky spots, or debris around the seal and hinges. These can stop the lid from closing tight and let cold air escape. If you see any cracks or wear, you should think about replacing the gasket. High quality silicone gaskets last longer and stay flexible, so your cooler keeps things cold.
Here’s a quick checklist for preventive maintenance:
- Inspect seals and latches before and after each trip.
- Remove any dirt or food bits with a soft cloth.
- Check for signs of aging, like brittleness or cracks.
- Make sure the lid closes tightly and the latches snap shut.
- Test the seal by closing the lid and listening for air leaks.
Tip: If you notice the lid doesn’t close all the way, try cleaning the gasket and hinges. Sometimes a simple wipe-down fixes the problem.
Simple Maintenance
Taking care of seals and latches helps you keep a lid on it—literally! Regular cleaning with mild soap and water keeps mold and mildew away. Always dry the cooler with the lid open. This stops moisture from building up and keeps the seal in good shape. Avoid leaving your cooler in direct sunlight or near heat sources. Heat can make the gasket brittle or even melt parts of the latch.
Here’s a table to help you remember the best maintenance steps:
| Step | Why It Matters |
|---|---|
| Clean seals and latches | Prevents mold, mildew, and corrosion |
| Dry with lid open | Stops moisture buildup and mold |
| Store in cool, dry place | Keeps seals flexible and strong |
| Lubricate hinges | Ensures smooth opening and closing |
| Replace worn gaskets | Maintains tight seal and cold retention |
If you ever need to replace a gasket, choose high quality silicone gaskets for better durability. Store extra gaskets in a cool, dry spot. Handle them gently to avoid damage. Regular preventive maintenance means fewer leaks and better cooling. You get more out of your cooler every time you use it.
Storing Your Cooler Properly
Air Circulation
You want your cooler to stay fresh and ready for your next adventure. Good air flow is the secret. After you clean your cooler, always let it dry completely. Moisture left inside can cause mold and bad smells. To help with this, store your cooler with the lid propped open. You can use a small towel or even the handle to keep the lid from closing all the way.
Tip: Remove the drain plug before storing your cooler. This lets air move through and helps everything dry out. If you leave the drain plug in, water can get trapped and cause leaks or mold.
Here’s a simple storage checklist:
- Wash your cooler with mild soap and warm water.
- Rinse and let it air dry with the lid open.
- Remove the drain plug.
- Store the cooler with the lid slightly open.
If you store your cooler with the lid closed and the drain plug inserted, you might run into problems. A closed lid can trap moisture, leading to mold and mildew. It can also create a vacuum inside, making the lid hard to open next time. In some cases, pressure can build up and make opening the cooler tricky or even unsafe.
Avoiding Heat Sources
Where you keep your cooler matters. Always choose a cool, dry spot for storage. Avoid places near heaters, stoves, or direct sunlight. Heat can damage the insulation and weaken the seals. Over time, this can shorten the life of your cooler and hurt its performance.
A quick table for the best storage spots:
| Good Storage Spots | Spots to Avoid |
|---|---|
| Basement shelves | Attics |
| Garage (shaded area) | Near water heaters |
| Closet or mudroom | In direct sunlight |
Proper storage is a key part of cooler maintenance. When you follow these steps, you help your cooler last longer and work better every time you use it.
Taking care of your large hard cooler means you get cold drinks and fresh food every time. When you clean, store, and pack your cooler the right way, you help it last longer and work better. Here’s what you gain:
- Strong insulation keeps ice for days, even on long trips.
- Easy-to-clean surfaces stop bacteria and odors.
- Less money spent on replacements.
KUER’s coolers stand out for their durability and smart design. Check out how KUER compares to other brands:

Use these tips, and your large hard cooler will be ready for every adventure.
FAQ
How often should you clean your large hard cooler?
You should clean your cooler after every use. This stops bacteria and mold from growing. If you store raw meat or fish, always deep clean right away. Regular cleaning keeps your cooler fresh and ready for your next trip.
Can you use bleach to clean your cooler?
Yes, you can use a mild bleach solution. Mix one tablespoon of bleach with one gallon of water. Wipe the inside, then rinse well. Never use strong chemicals or scrubbers. They can damage the cooler’s surface.
What is the best way to store your cooler?
Store your cooler with the lid propped open and the drain plug removed. This lets air flow inside and prevents mold. Keep your cooler in a cool, dry place away from sunlight or heat sources.
Is it safe to use dry ice in a KUER cooler?
Yes, KUER coolers work with dry ice. Always wrap dry ice in newspaper or a towel. Wear gloves when handling it. Only use dry ice in well-ventilated areas. Never seal your cooler airtight with dry ice inside.
How can you make ice last longer in your cooler?
Pre-chill your cooler before packing. Use a mix of block ice and frozen water bottles. Fill empty spaces with ice packs. Keep the lid closed as much as possible. Shade your cooler from the sun for best results.


 Request a quote